
Steel bracelet is my favorite type of watch strap because of its practicality, convenience, and cool factor from the shiny metal and its weight. However, adjusting it to fit your wrist nicely is not as simple as the normal watch strap with pin and buckle.
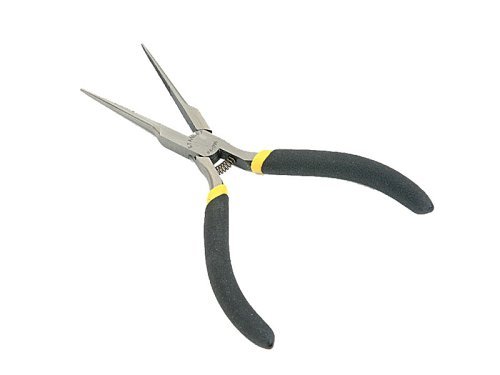
Since I began collecting watches few years ago, I’ve learnt a few DIY tricks myself and own of them is how to adjust watch bracelets (especially Seiko ones) on my own. The key to adjust watch bracelets easily is to use specialize tools such as pin remover and long-nosed pliers to assist you.
And since these tools are not that expensive to get, there’s no reason why you can’t do this. Trust me, it’s a dead simple job and will help you a lot in future (especially once you gained/lose some weight and need to readjust the bracelet lol!)
Resizing A Seiko Bracelet DIY Is Not That Hard!
Whenever I got a new Seiko with metal bracelet, I’ve always adjust the bracelet myself. Not only it’s 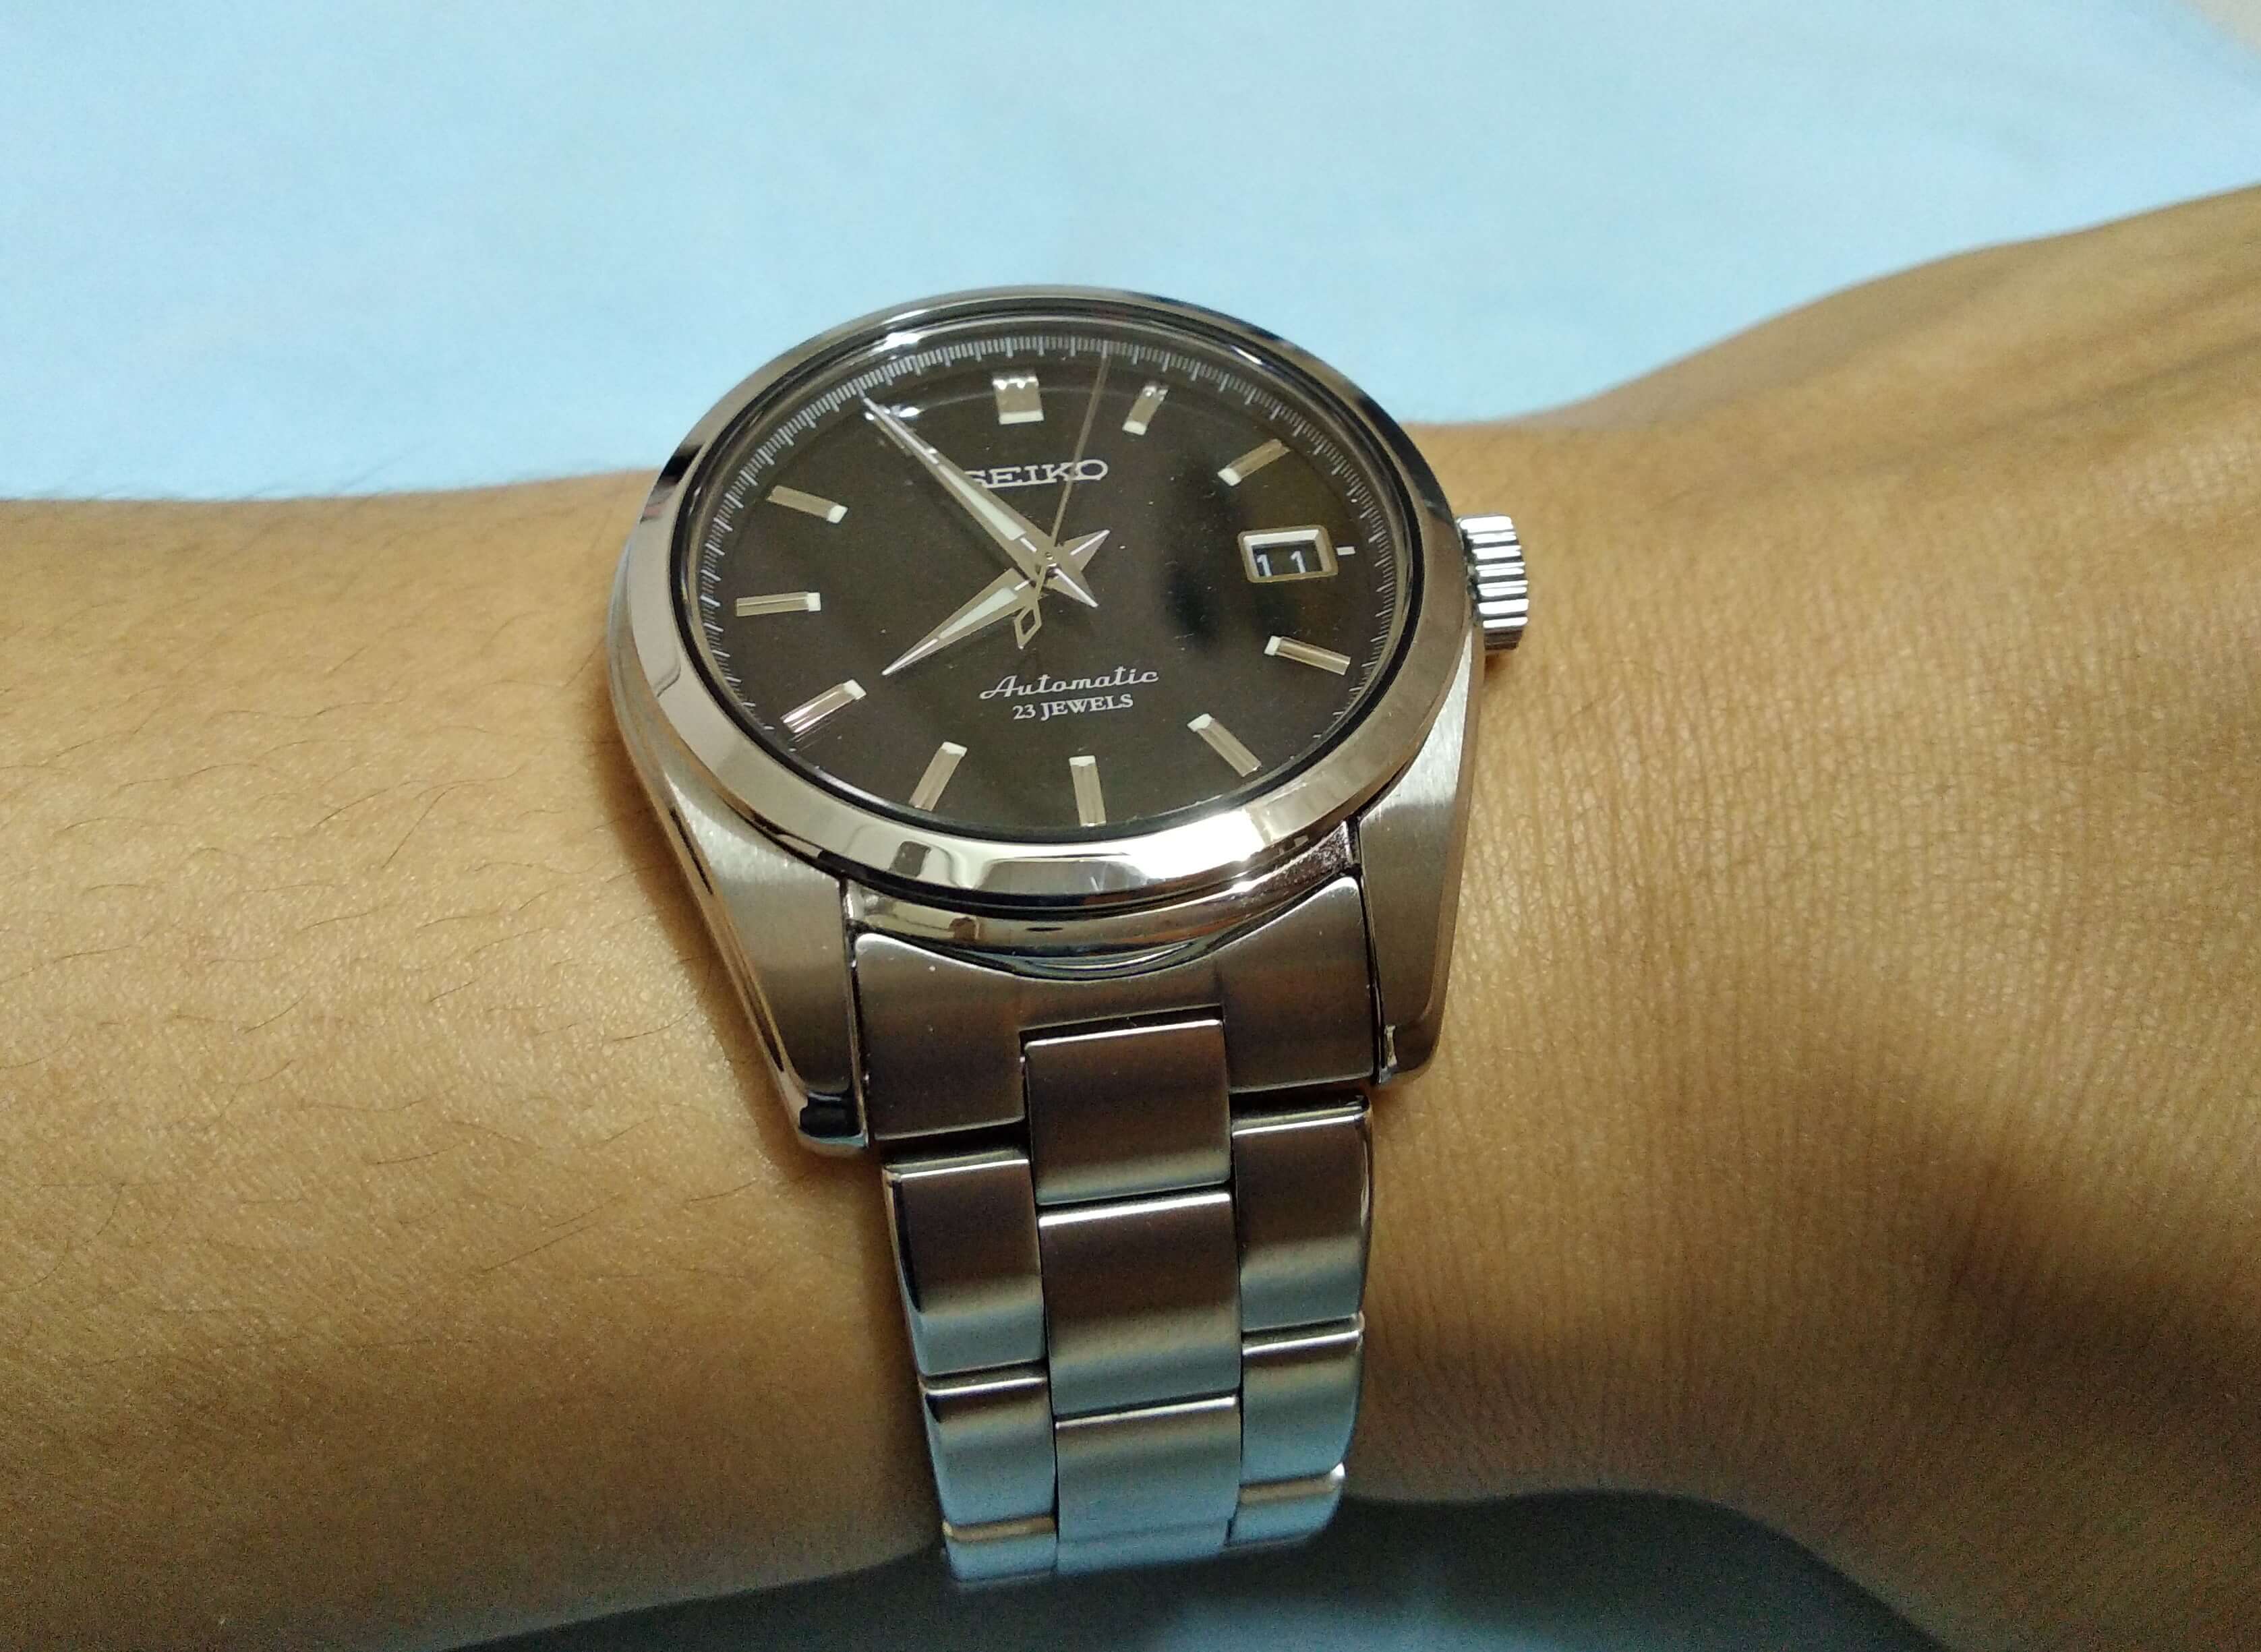 much cheaper than going to a watchmaker, it’s much much faster too!
Just imagine, your shipment of new shiny Seiko just arrived at your home. You open the box and totally love the watch and can’t wait to wear it immediately.
But there’s only one small problem: the metal bracelet need to be resized to your wrist before you can wear it.
A visit to your local watchmaker can be time consuming and perhaps not possible (shop already close at night time).
So knowing how to DIY and adjust the bracelet is an invaluable skill.
And did I mention it’s NOT THAT HARD too?
In this post, I’m going to show step by step how to adjust Seiko bracelets. I’ve included some pictures to show what I meant.
By the way, I found there are many types of Seiko bracelets depending on the watch so pick the bracelet/watch that’s similar to what you own.
These 3 are the watches that I owned and I believe will cover almost all of Seiko’s bracelet in the market right now.
- Seiko SBDC003/SBDC033 Sumo – Oyster bracelet for Diver/Prospex watches
- Seiko SKX013 – Jubilee bracelet
- Seiko SARB033 – Oyster bracelet
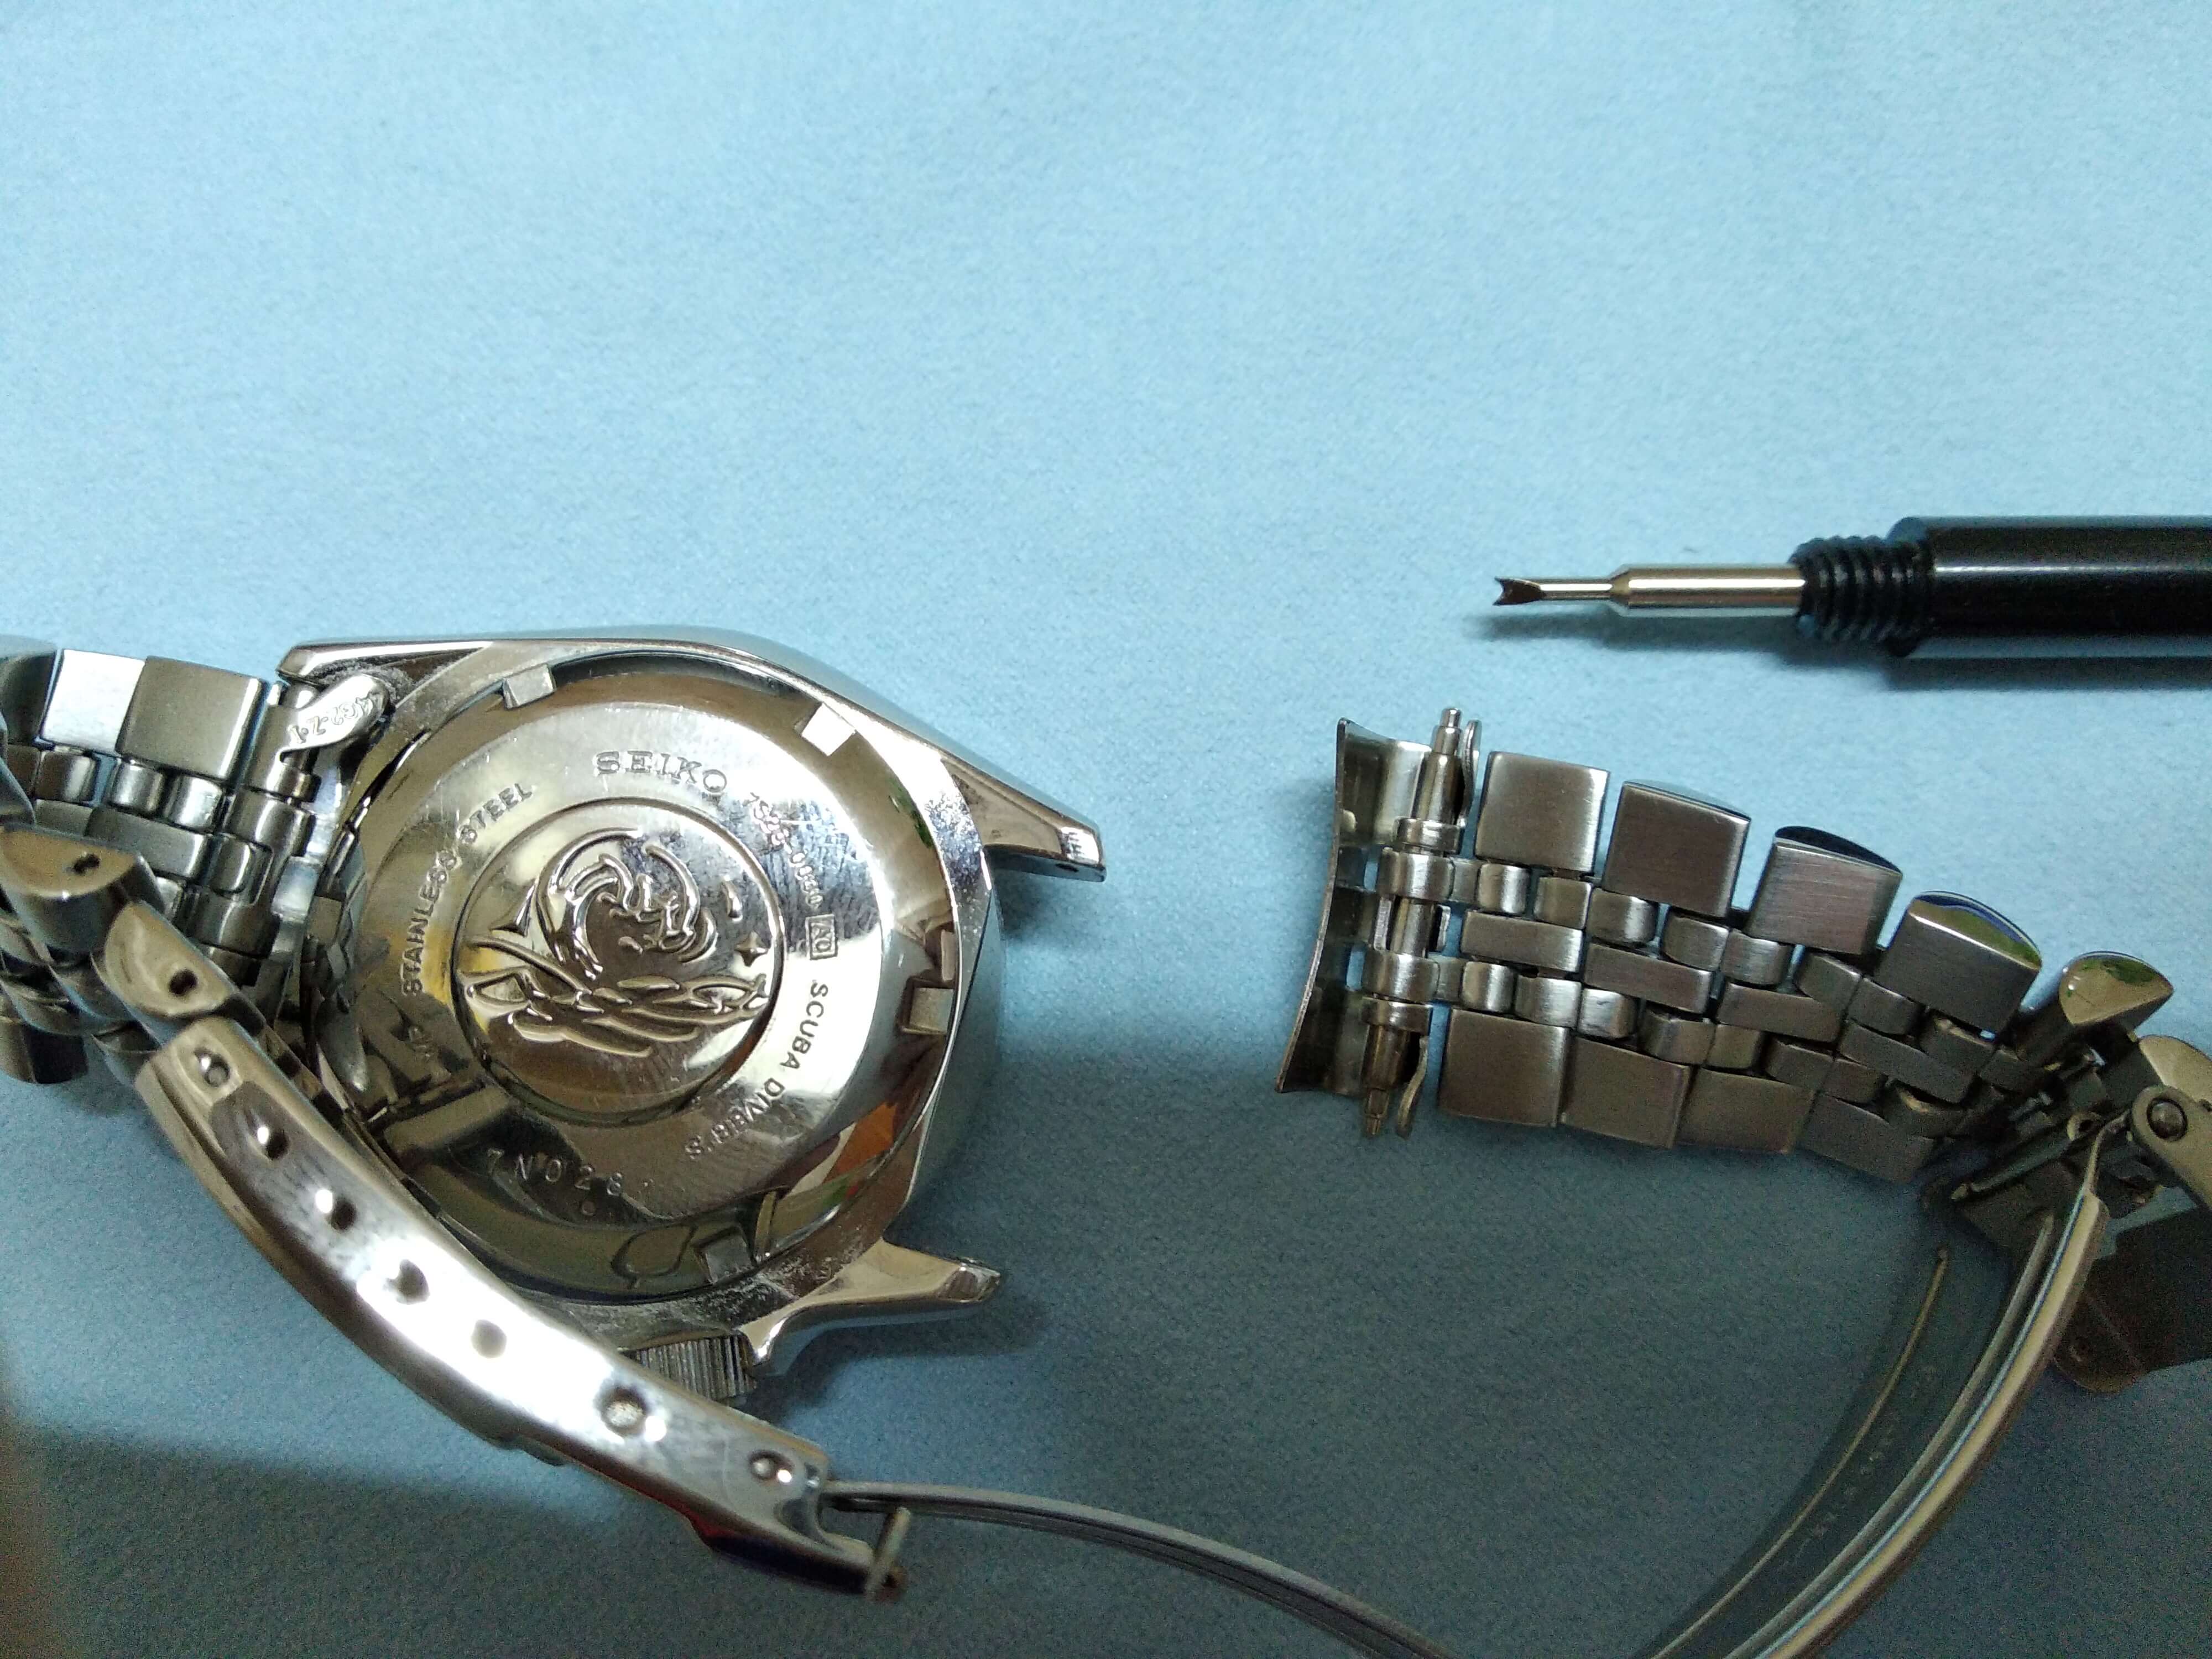
By the way, Seiko mainly uses pin and holder type of bracelet links. A typical bracelet is made up of “links” or segments of metal that we can see.
These links are in turn joined together by the pin. These pins are inserted inside the links and not easily seen.
So having a pin remover tool is one tool that I really recommend to resize the bracelet. Trying to push out the pin using needle or other things is not efficient.
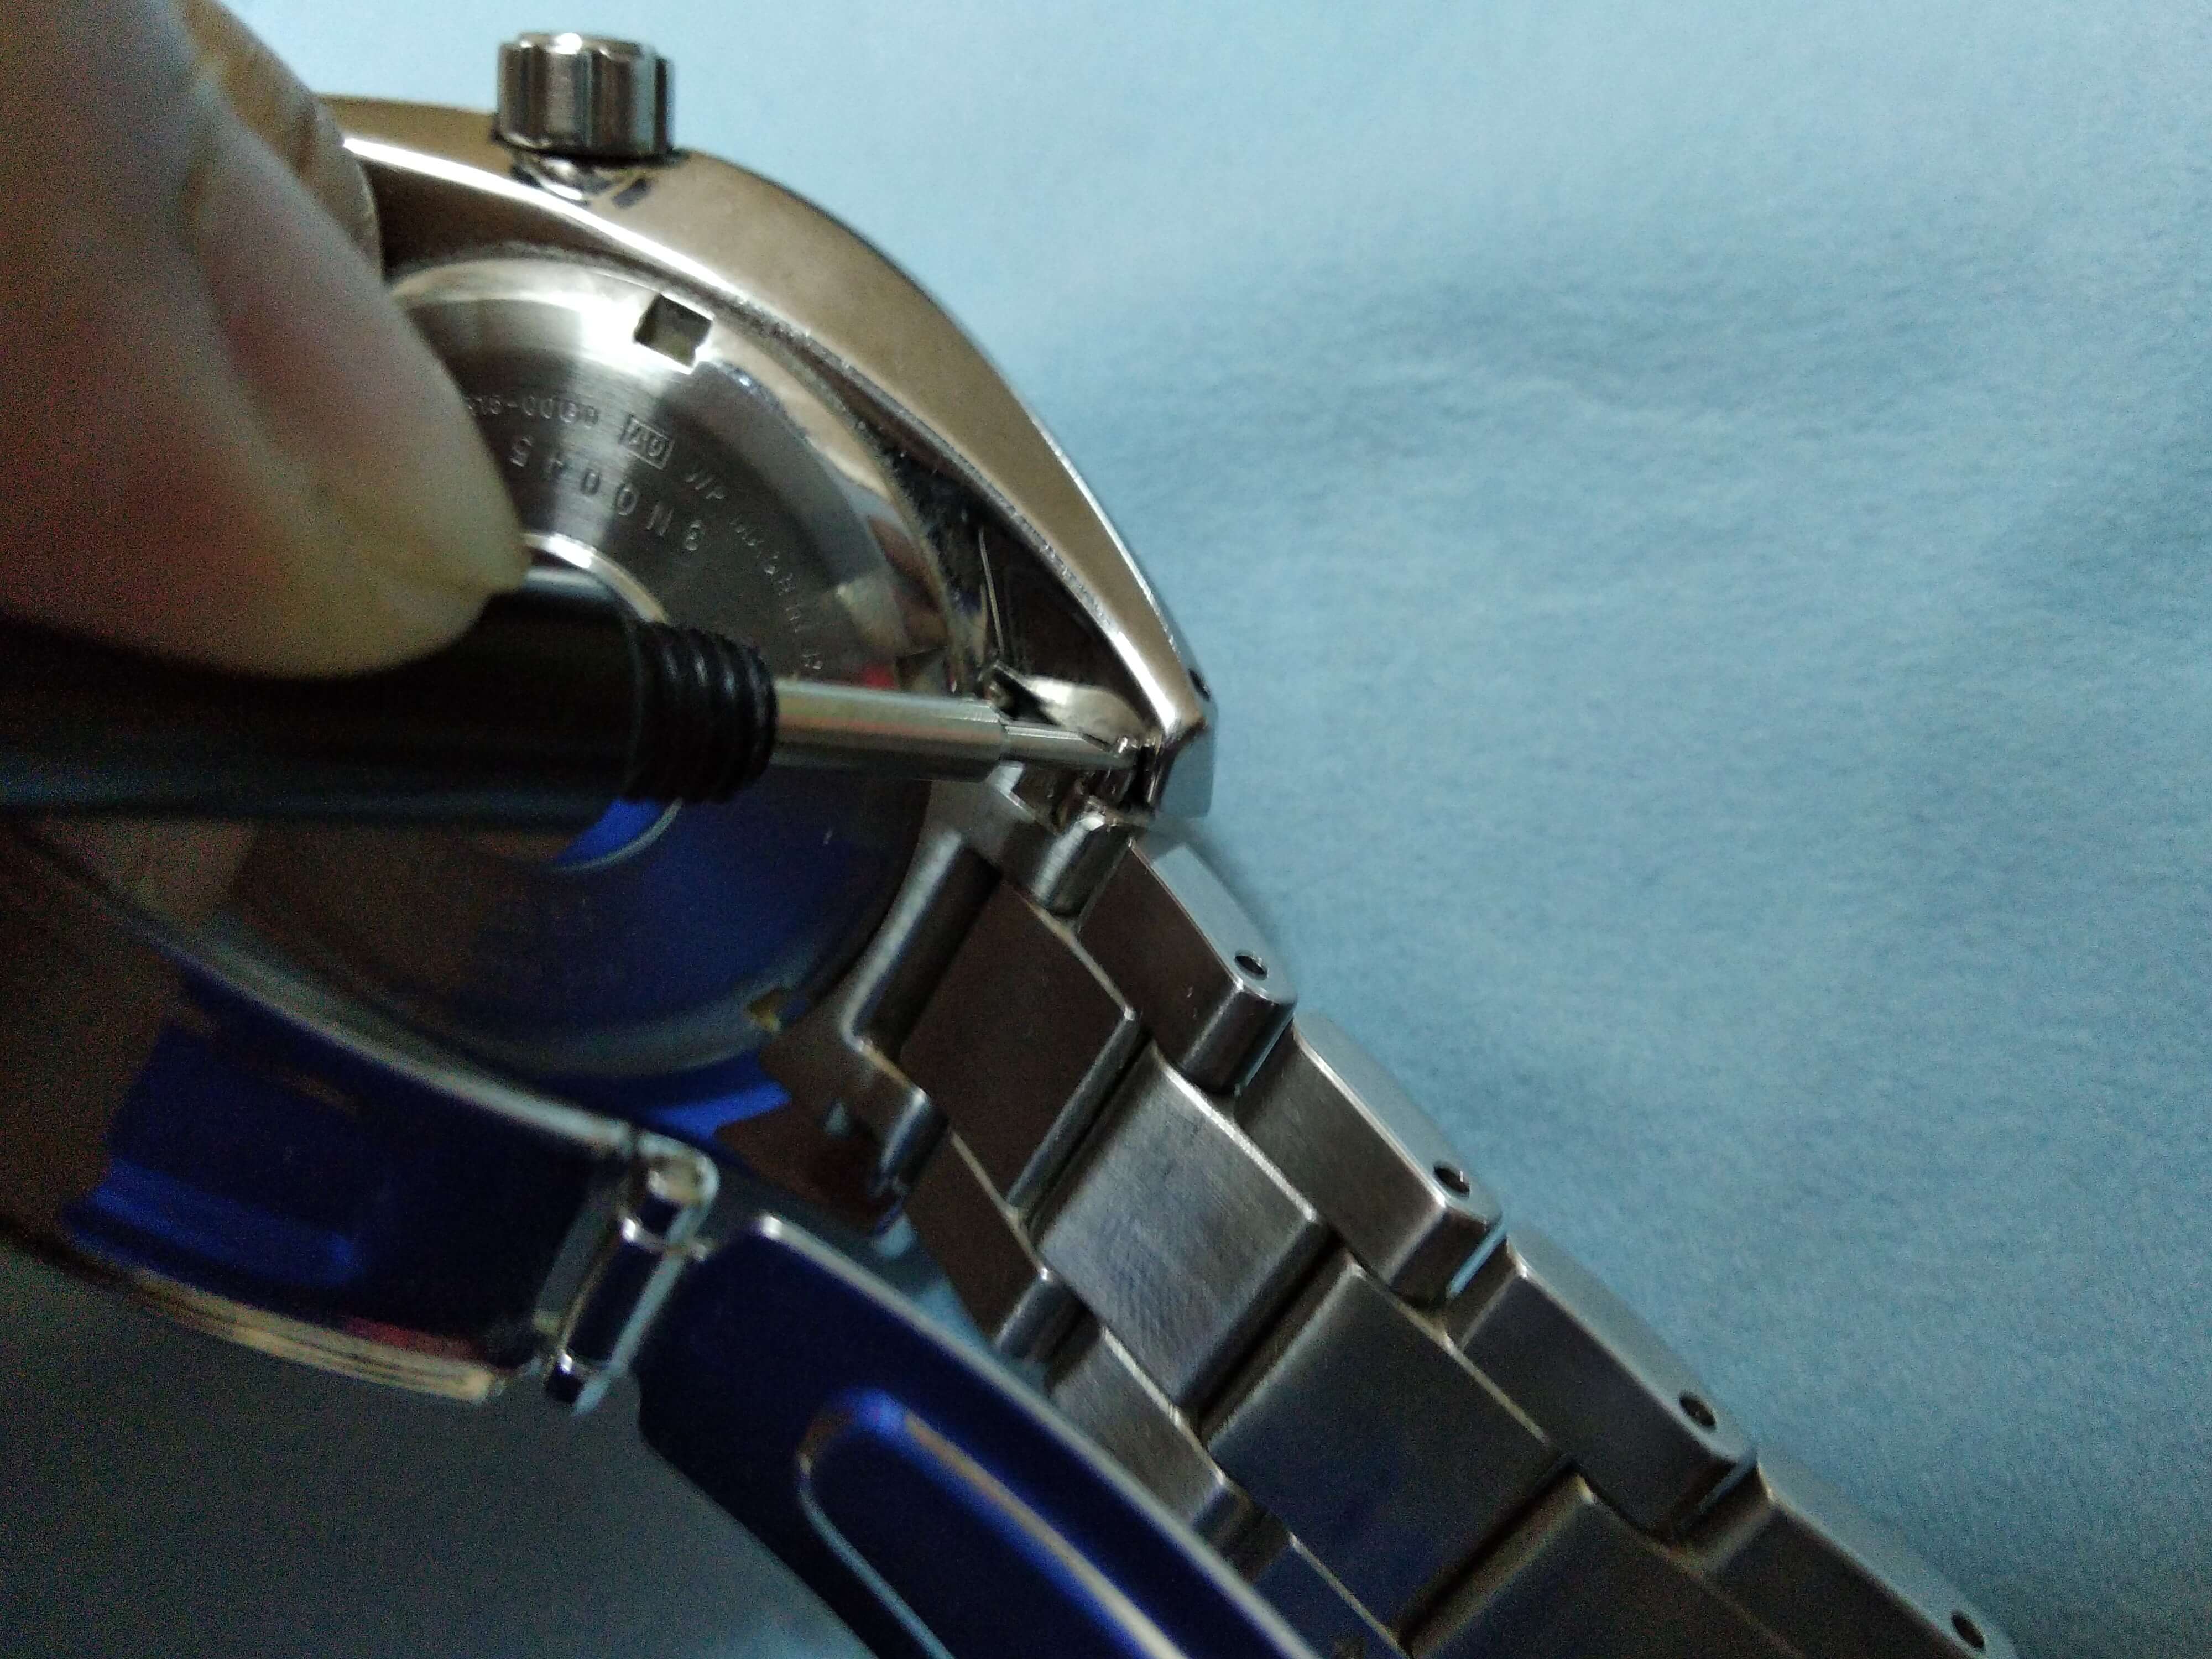
Adjusting Seiko SBDC003/SBDC033 Sumo Oyster Bracelet
The oyster bracelet on my Sumo (click the link to read my review of the Seiko Sumo) is the thick and heavy Prospex bracelet (which feels REALLY GOOD to 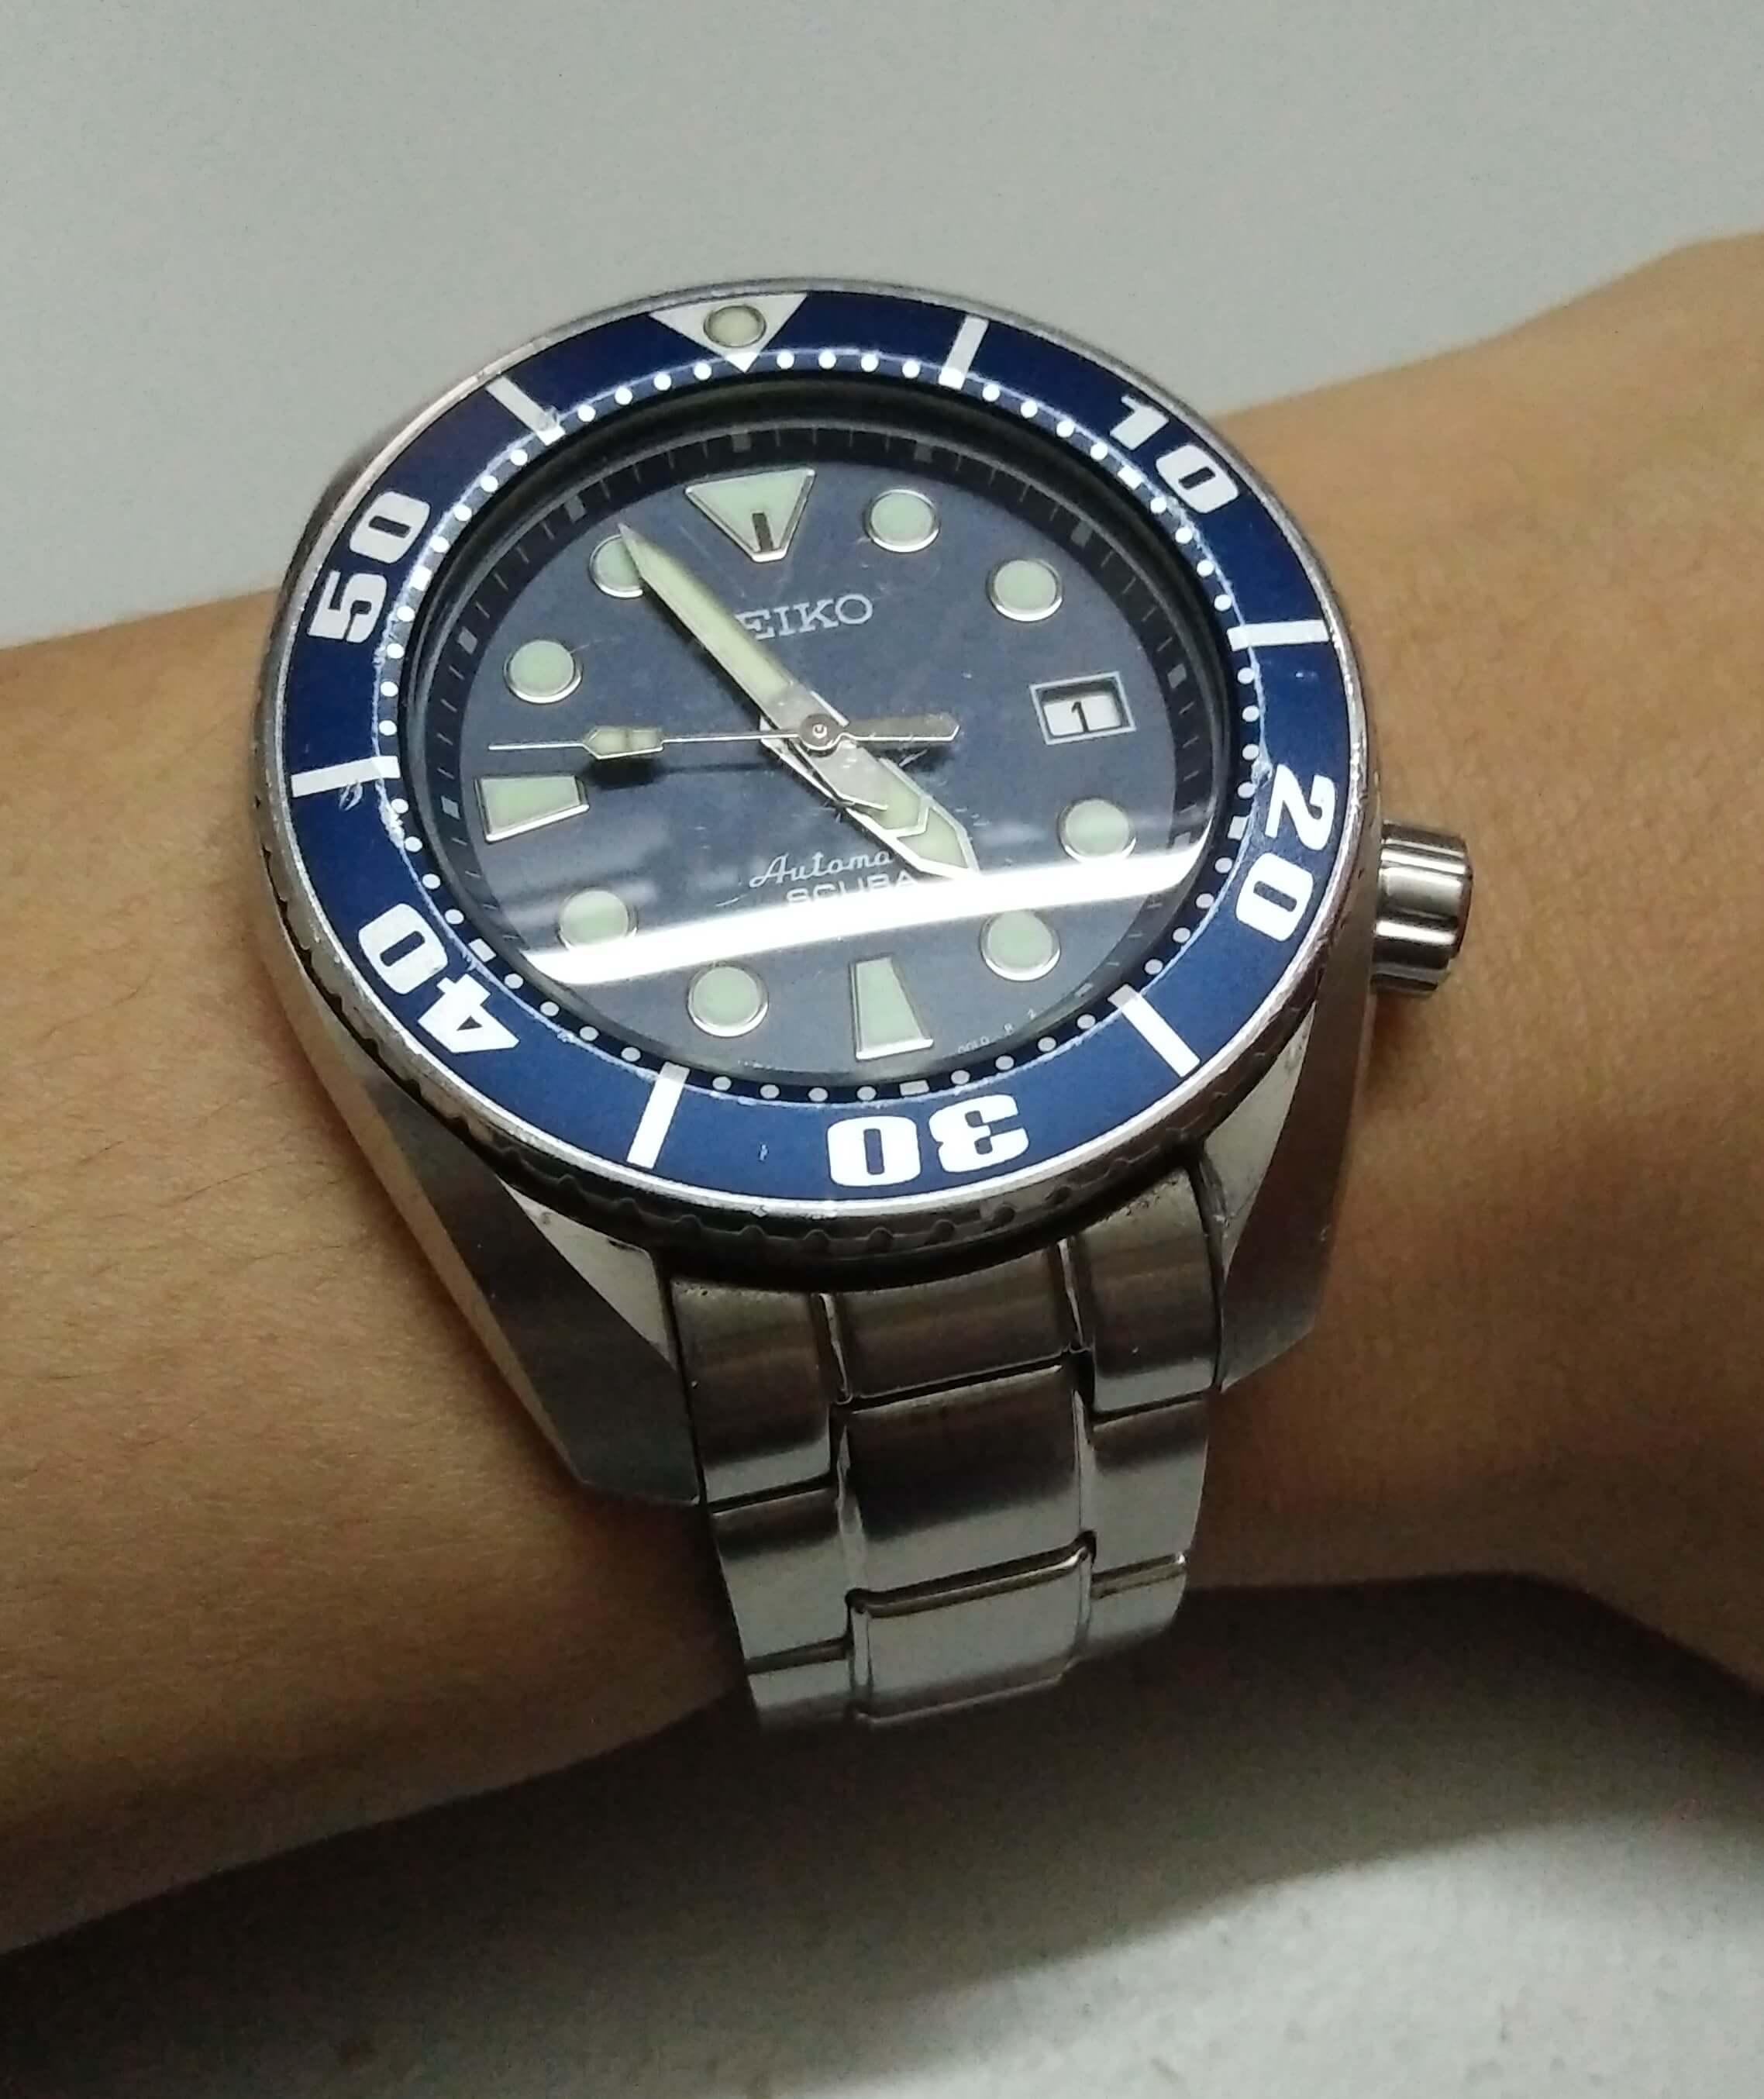 wear btw).
The steps to remove the links are below:
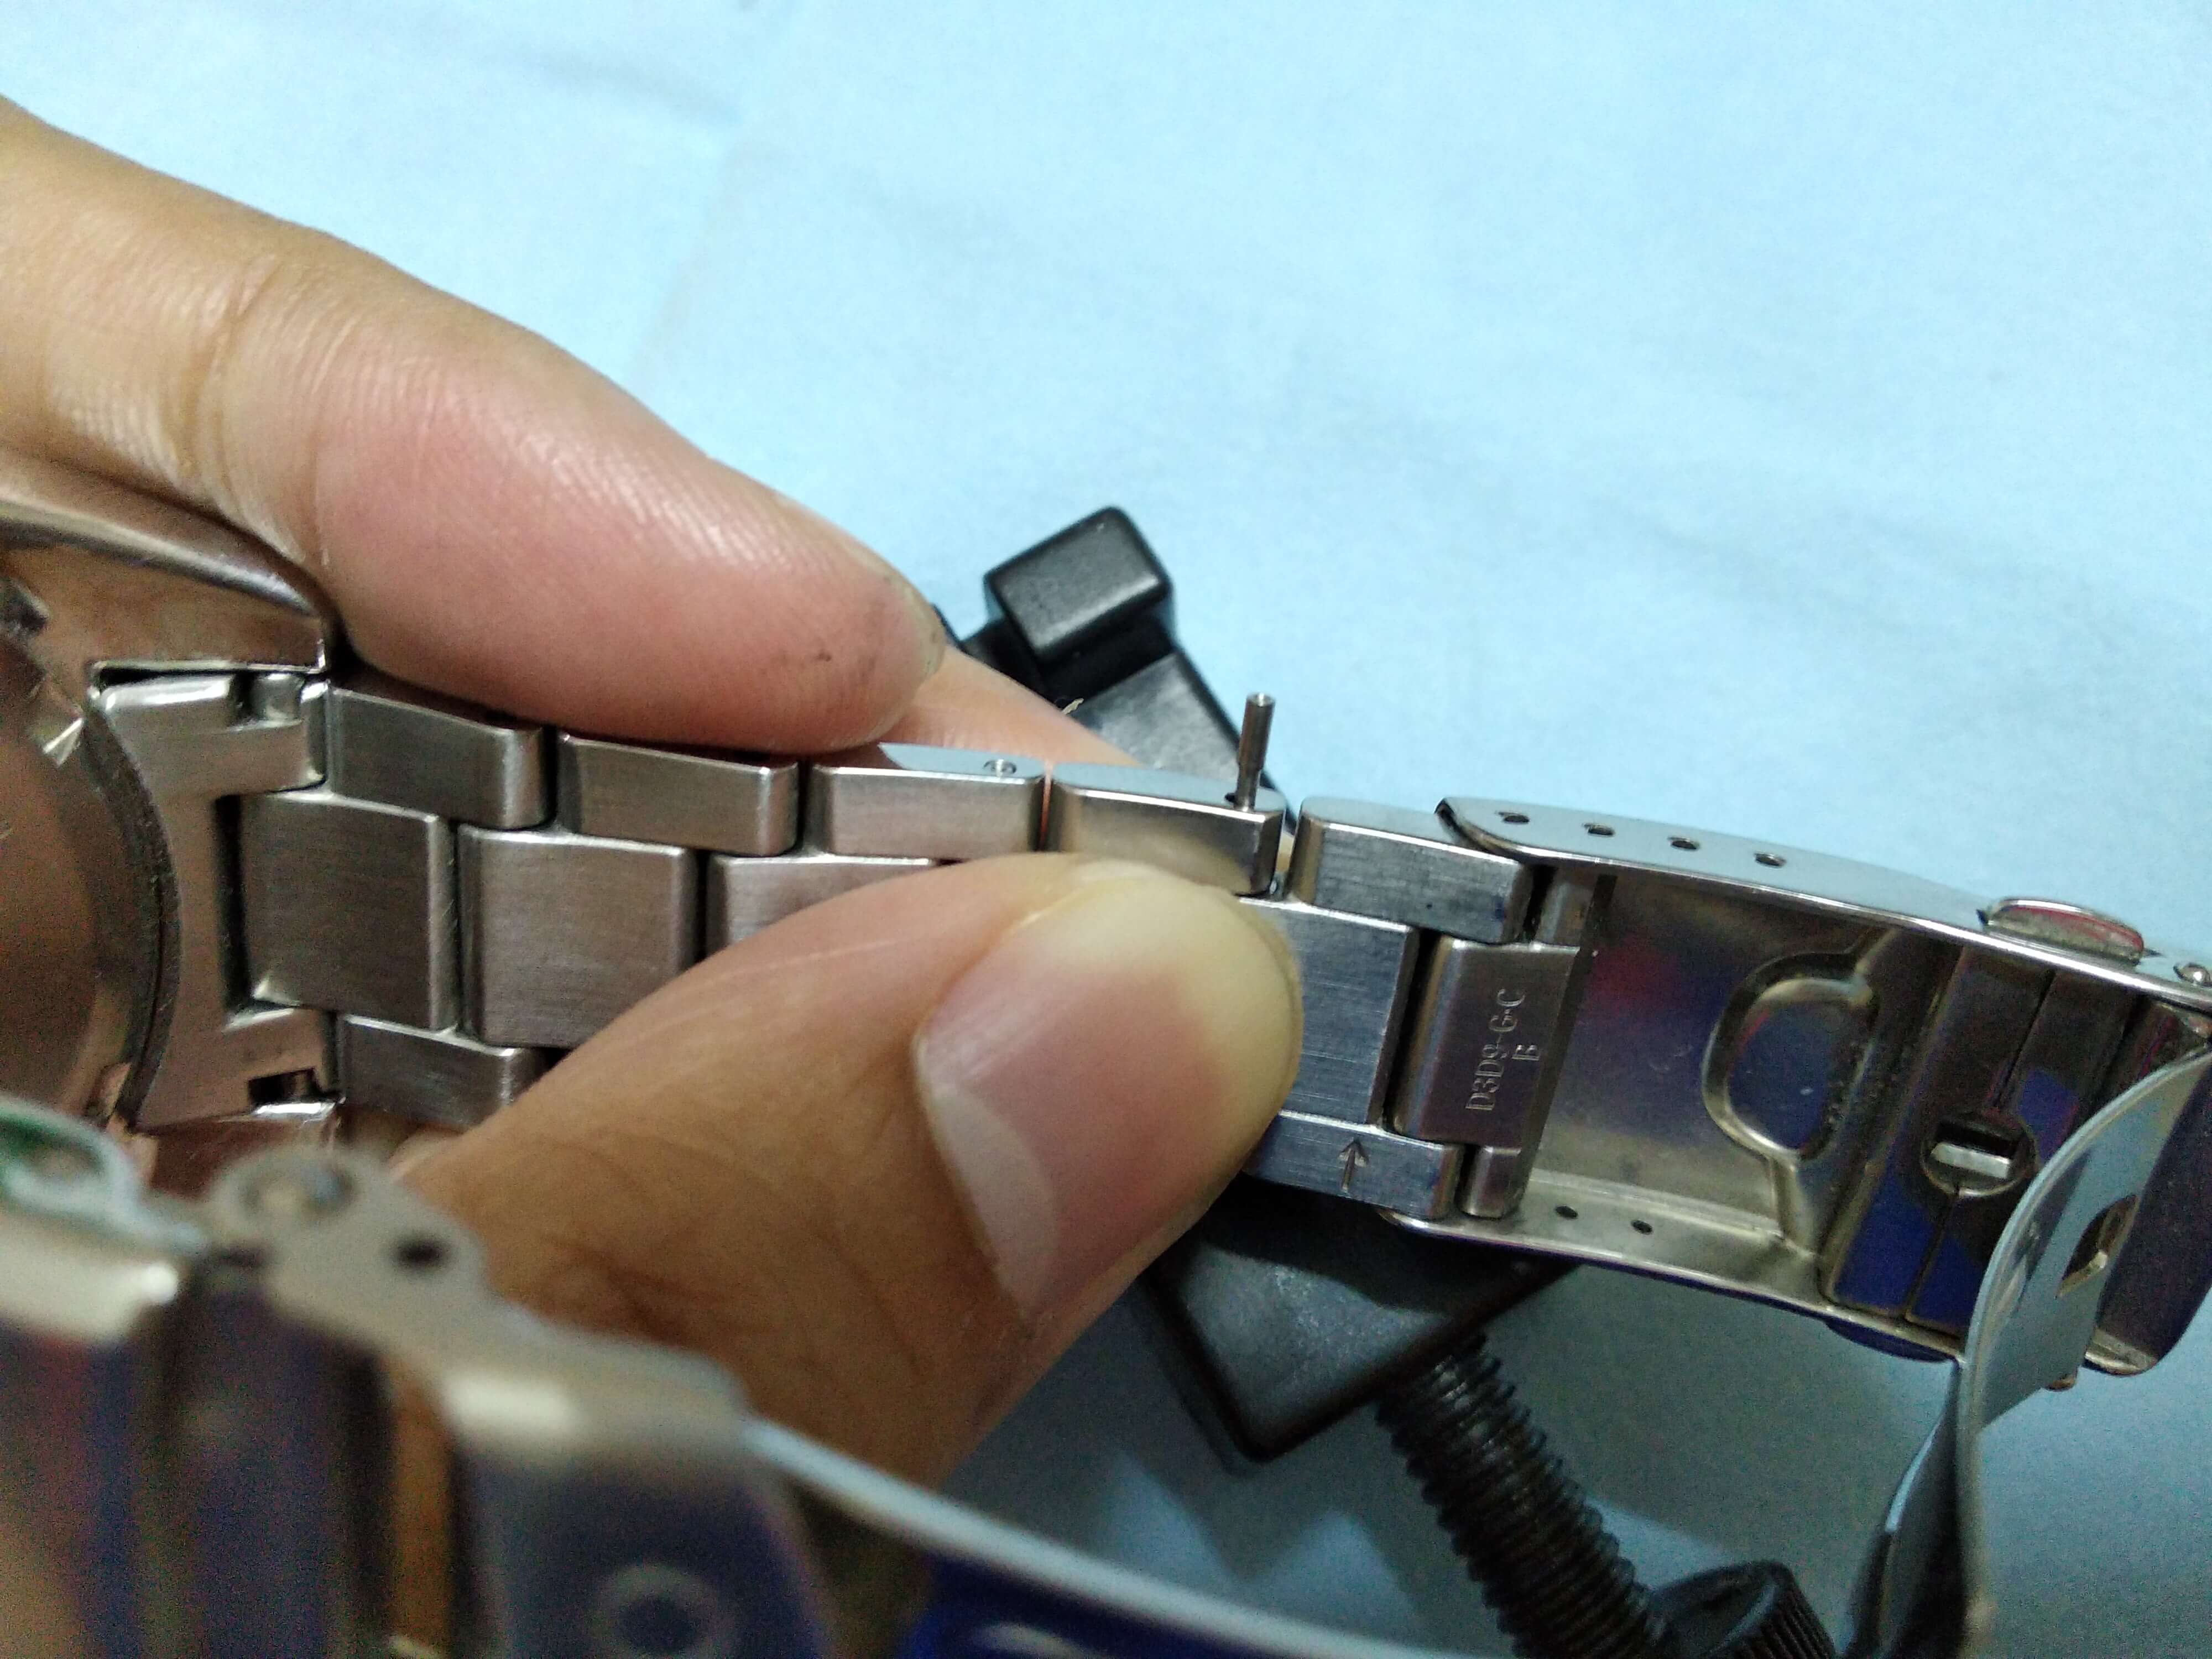
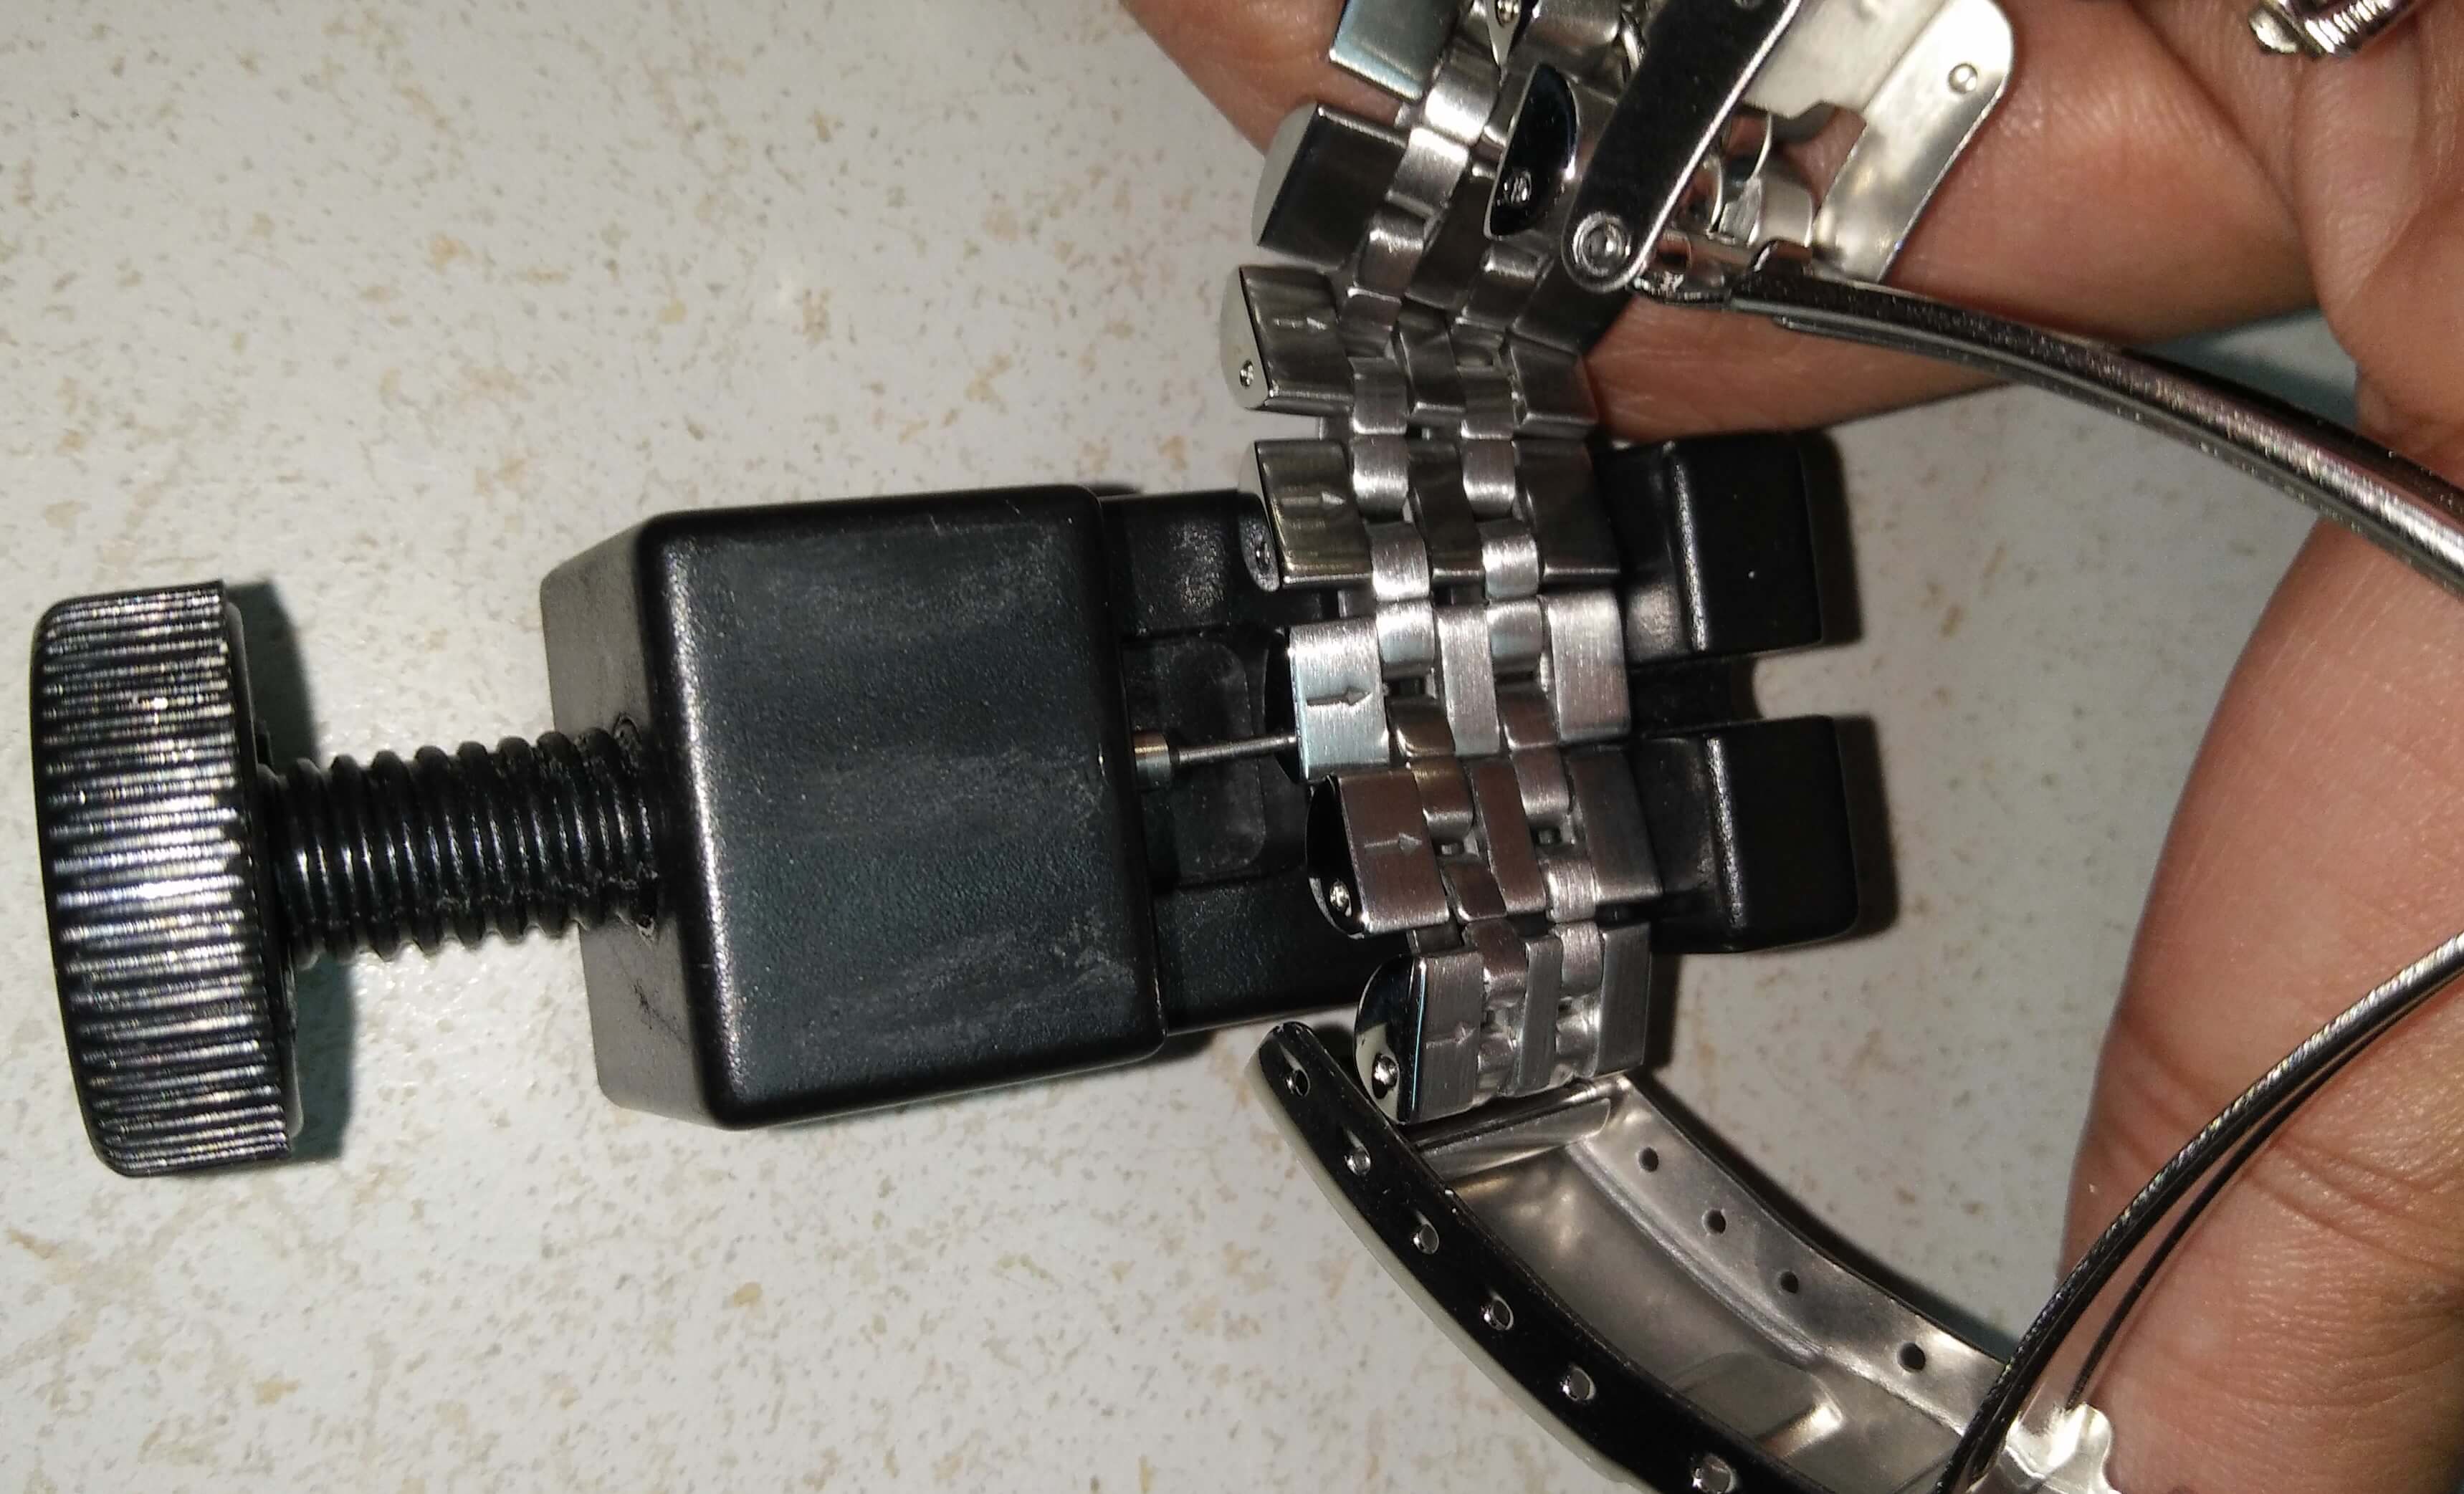
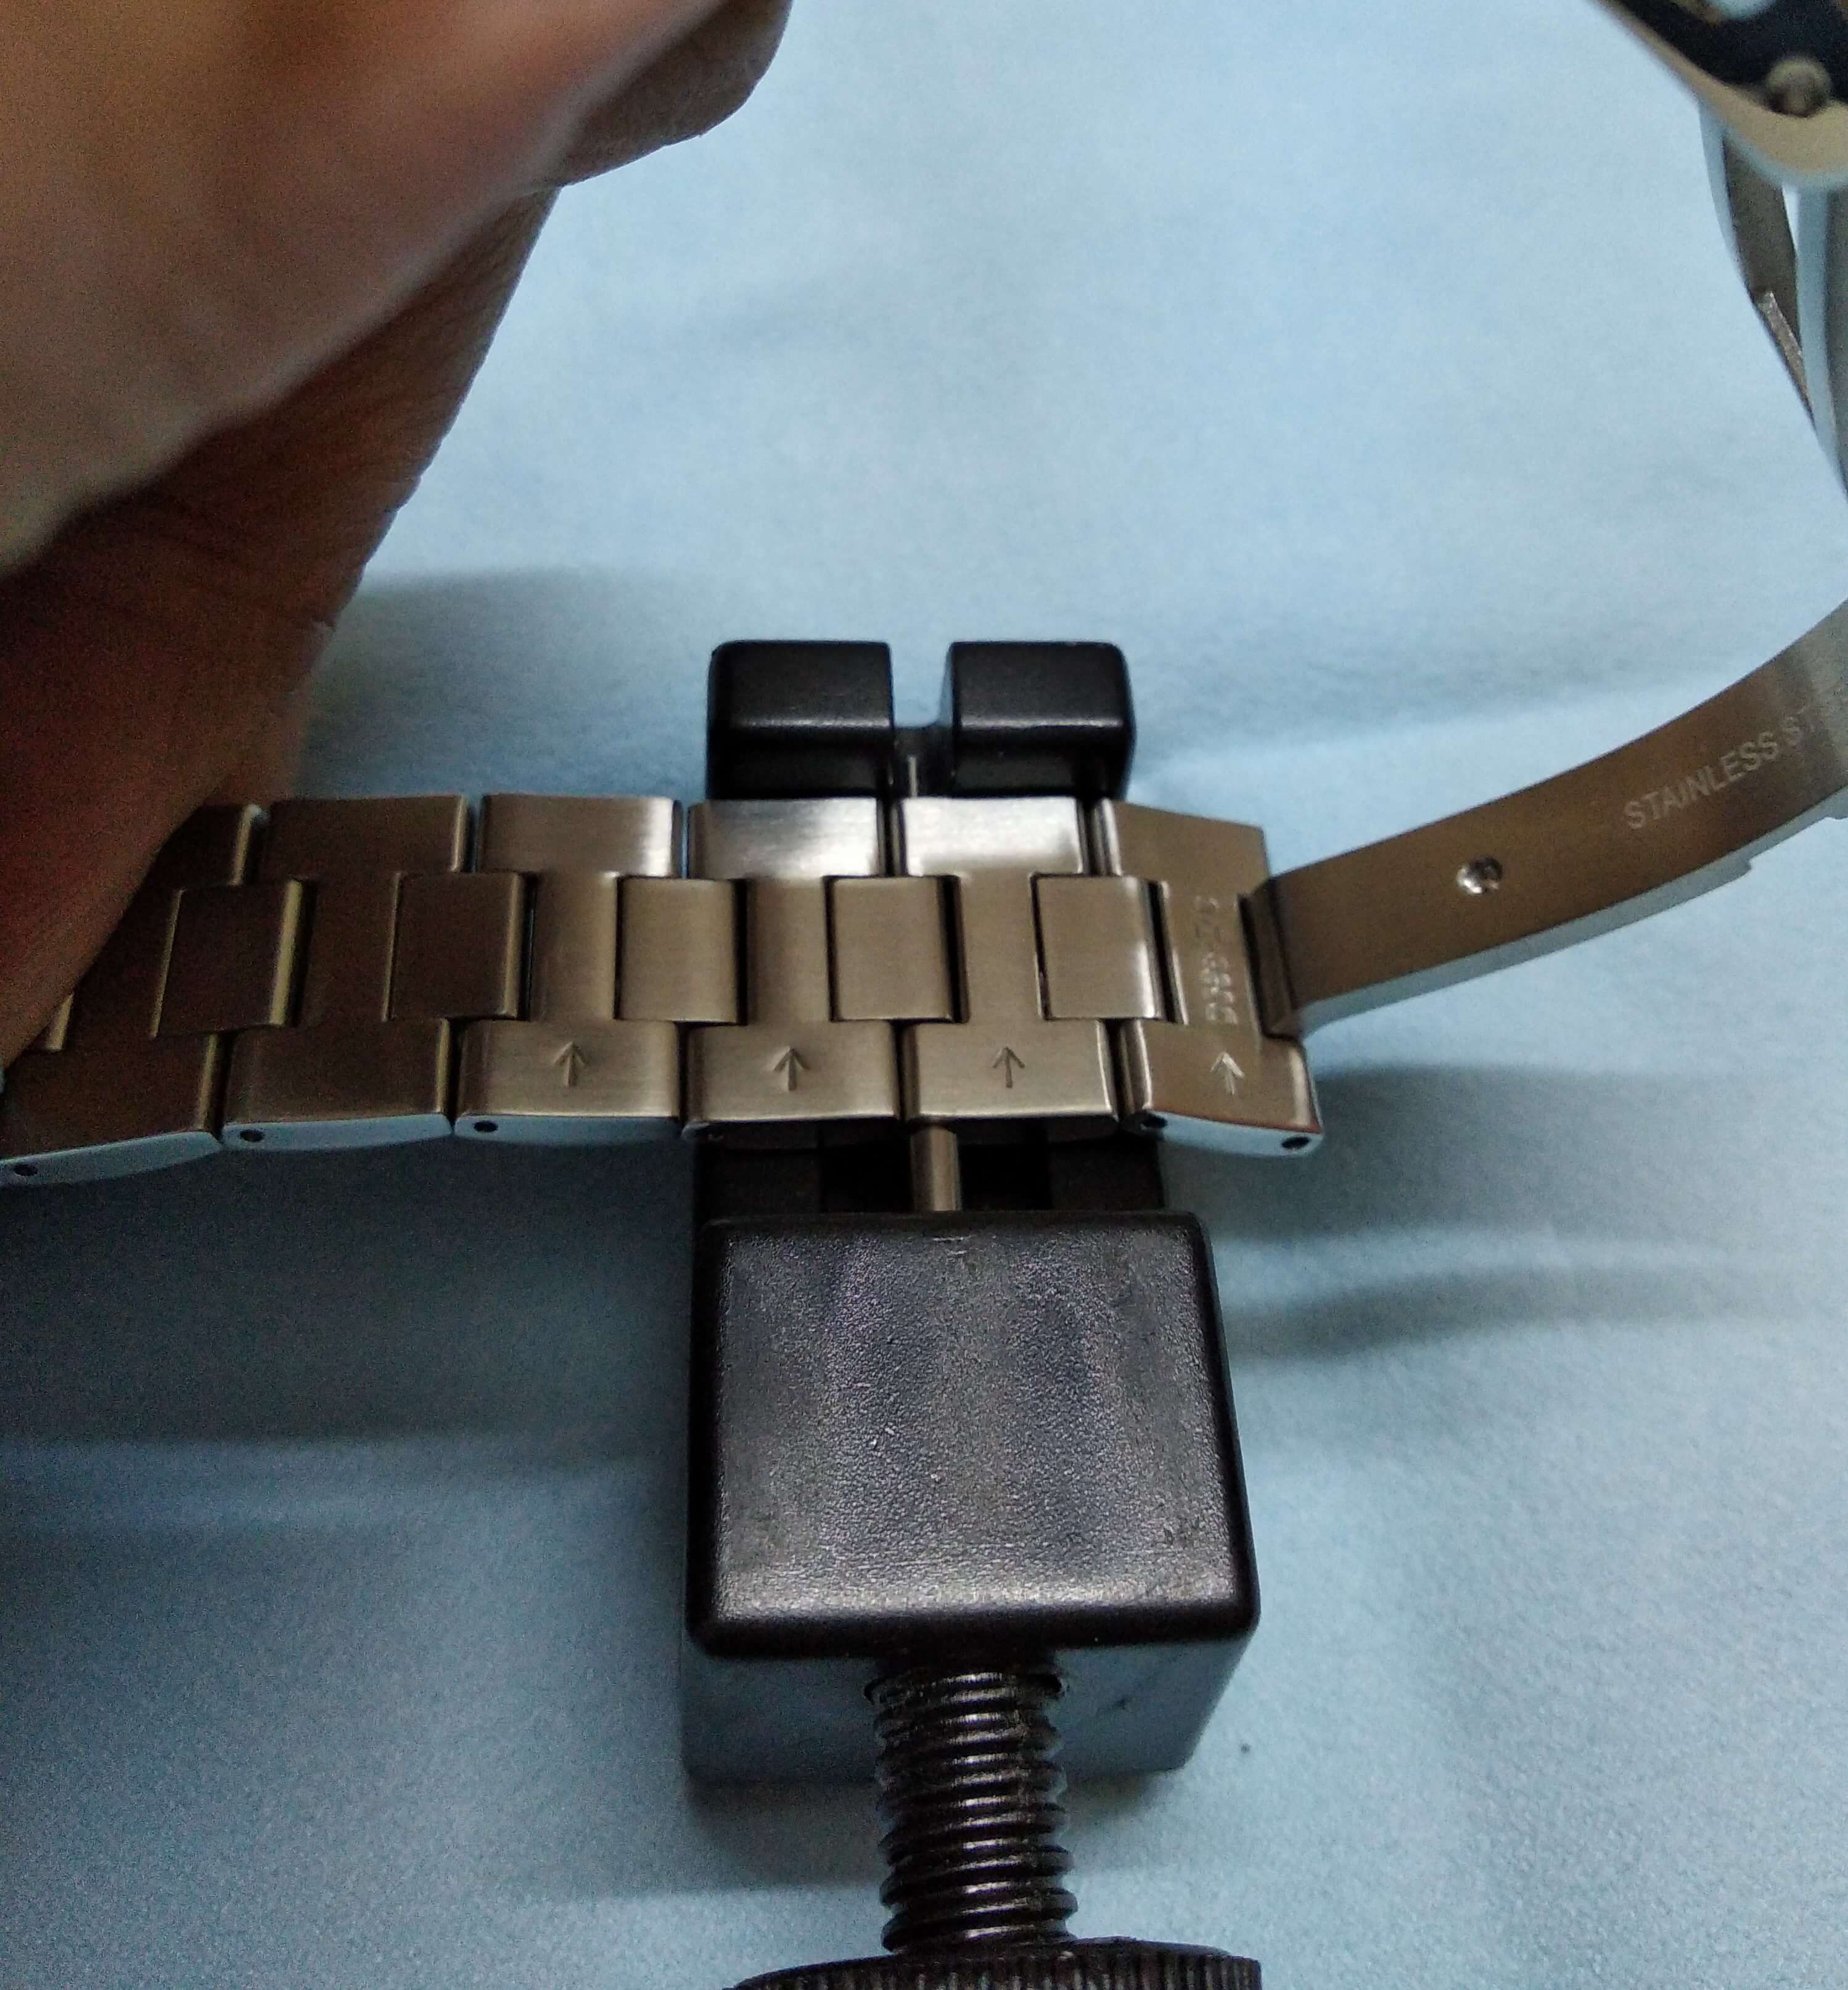
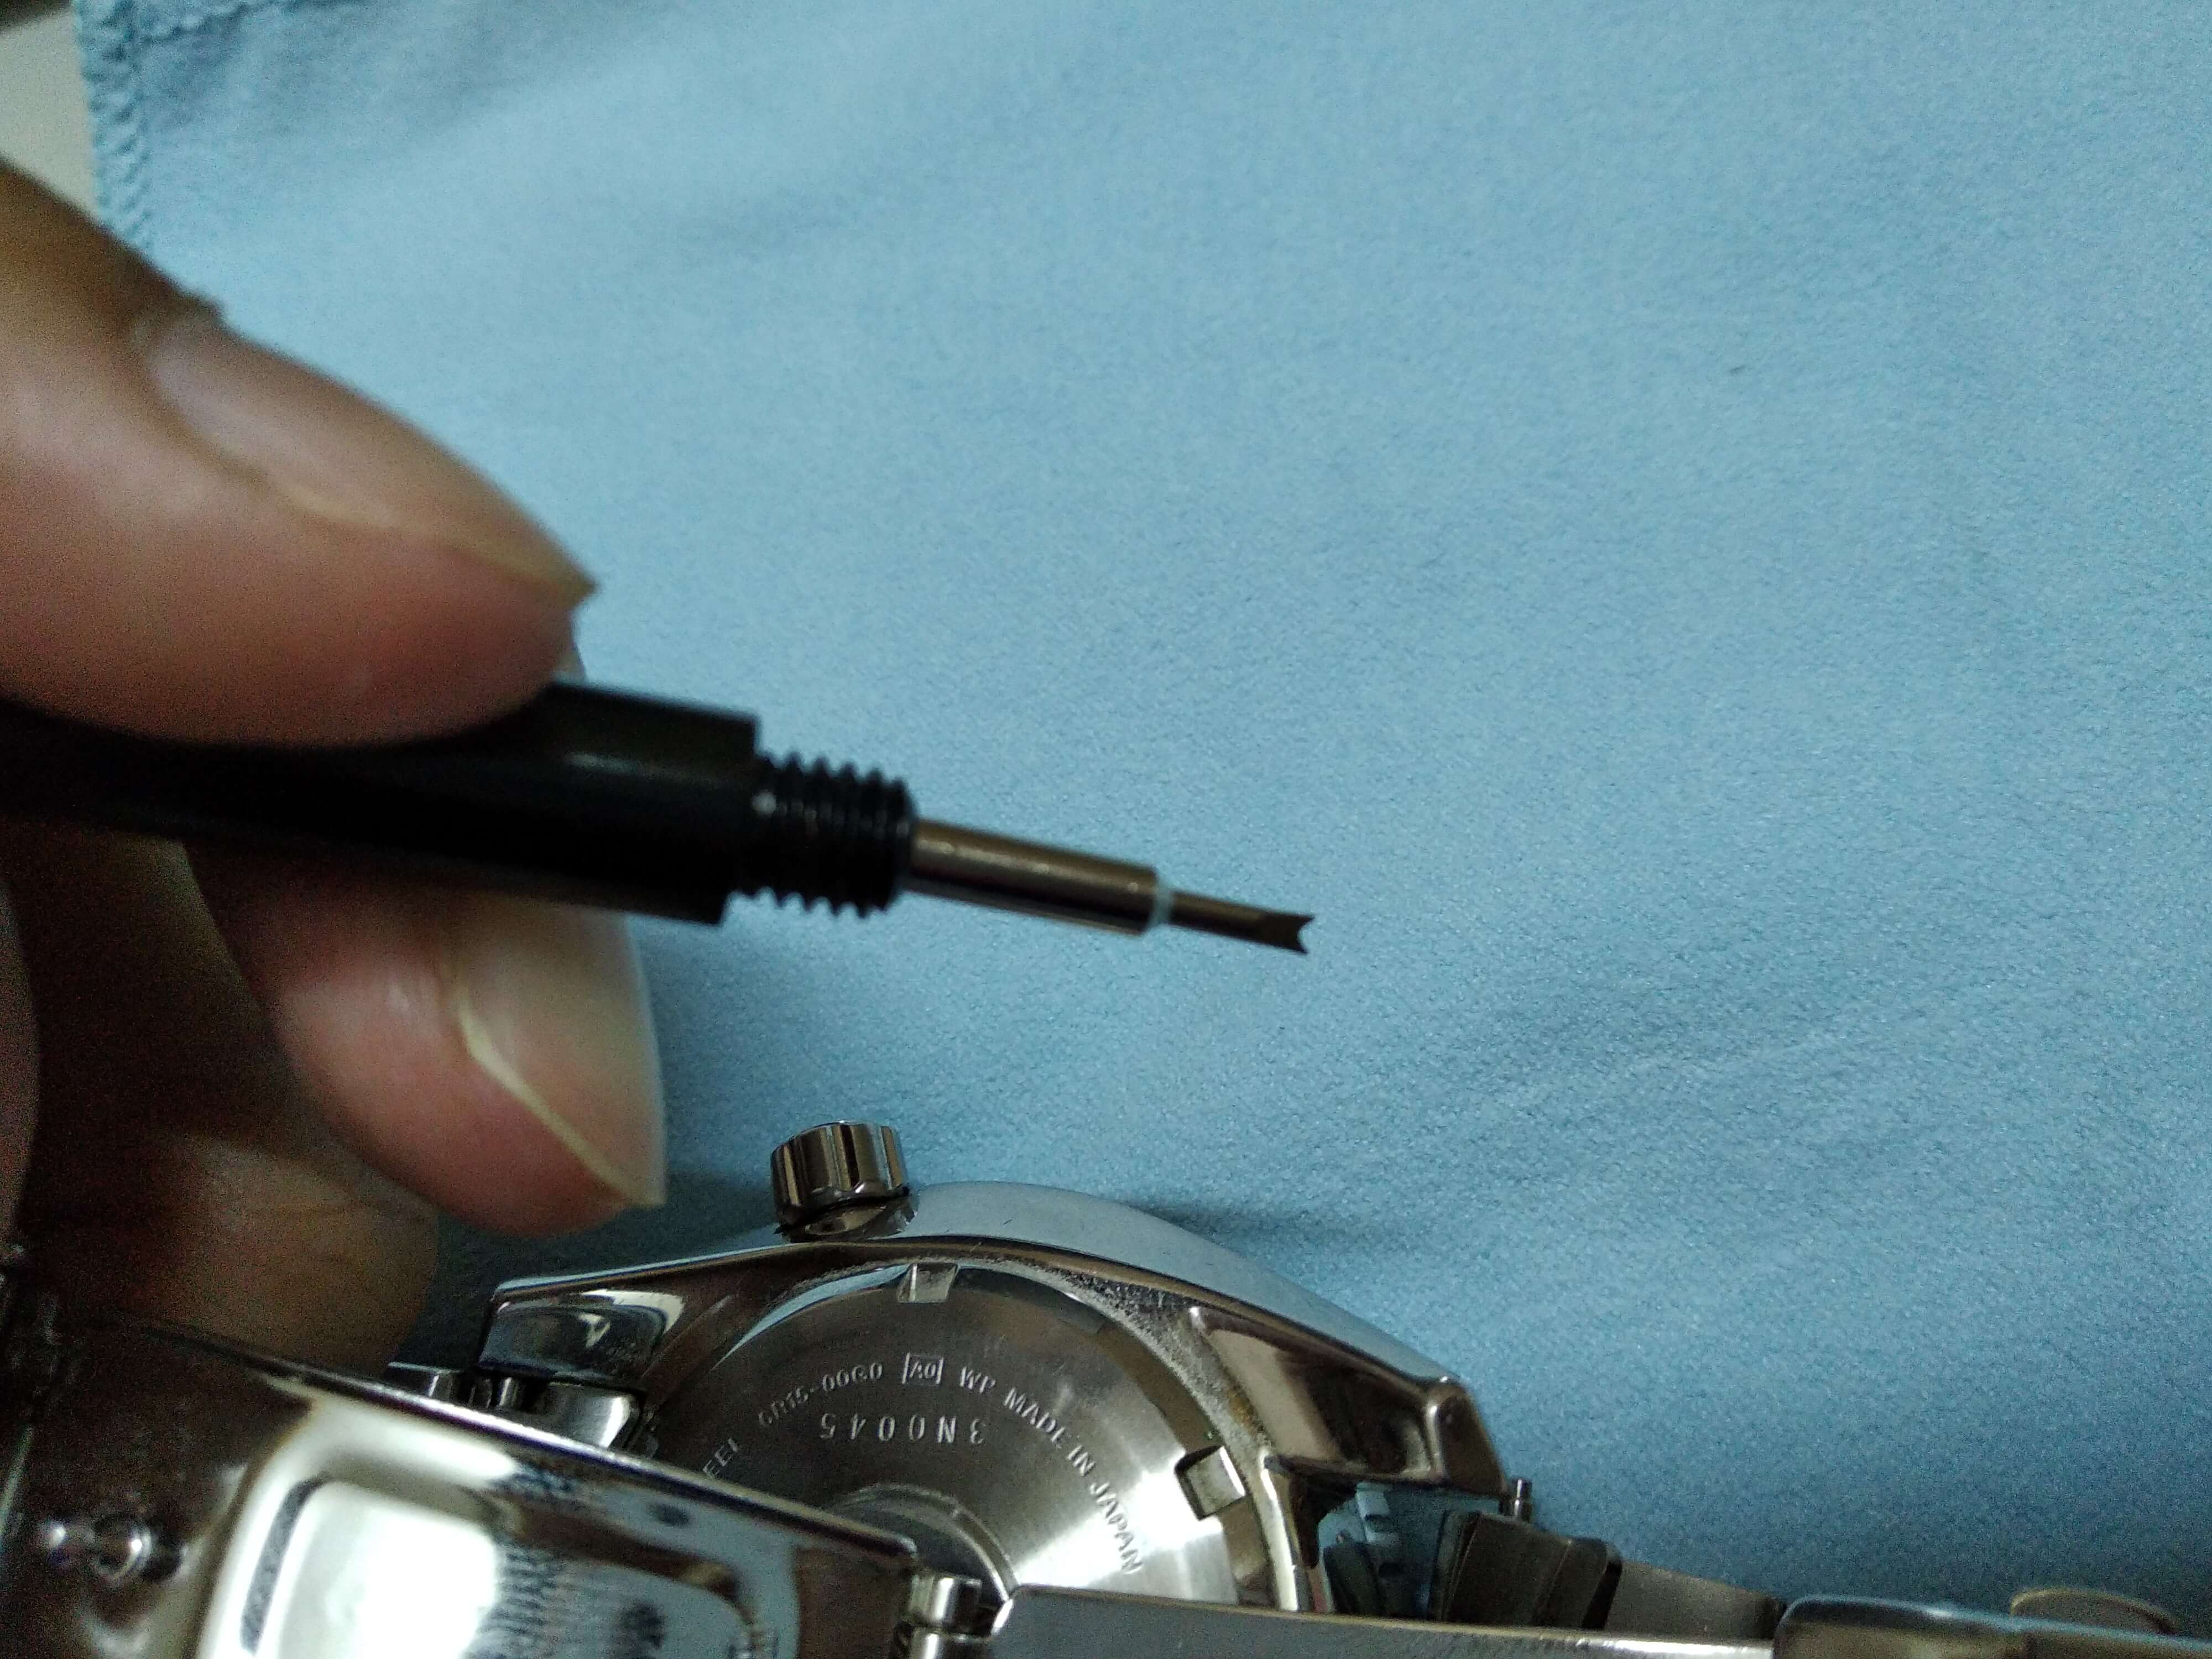
- Simply mount the bracelet on the pin remover tool with the needle to the side with the arrow.
- Then push in the tool’s needle by rotating the knob.
- As the needle goes in, the bracelet will be fixed in place by the tool fixture and the pin will pop up from the other side of the bracelet. Simply pull up the pin from the bracelet.
- At the same time, the pin holder will pop up from the other side of the bracelet.
- Repeat Step 1-4 for as many links as you need to remove.
- Once you’ve taken out the necessary bracelet portion, just do the same thing in backwards to put the links in place again.
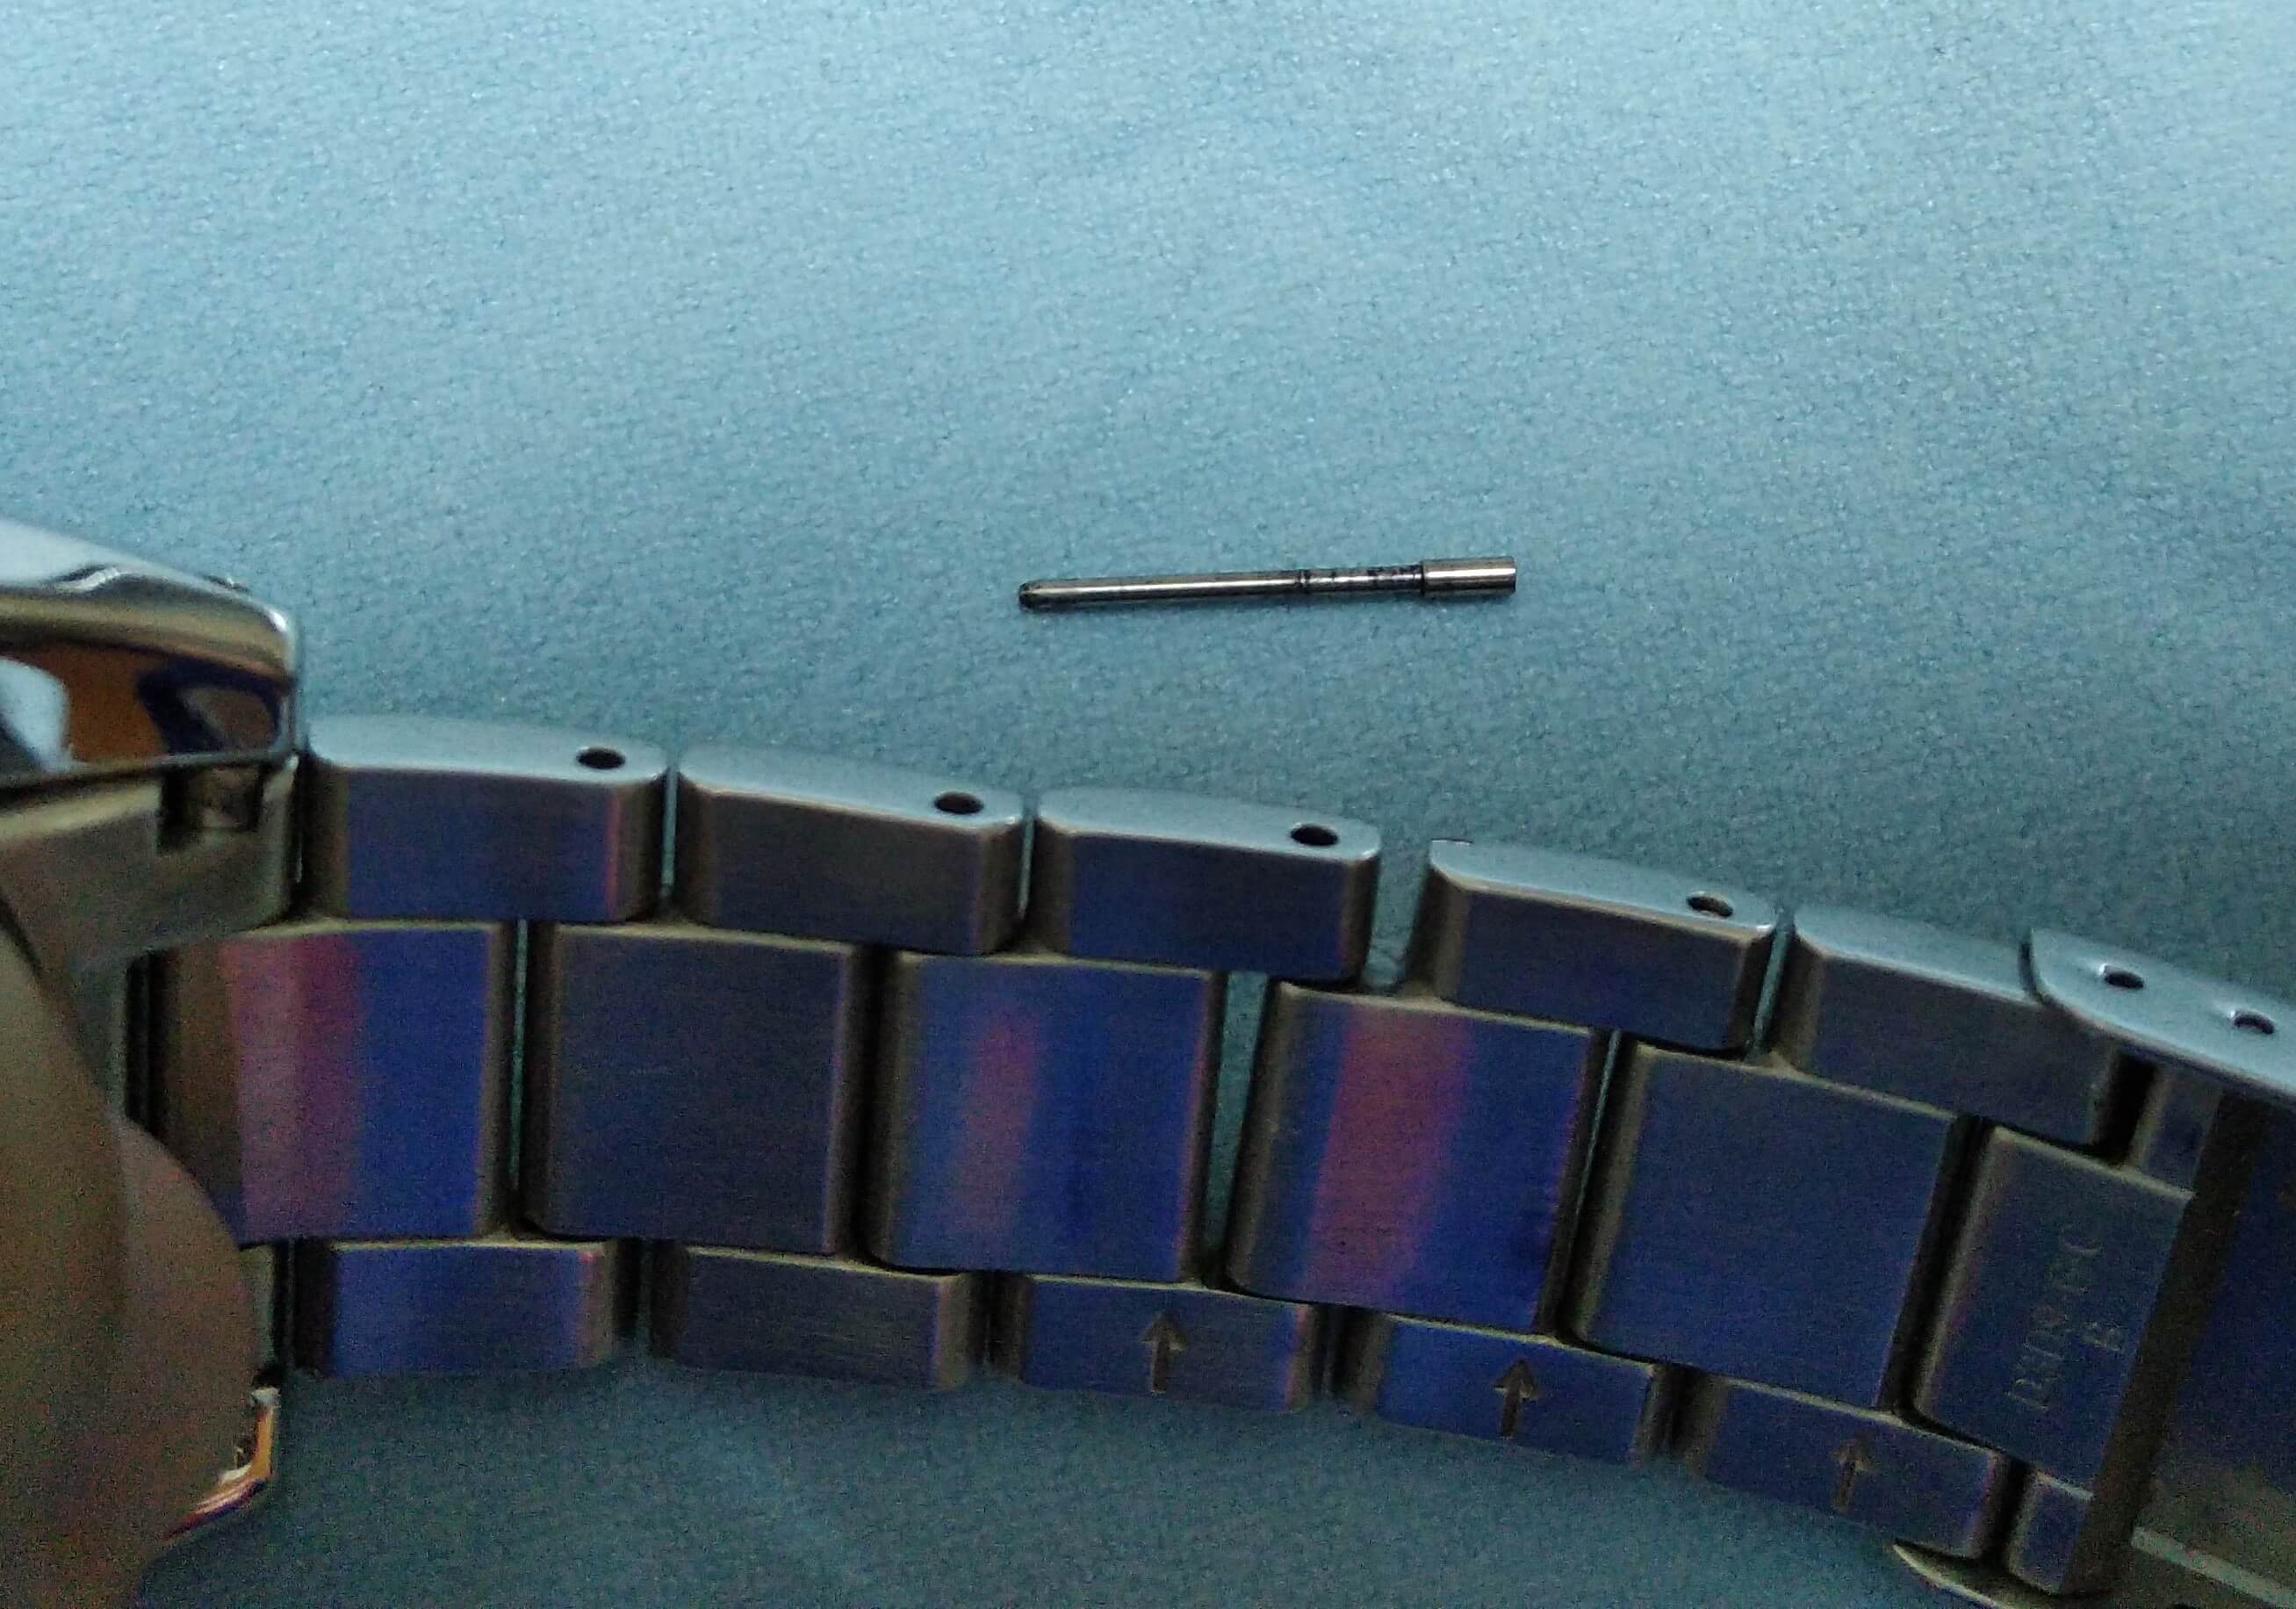
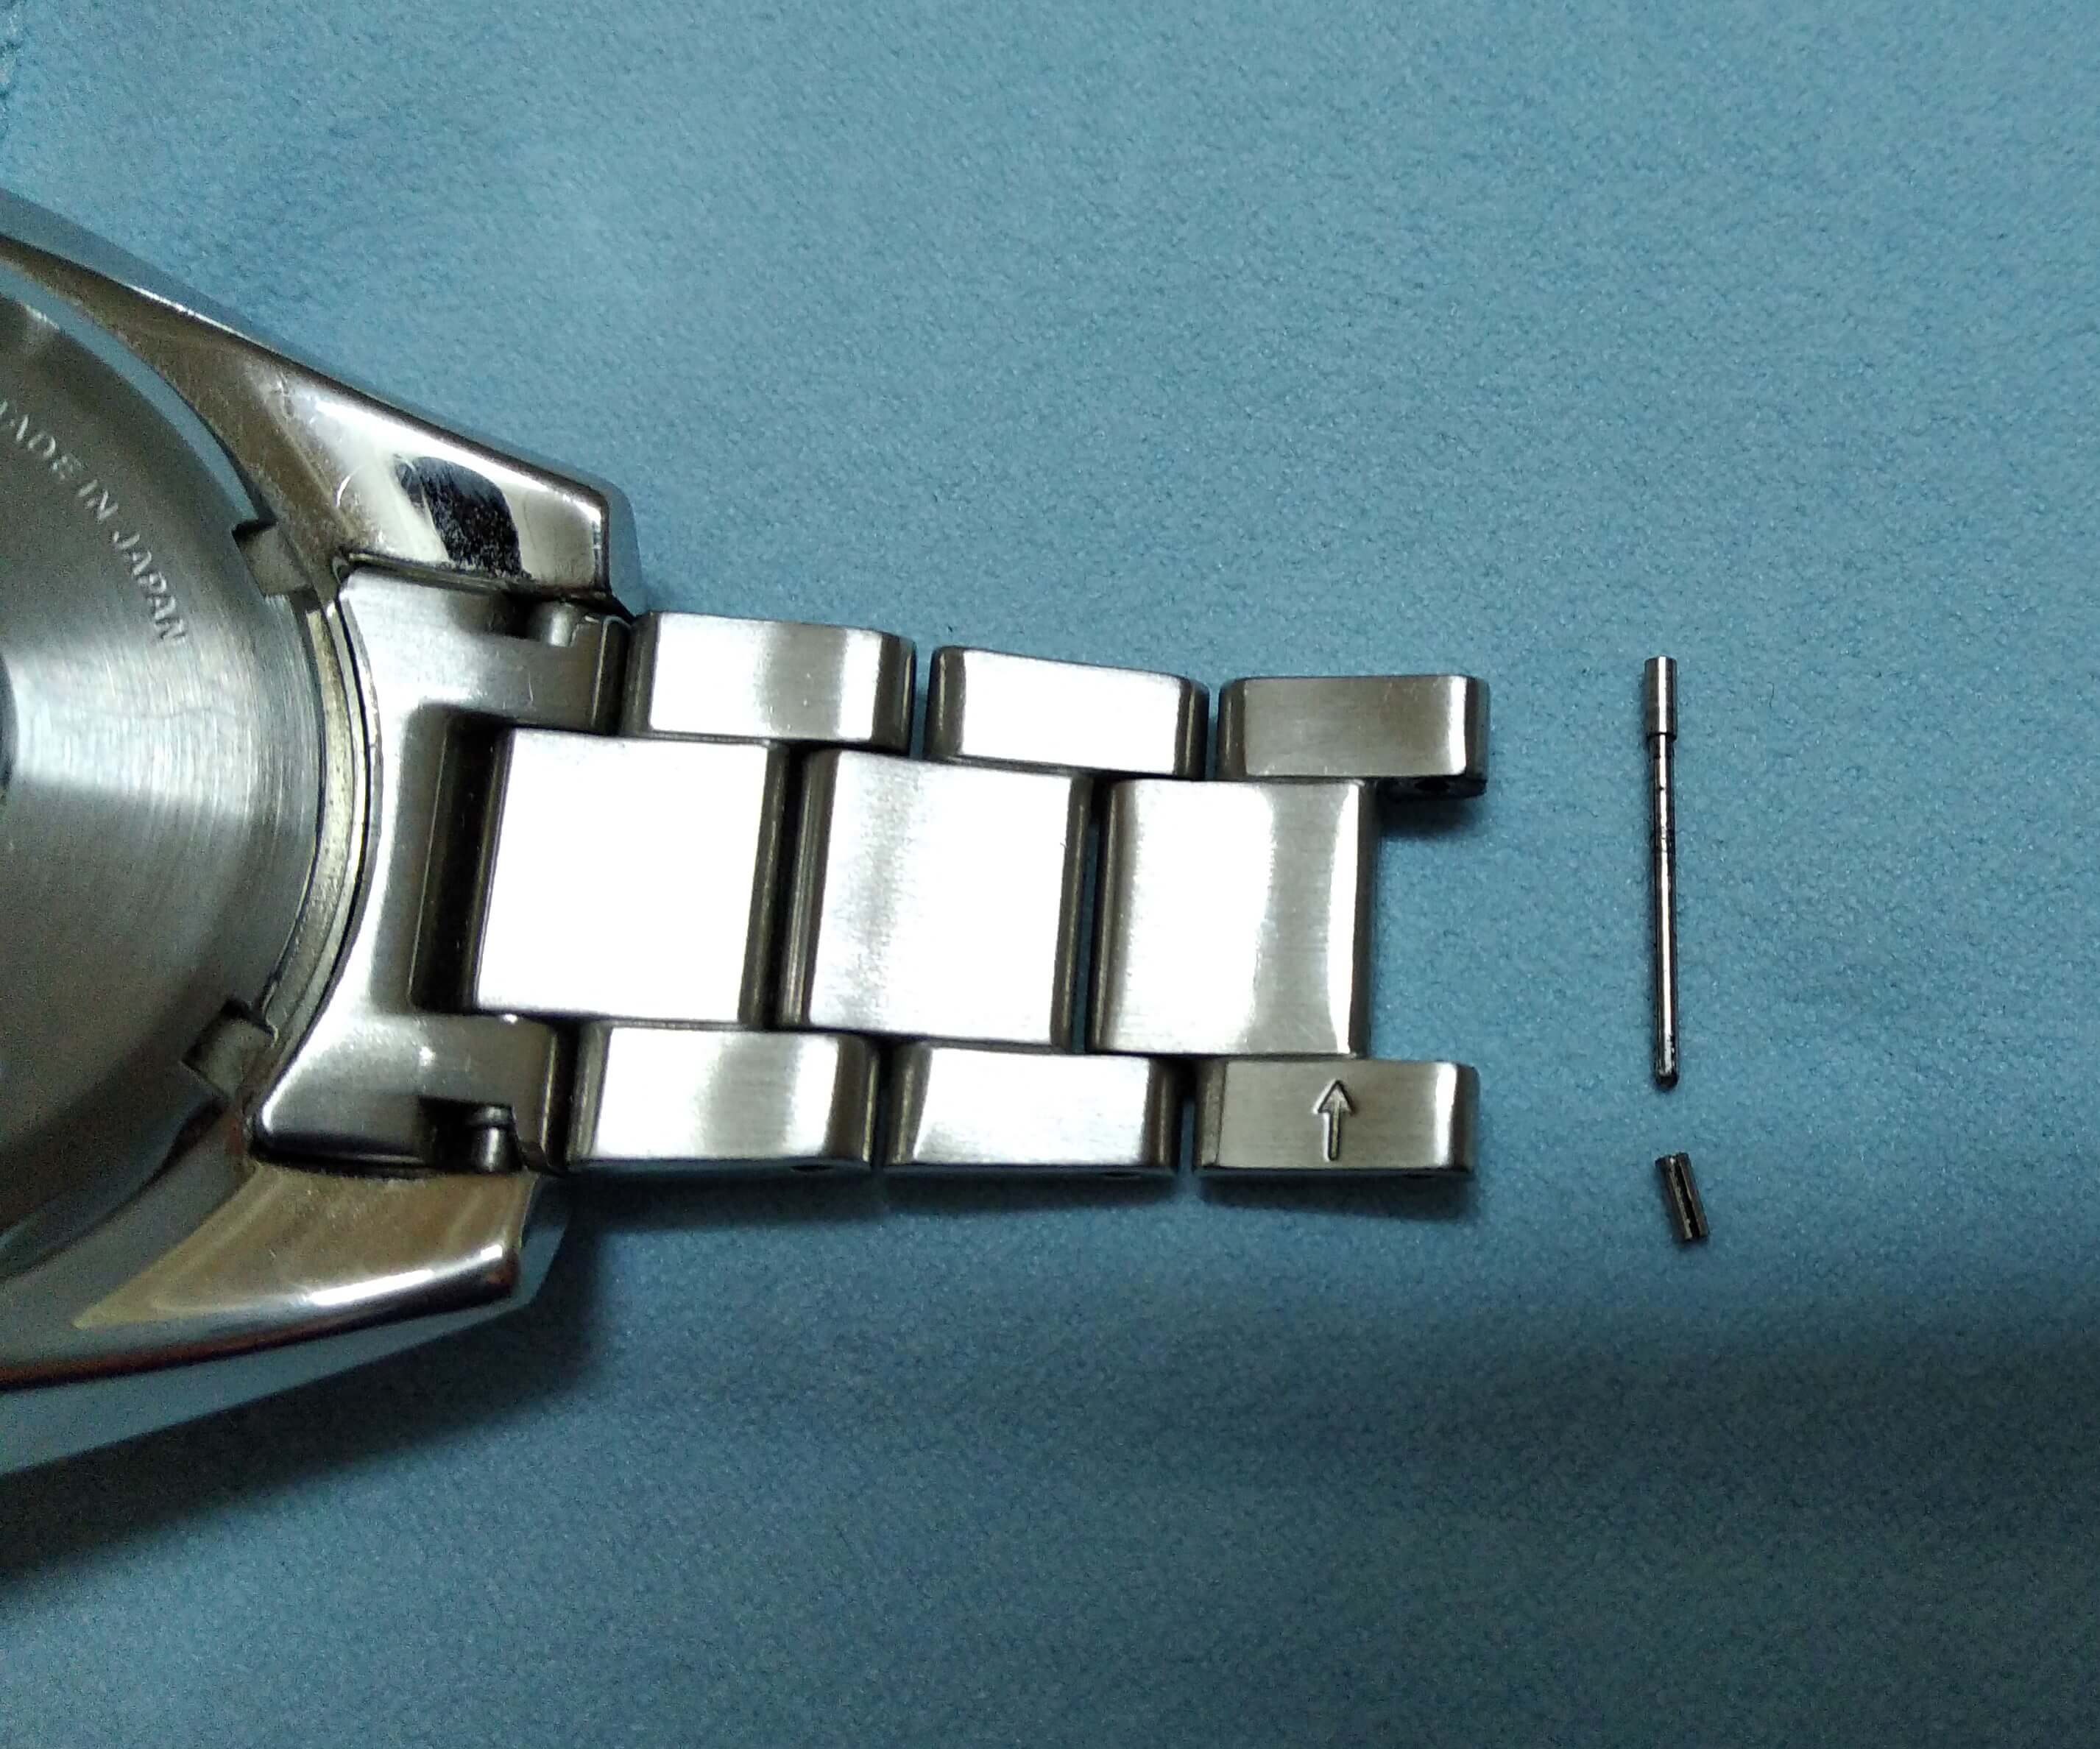
Do notice that its pin is bigger than the the other bracelets, presumably because it’s a thicker bracelet and requires a thicker pin to adequately hold them together.
| Adjusting Seiko Sumo Oyster Diver Bracelet | |
|---|---|
1. Put the bracelet on the pin remover tool |
2. Push the pin outside by rotating the tool’s knob |
3. The pin will pop out and can be pull out from the bracelet |
4. The pin and its holder laying beside the bracelet |
5. To join the links again, simply put the pin and its holder back at the same location |
6. Push it all back into place. You might want to push it down towards a desk of any surface to help with this. Ensure the full pin is inserted inside the bracelet. |
The pin is almost impossible to be taken out without the pin remover tool. I picked up one a few years ago and had been using it to size the bracelet on many watches.
It’s well worth the investment, in my opinion, and is an invaluable tool that anyone could have.
Watch Bracelet Link Pin Remover Tool Kit

Adjusting Seiko SKX013 Jubilee Bracelet

Adjusting the jubilee bracelet on the SKX013 (click the link to read my review of the Seiko Sumo) is quite easy as its link consists of one link without any holder.
Btw, I believe the more popular SKX007 also have the same type of bracelet.
The same step as adjusting the Sumo applies here.
As you can see below, the pin on this SKX013 is a single pin with an enlarged head to keep the pin in place.
I really like this type of pin as you don’t have to deal with a very small pin holder like Seiko’s other bracelets.
| Adjusting Seiko SKX013 Jubilee Bracelet | |
|---|---|
Follow the same steps as Seiko Sumo to remove the pin |

The pin in the SKX013 is a bit different as it does not have a pin holder. |
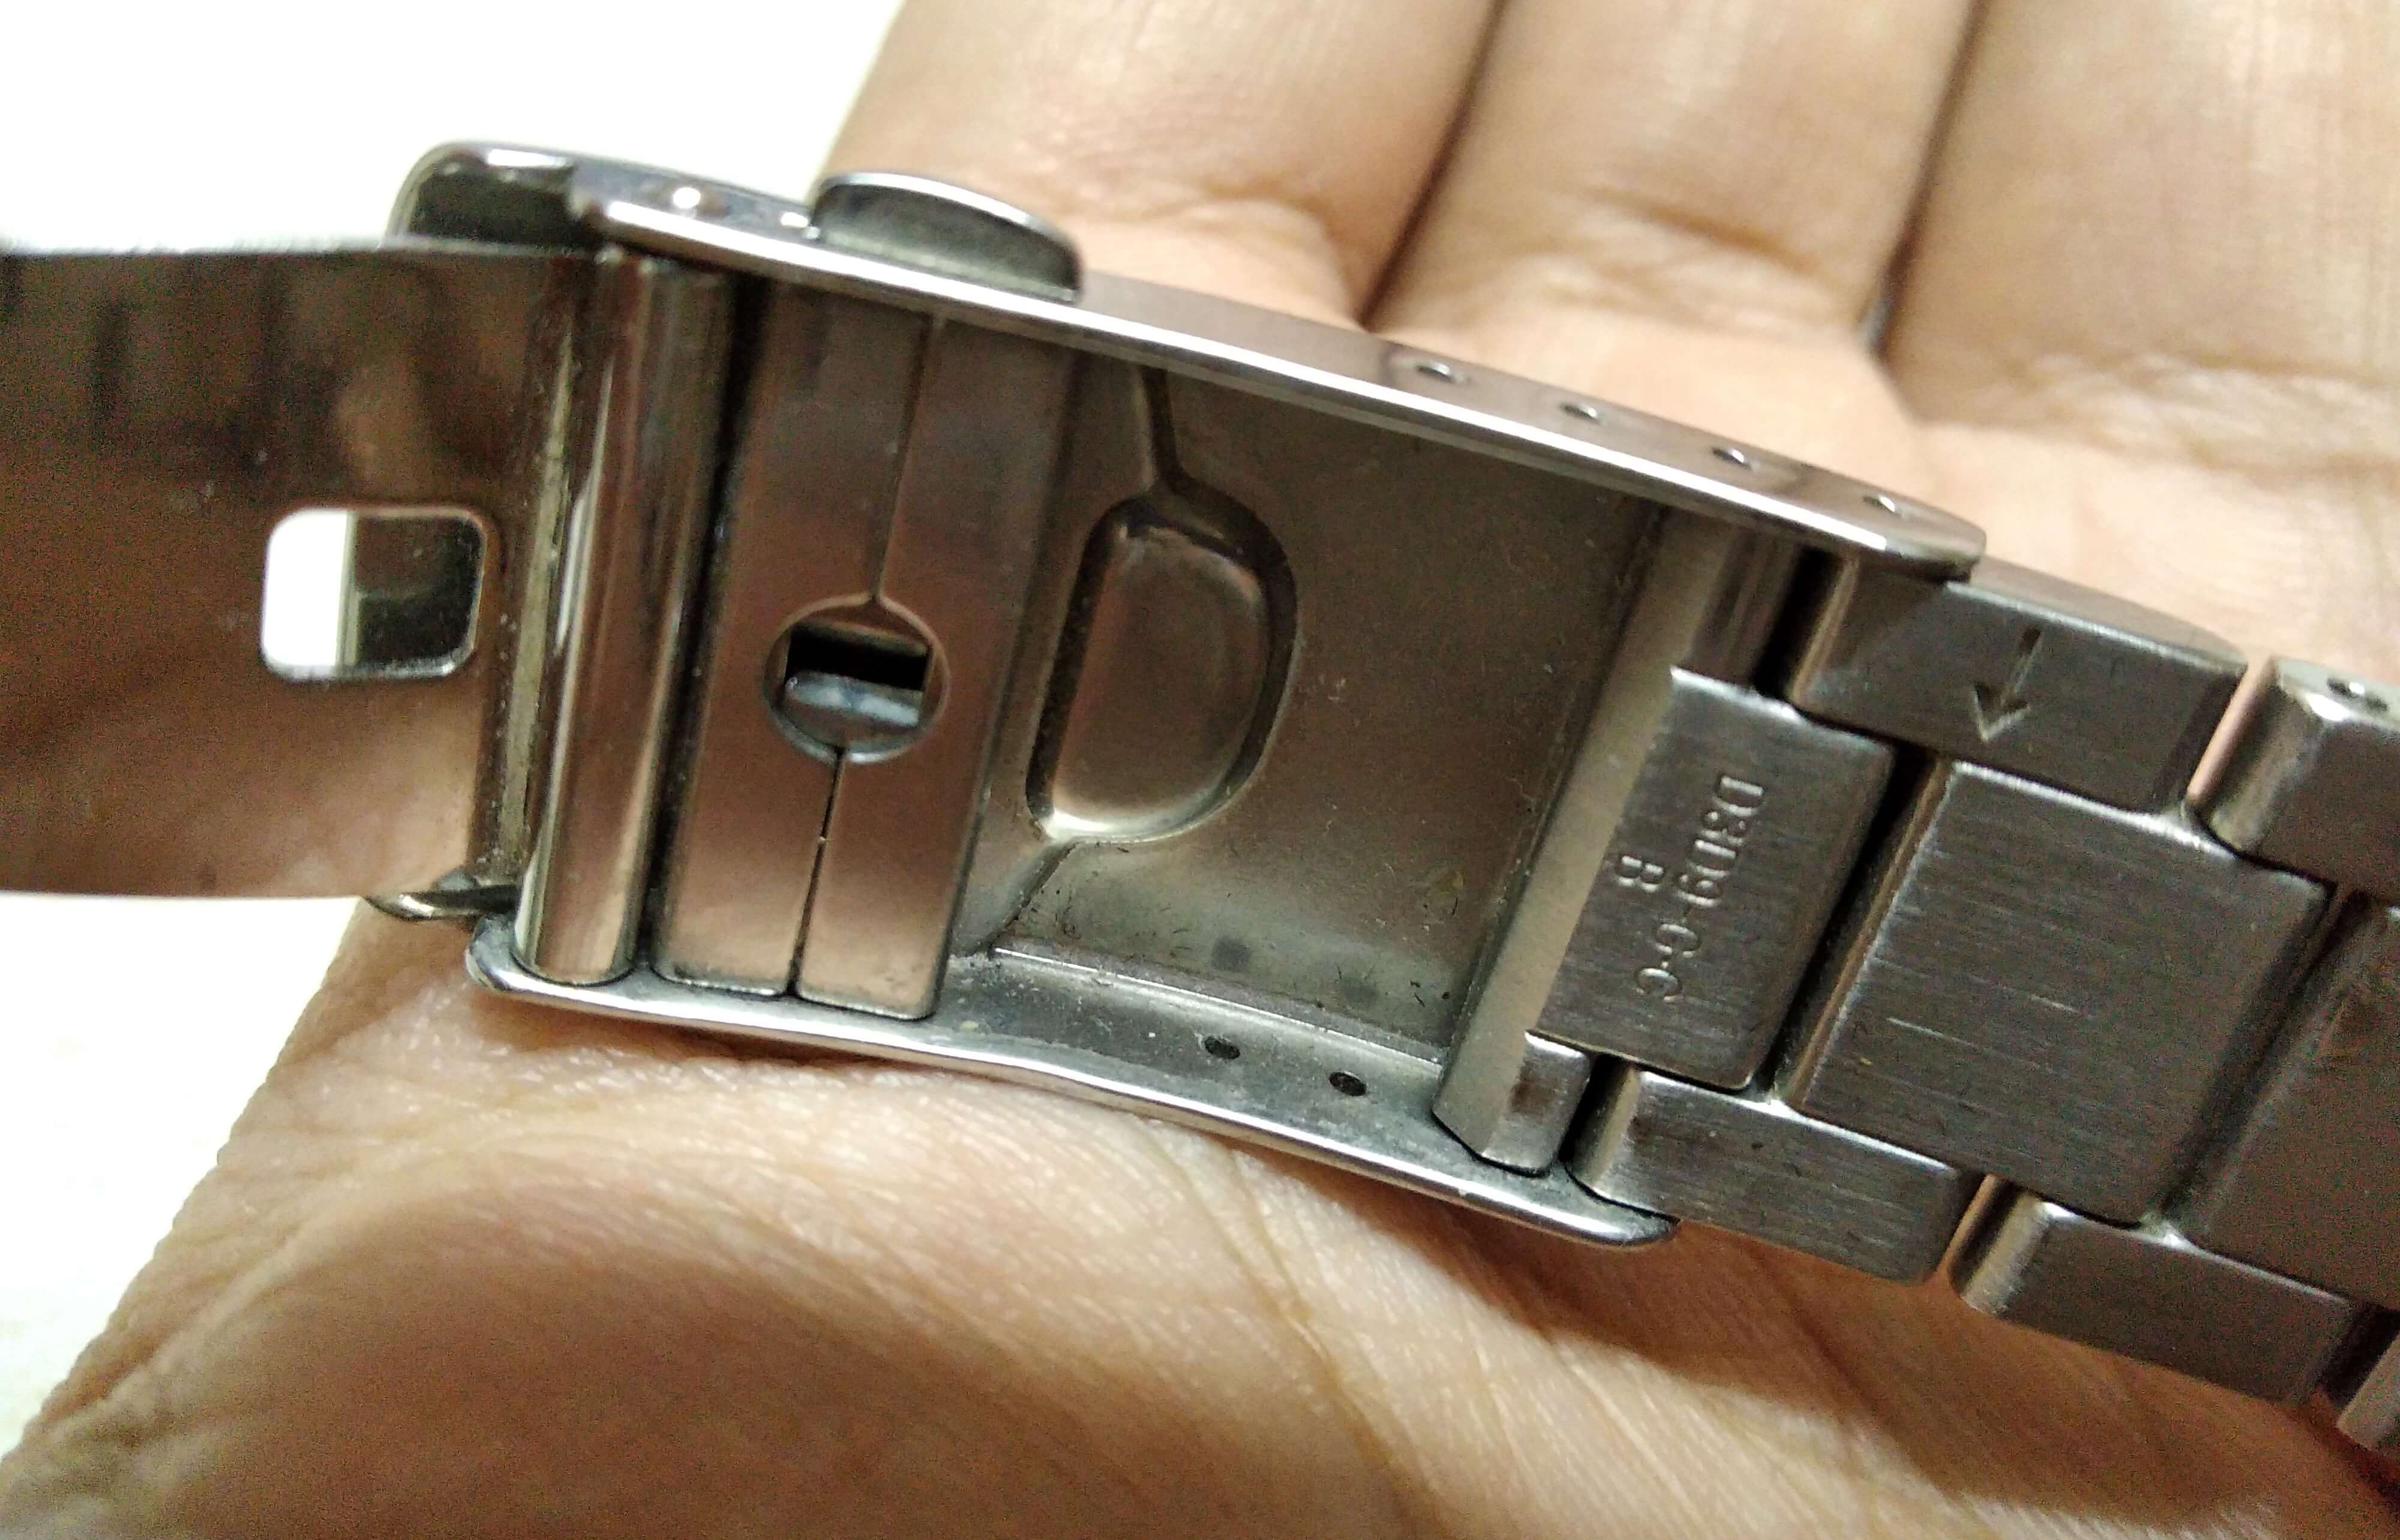
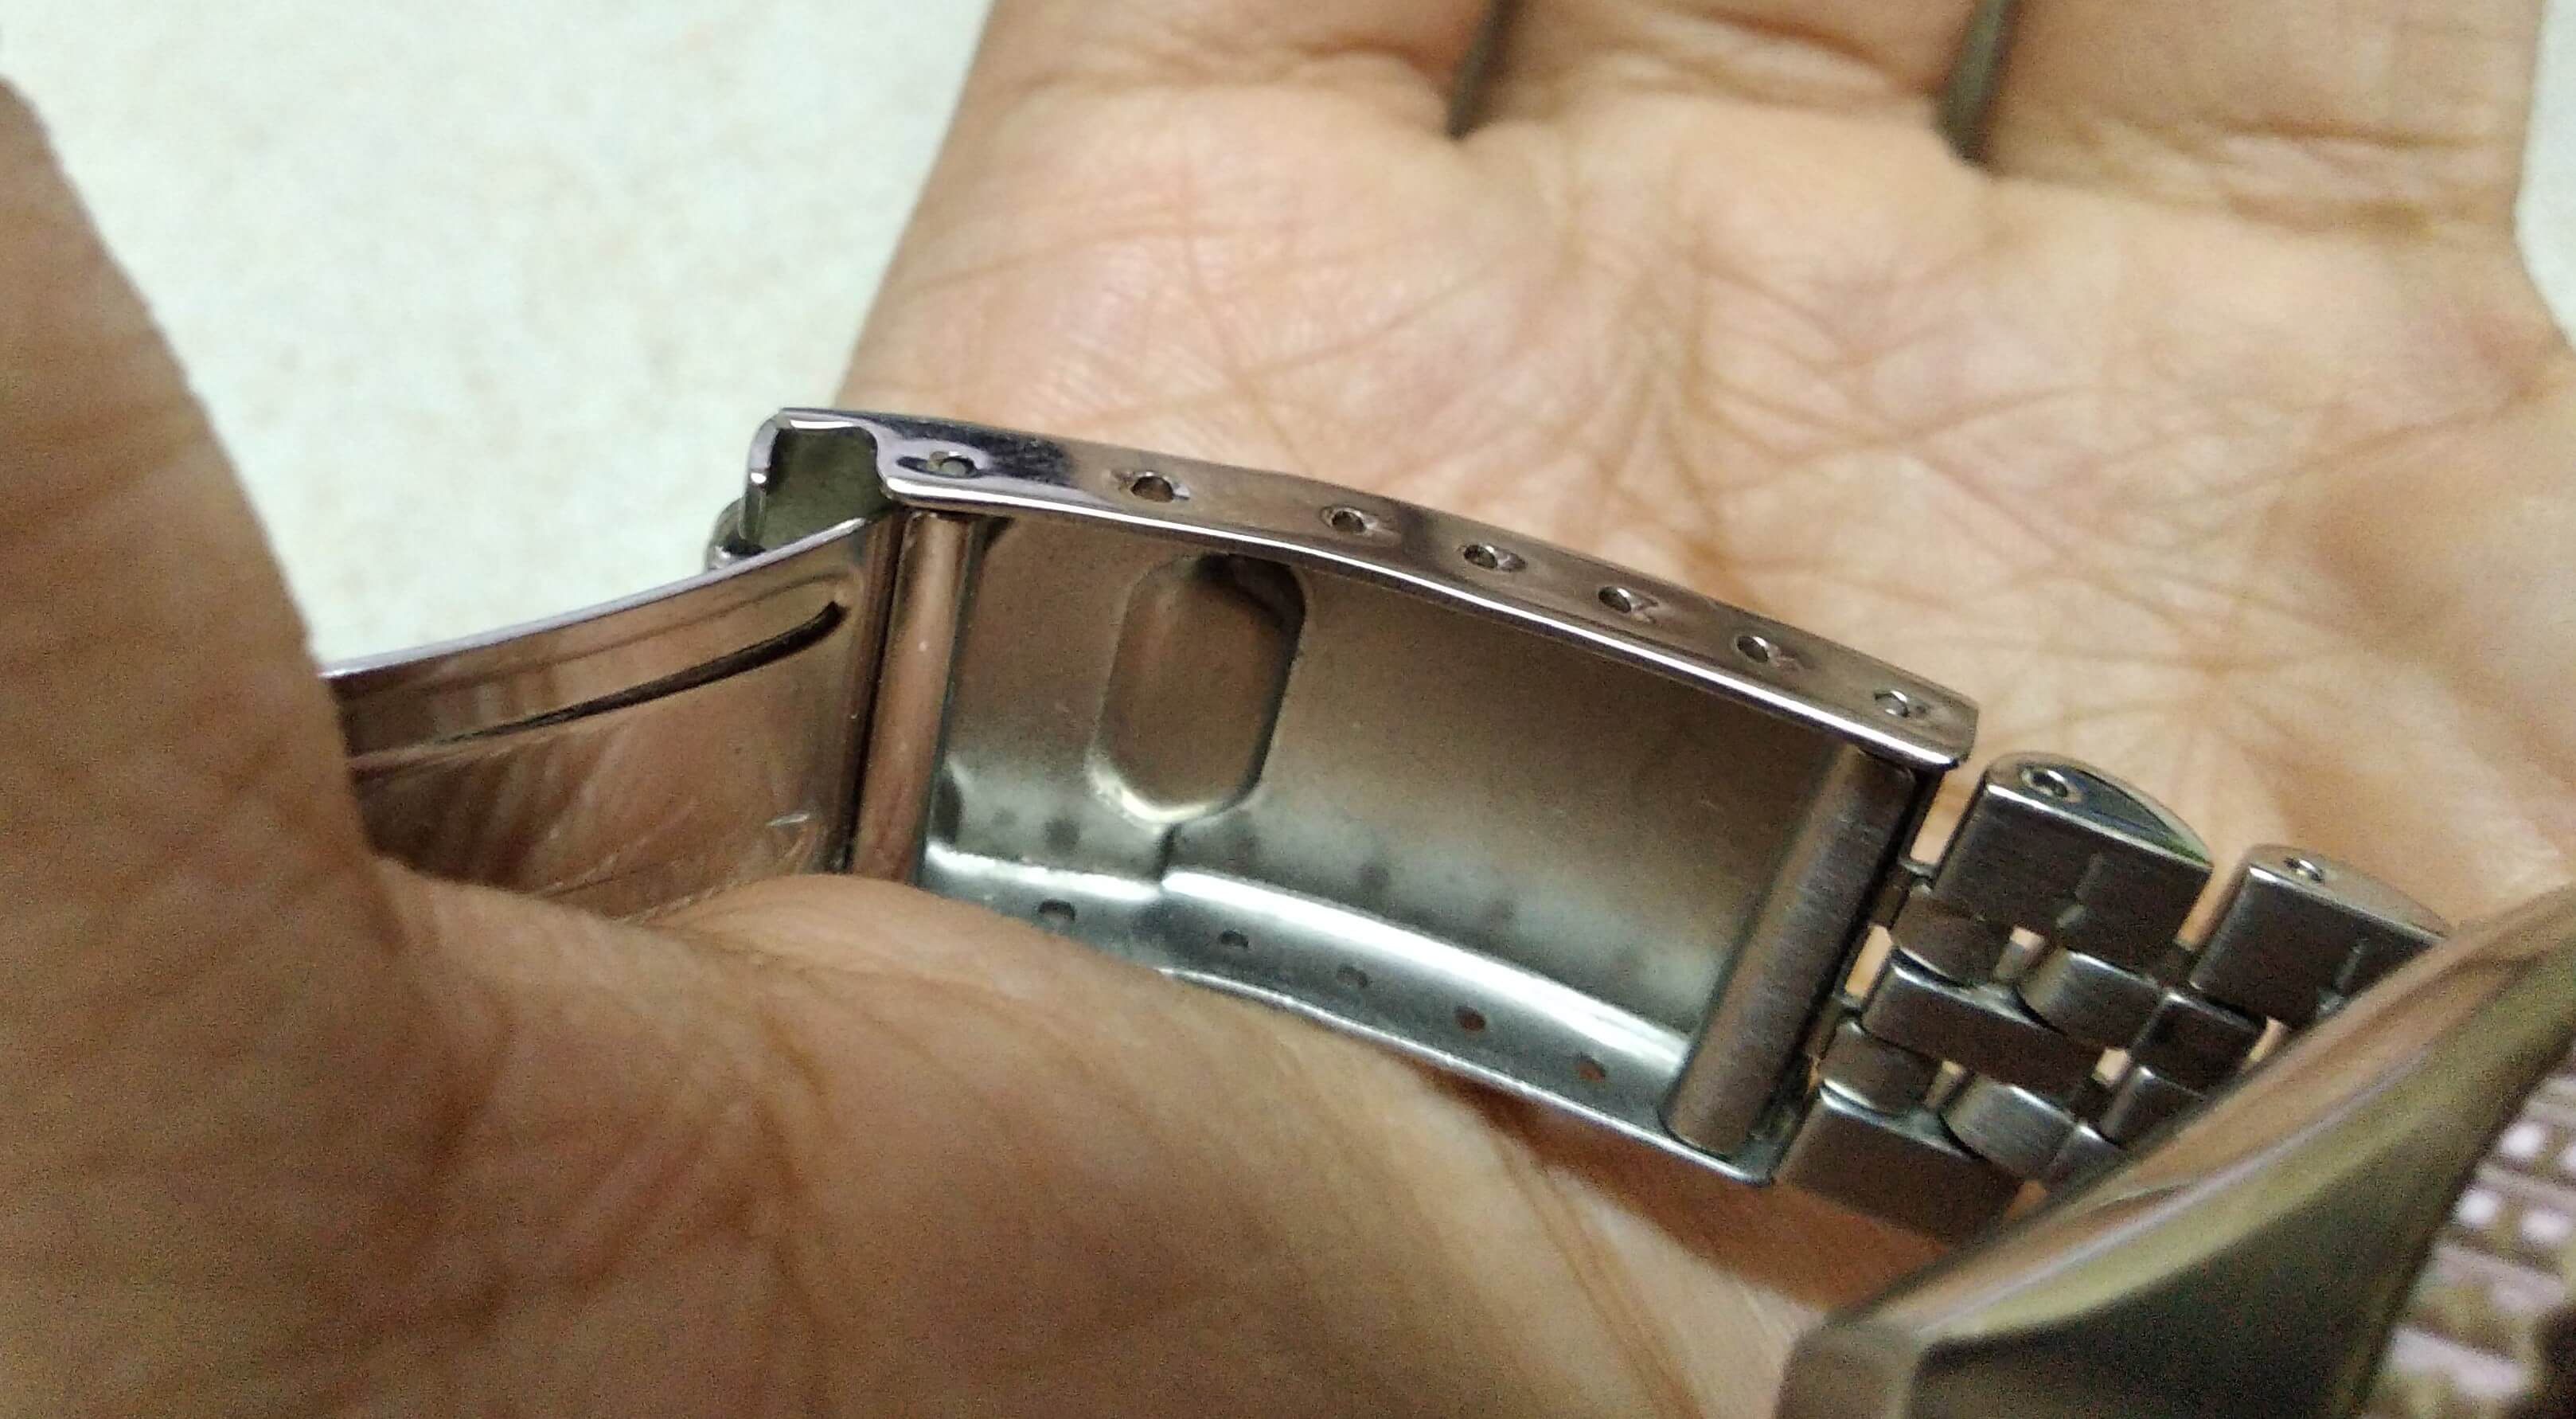
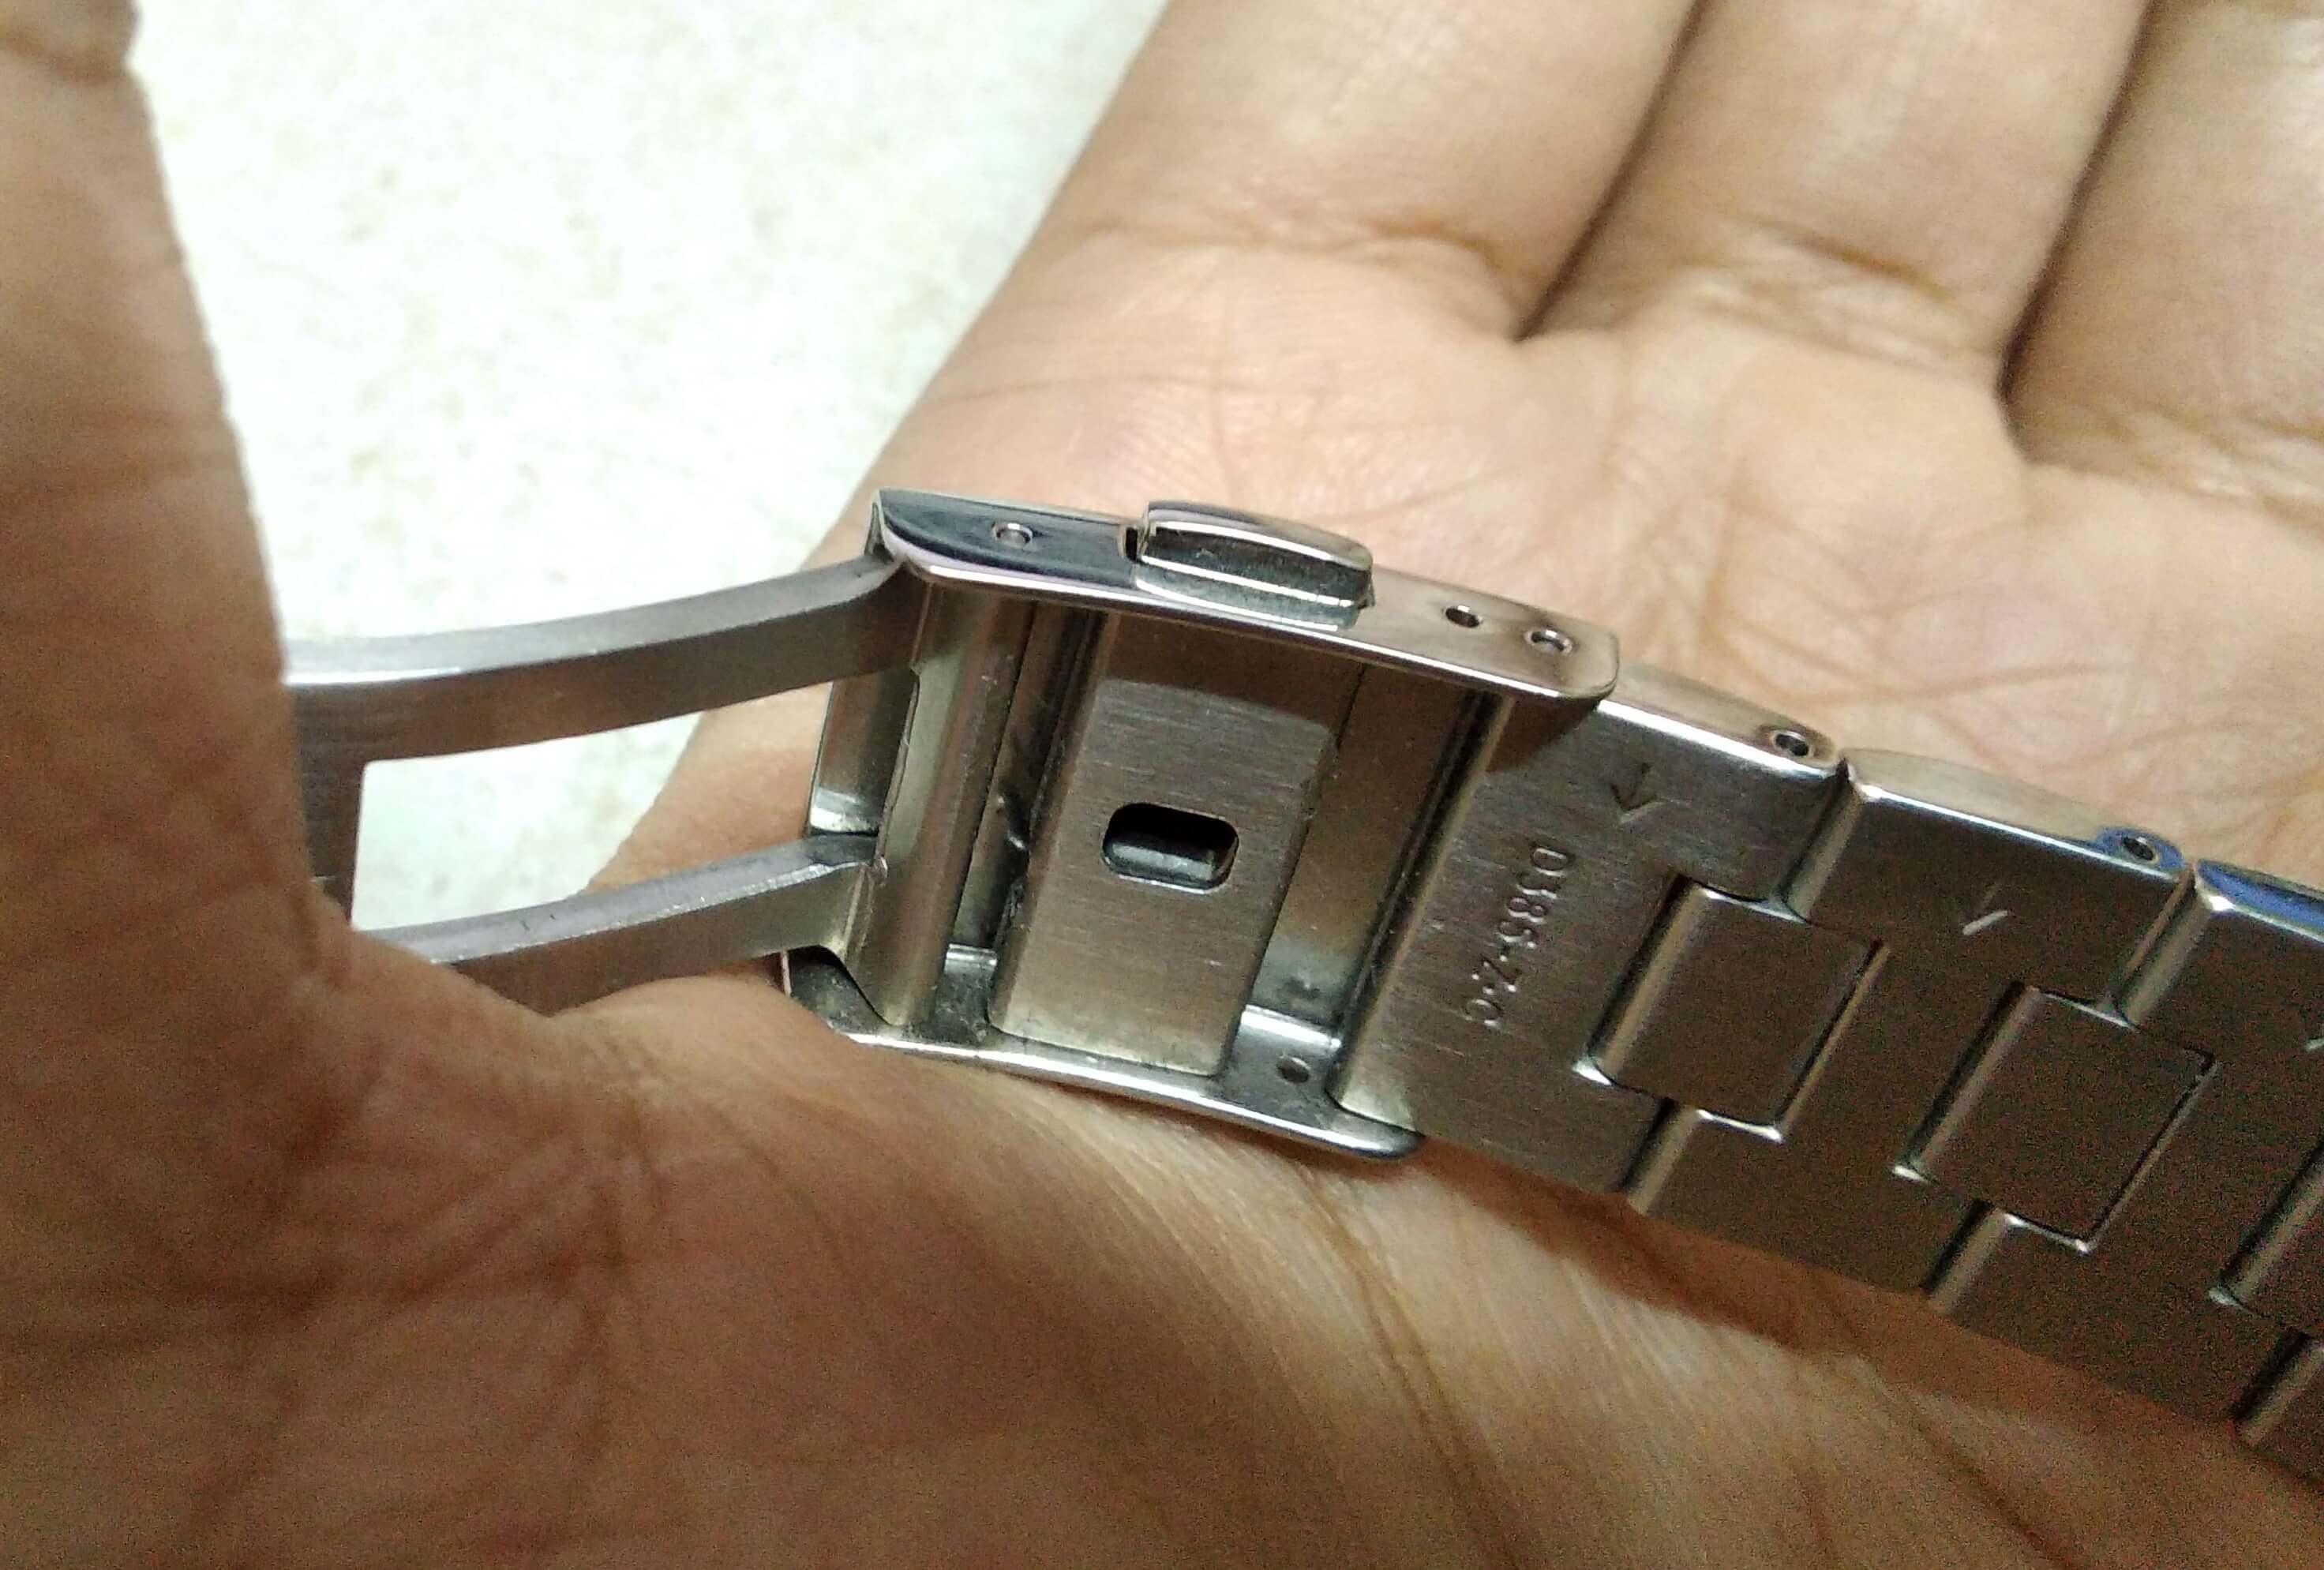
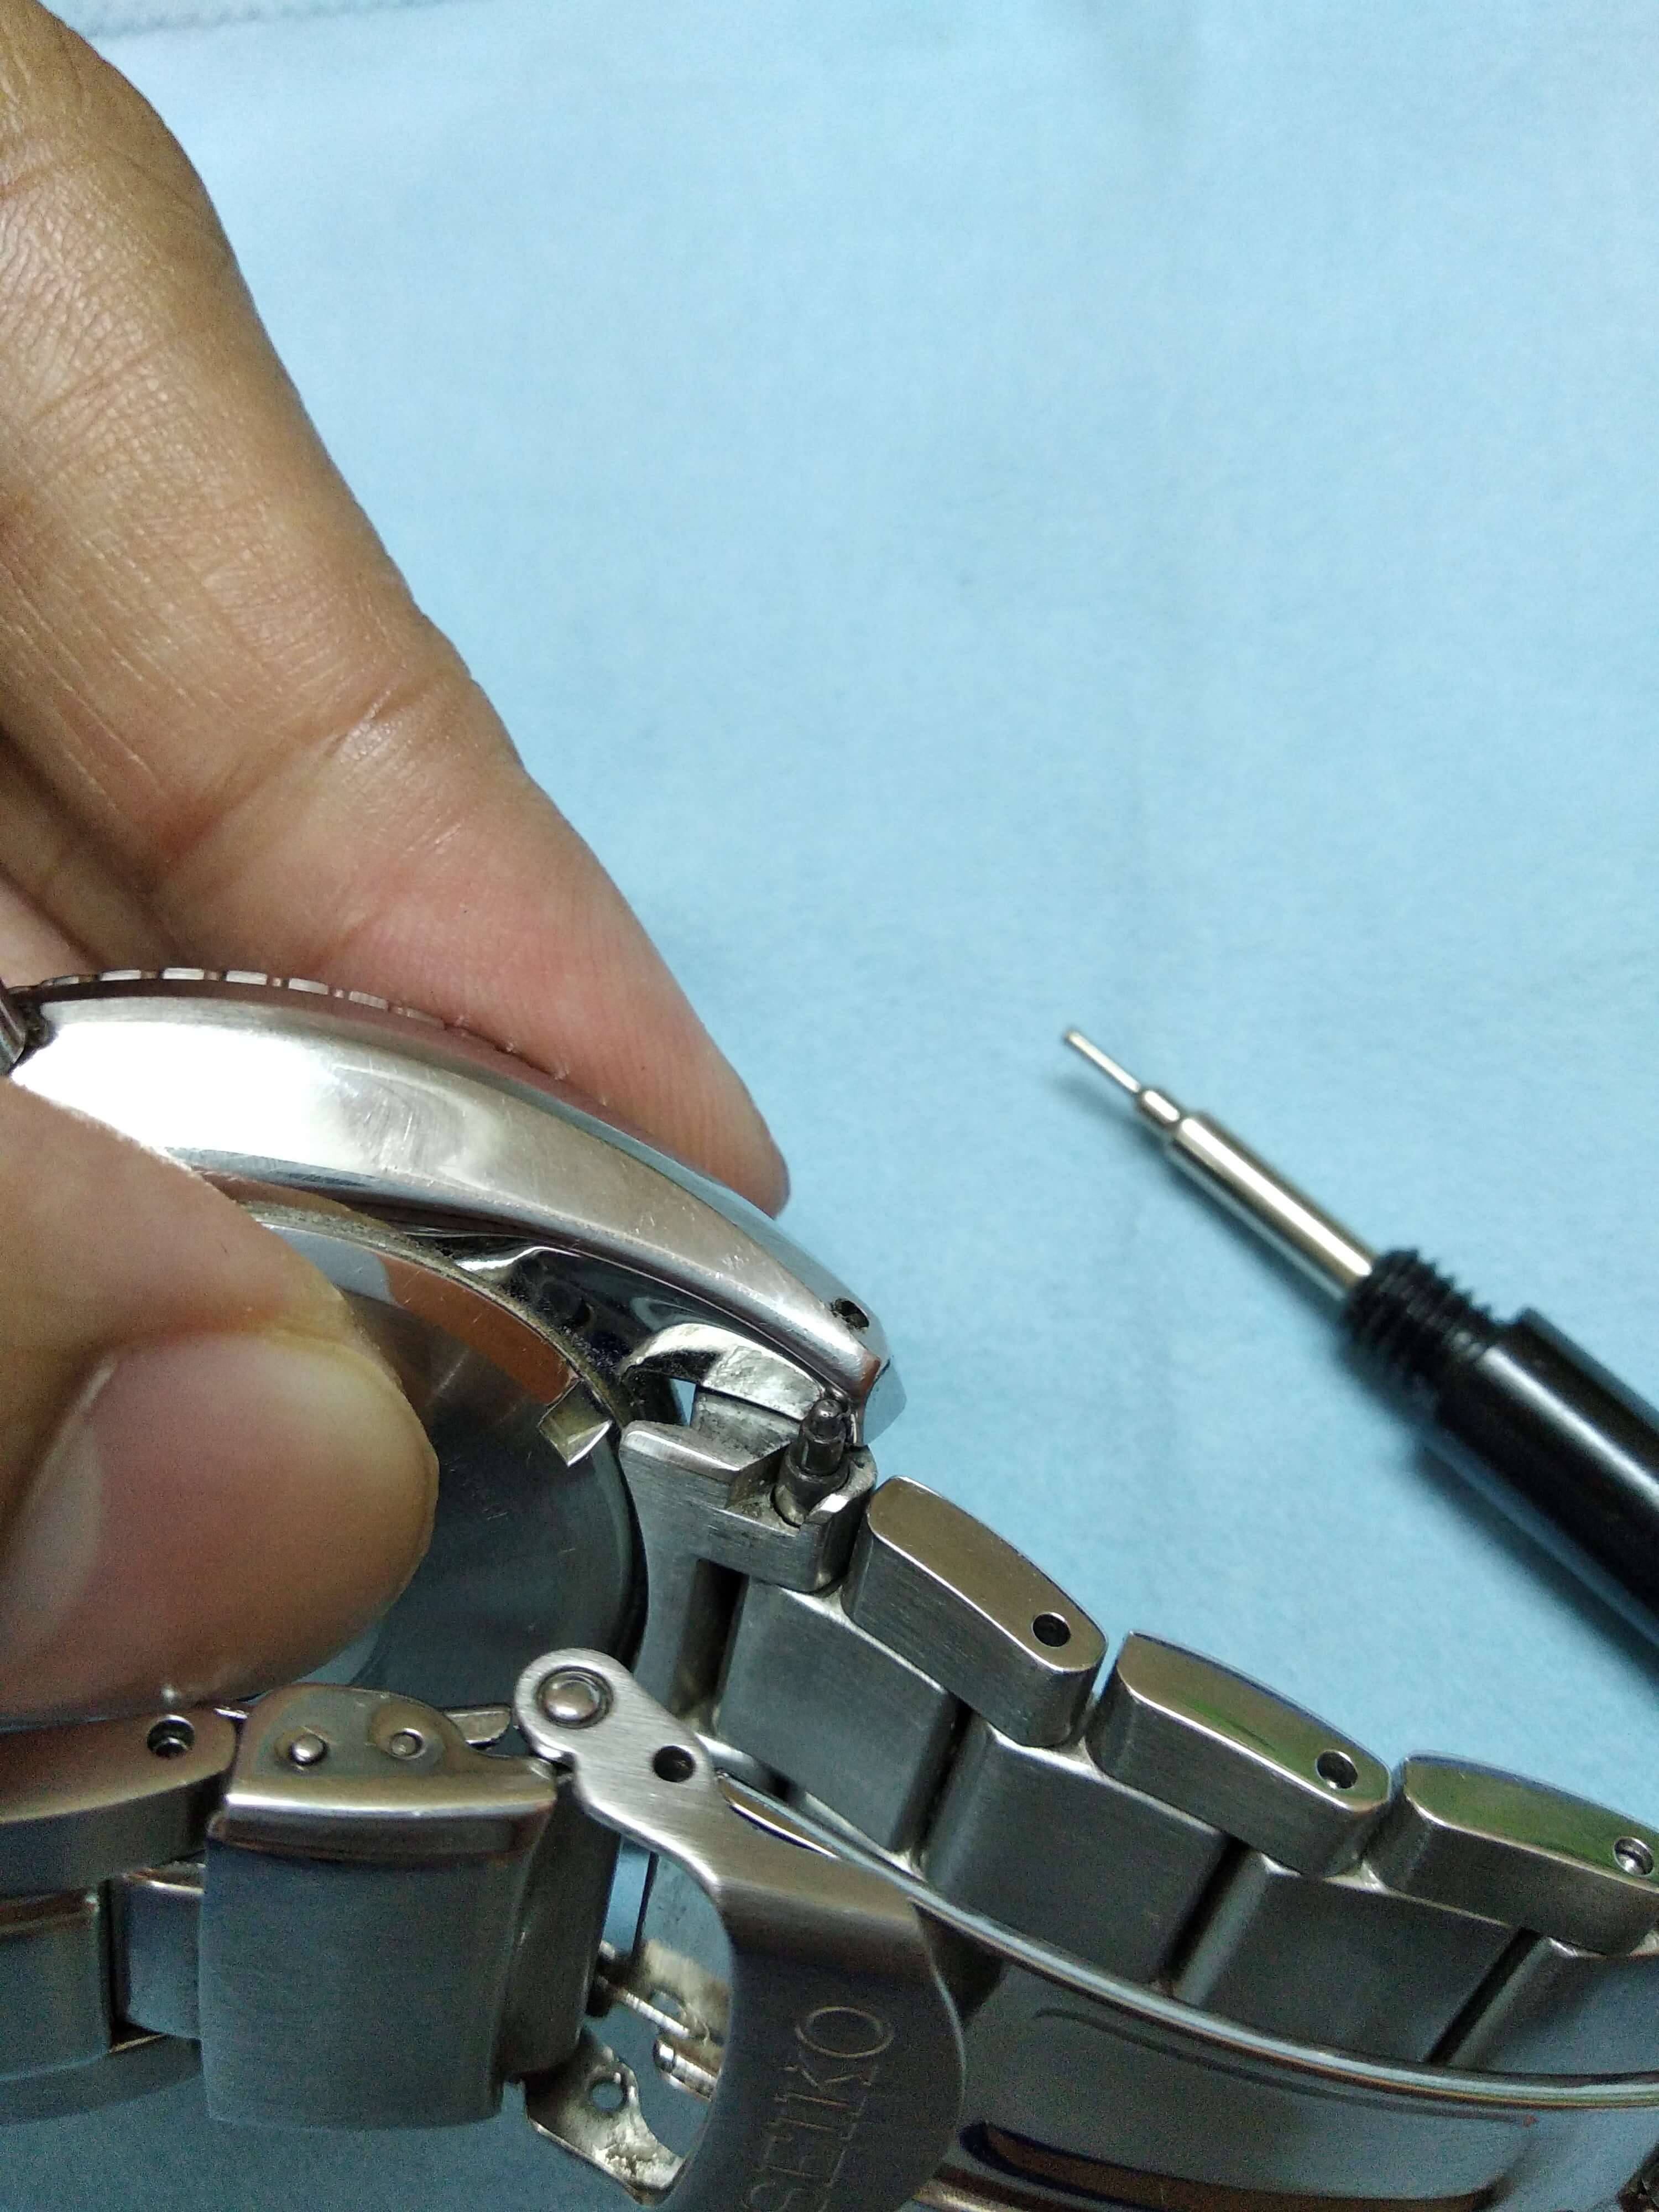
Adjusting Seiko SARB033 Oyster Bracelet
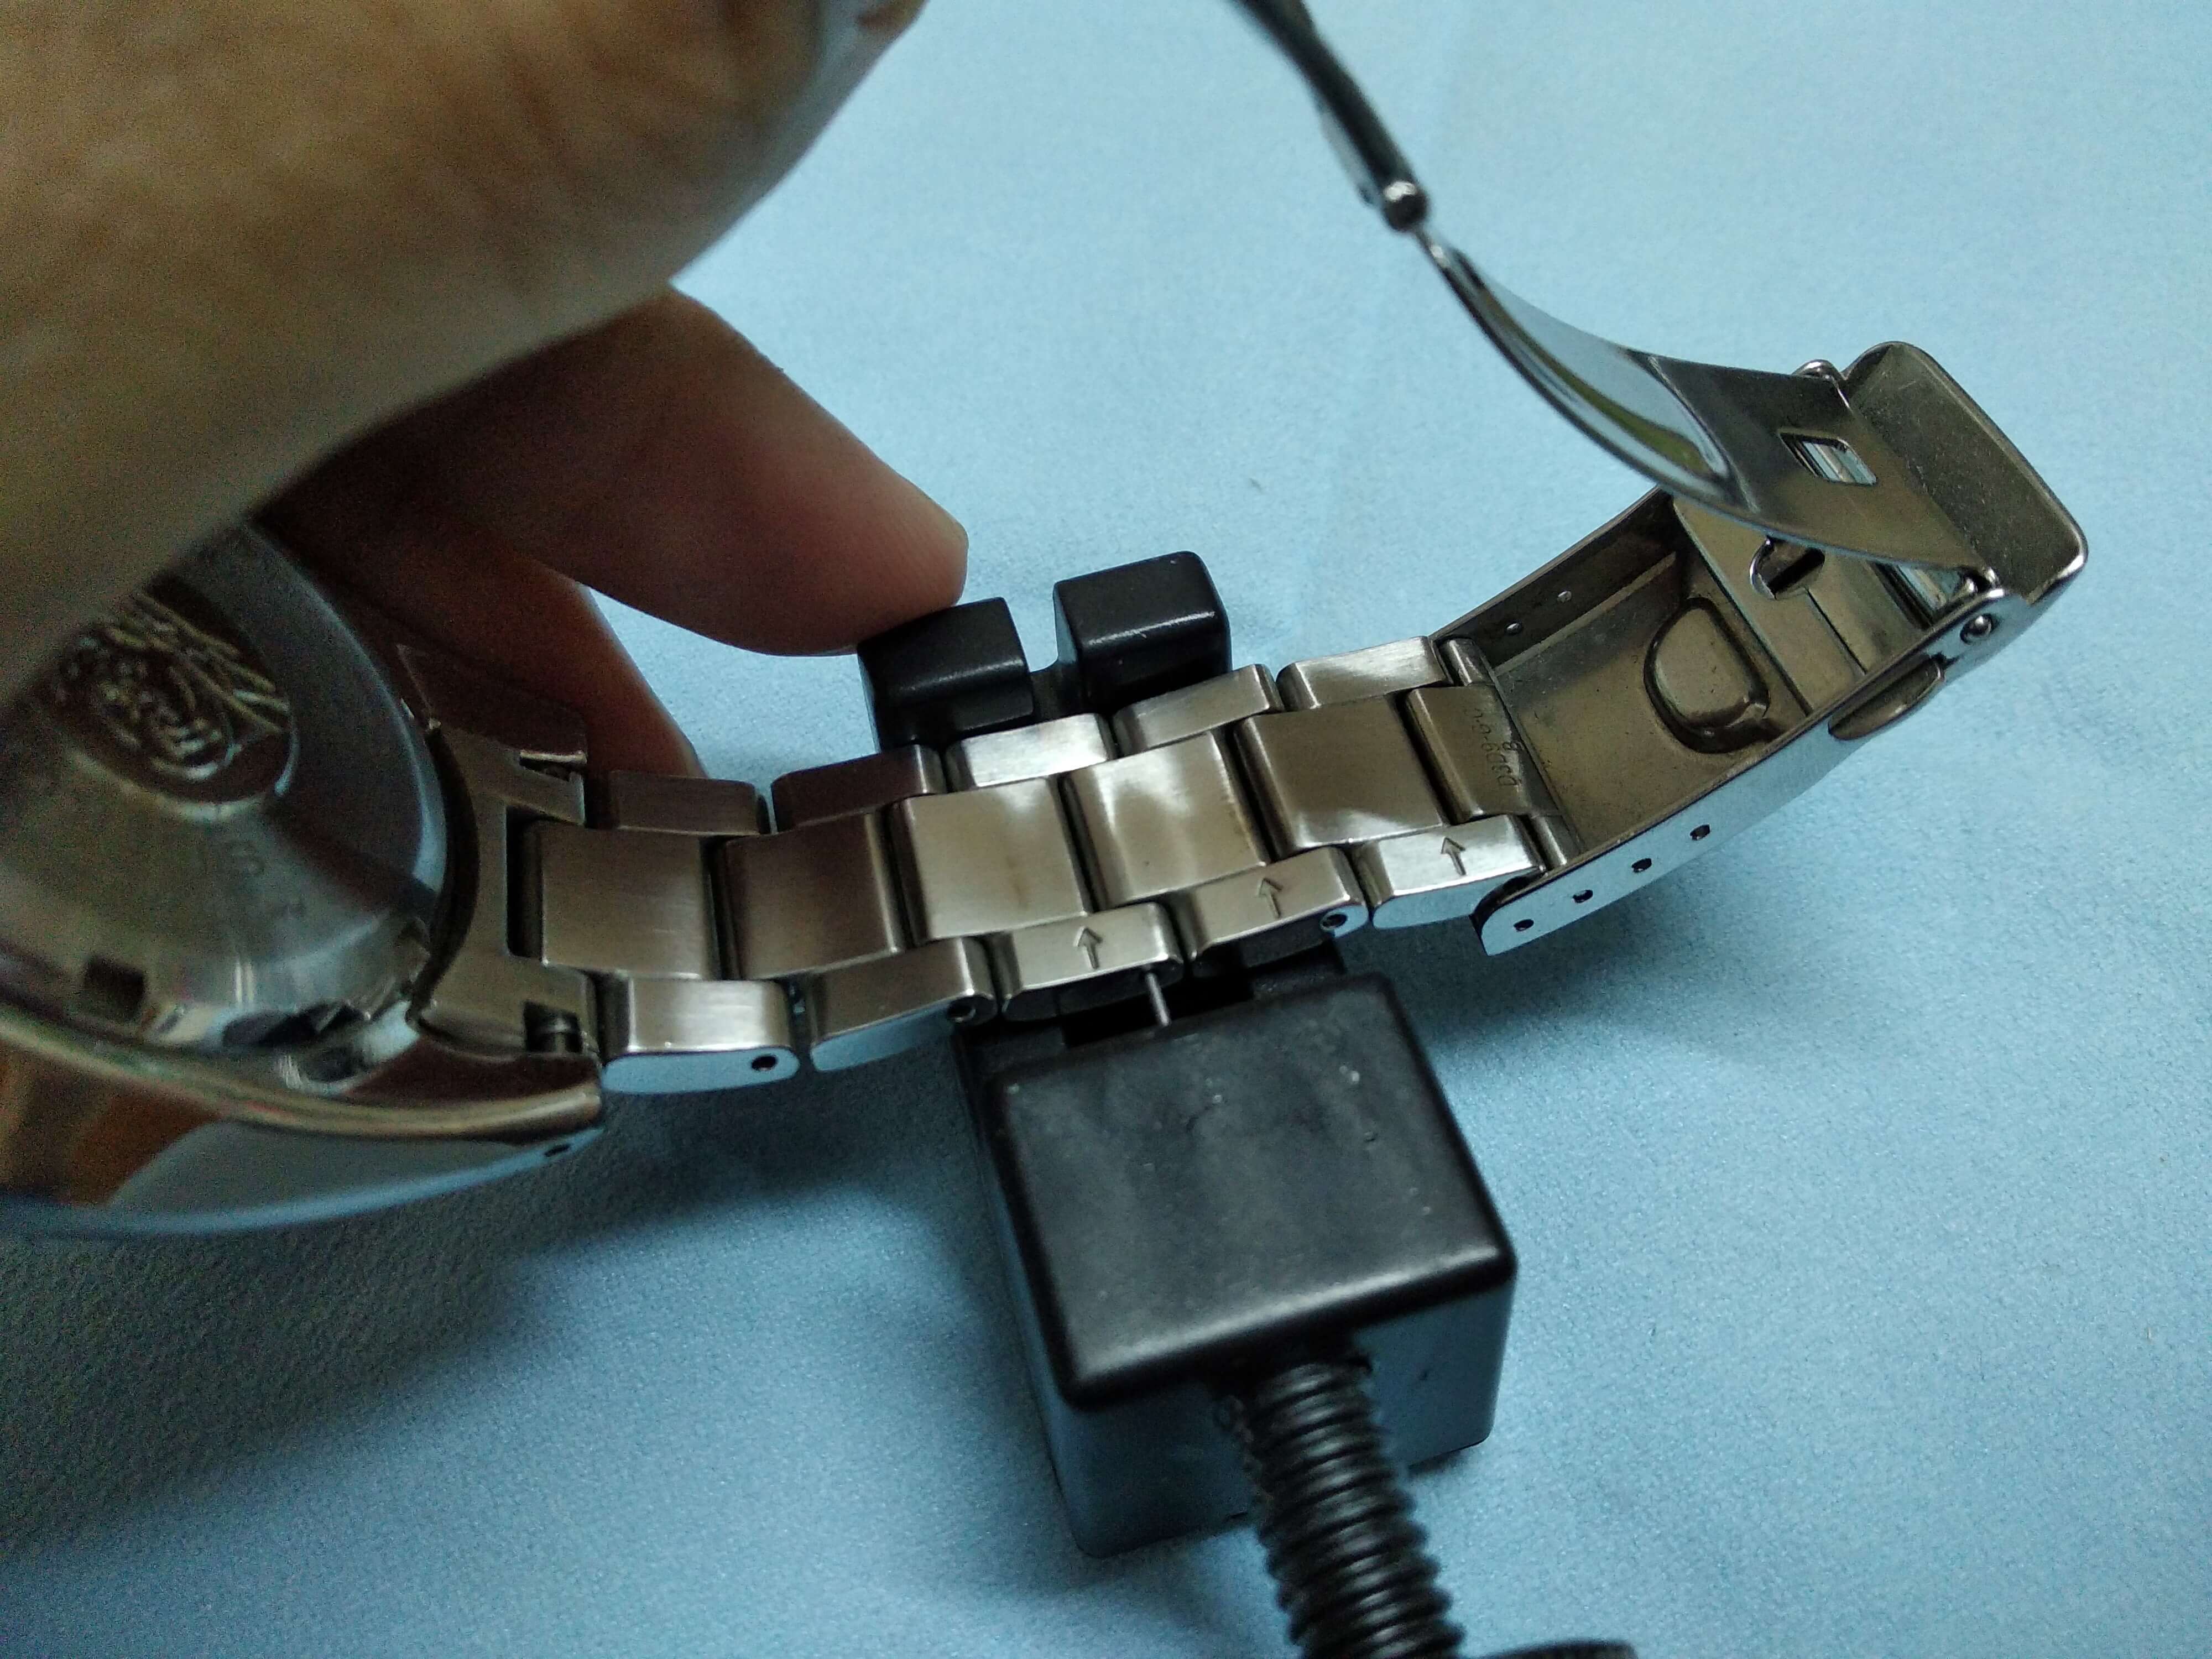
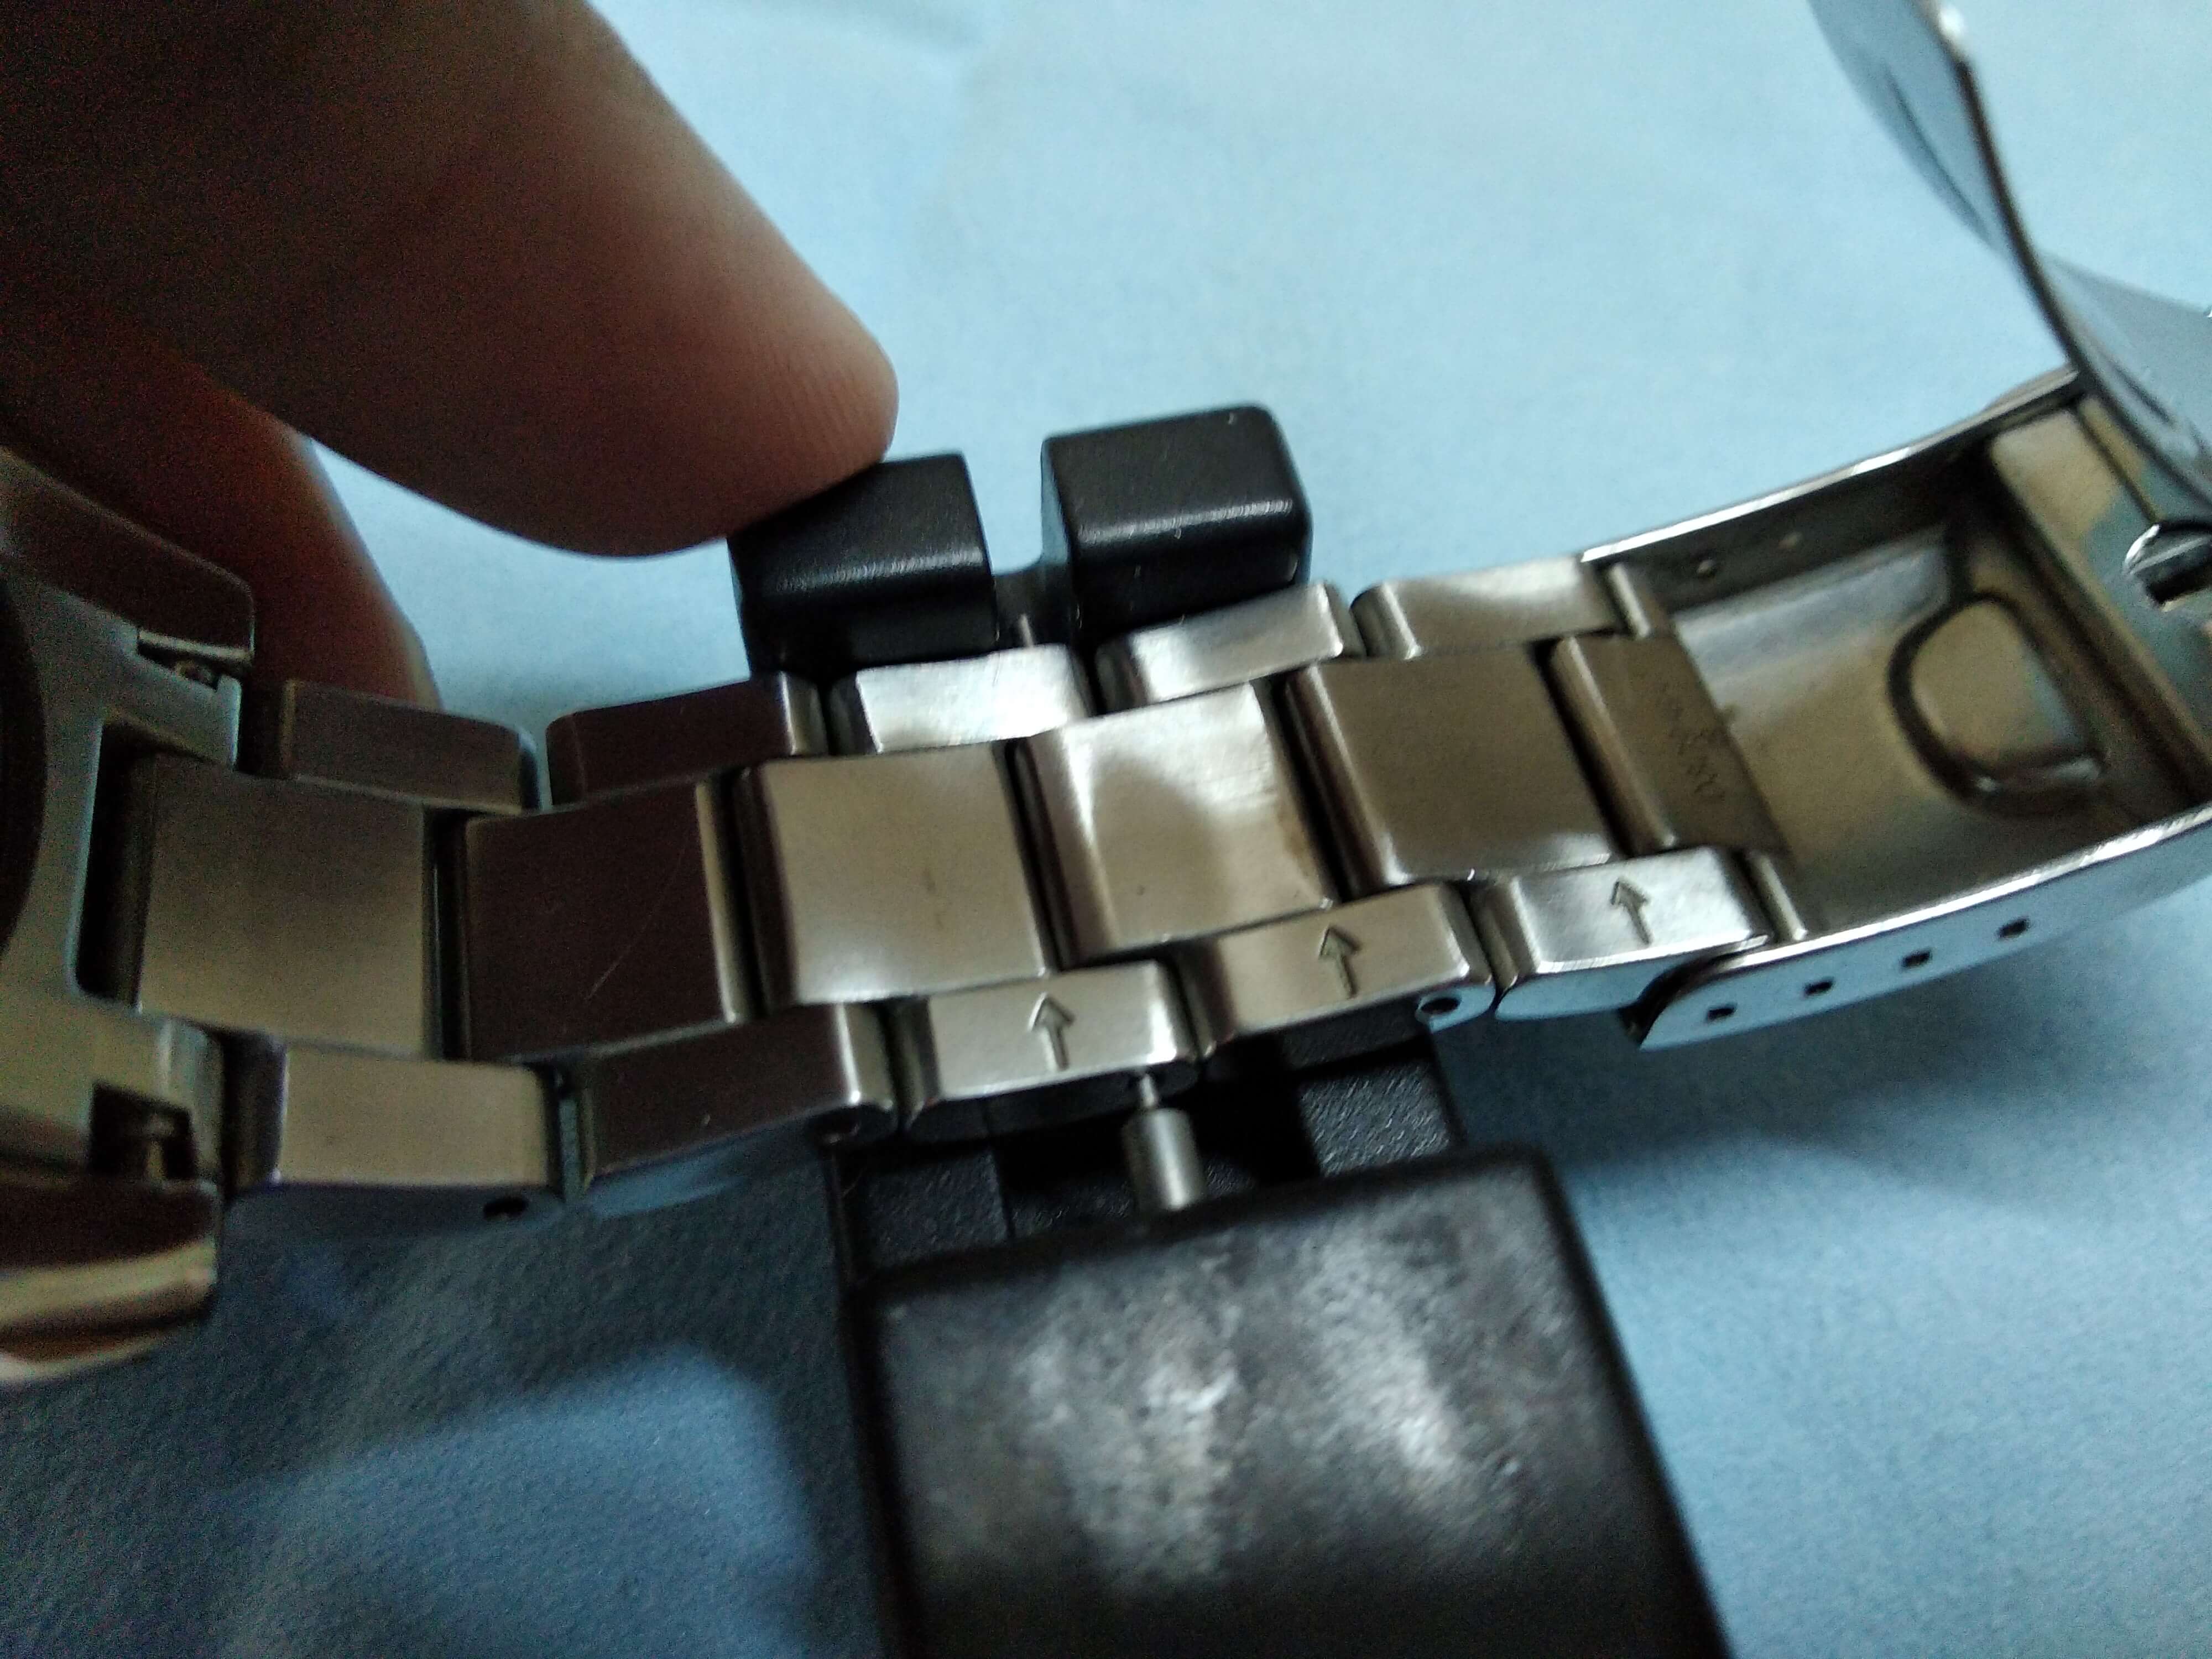
For the oyster bracelet on the SARB033, the process is exactly the same as above bracelets, with some additional work on the pin holder.
- Mount the watch on the pin remover tool. The needle need to be in the same side as the arrow.
- Push in the needle by rotating the tool’s knob.
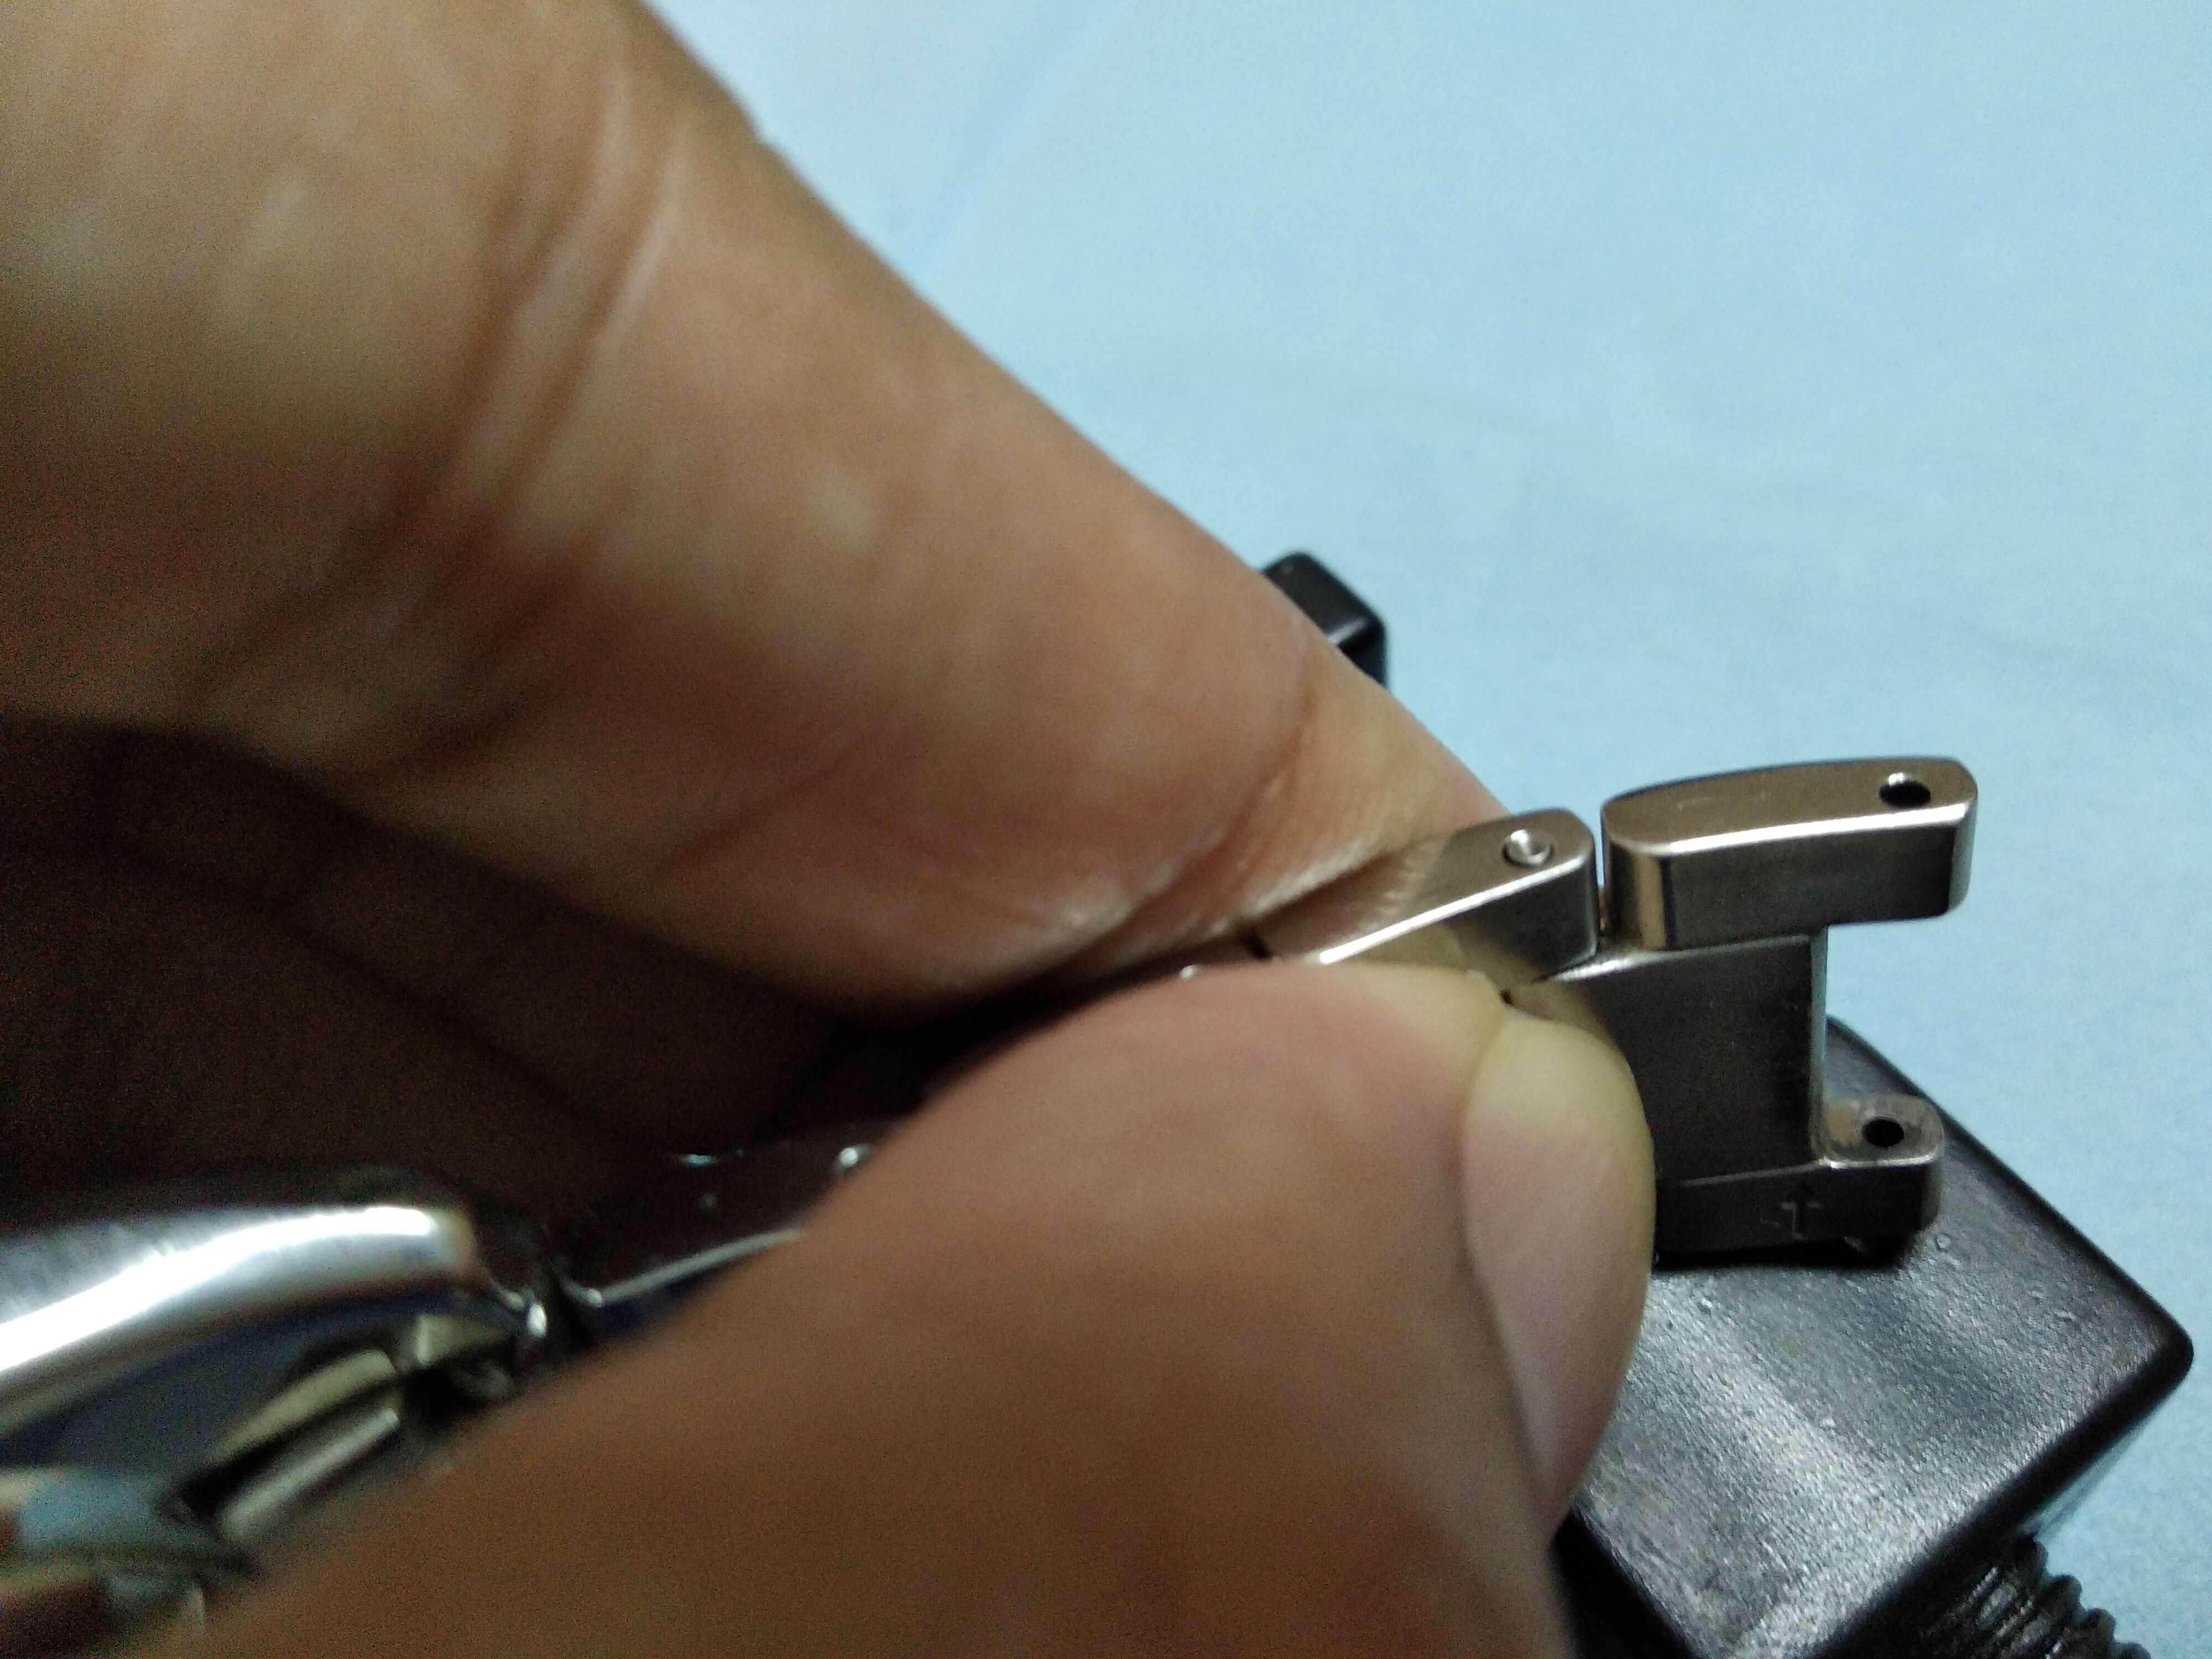
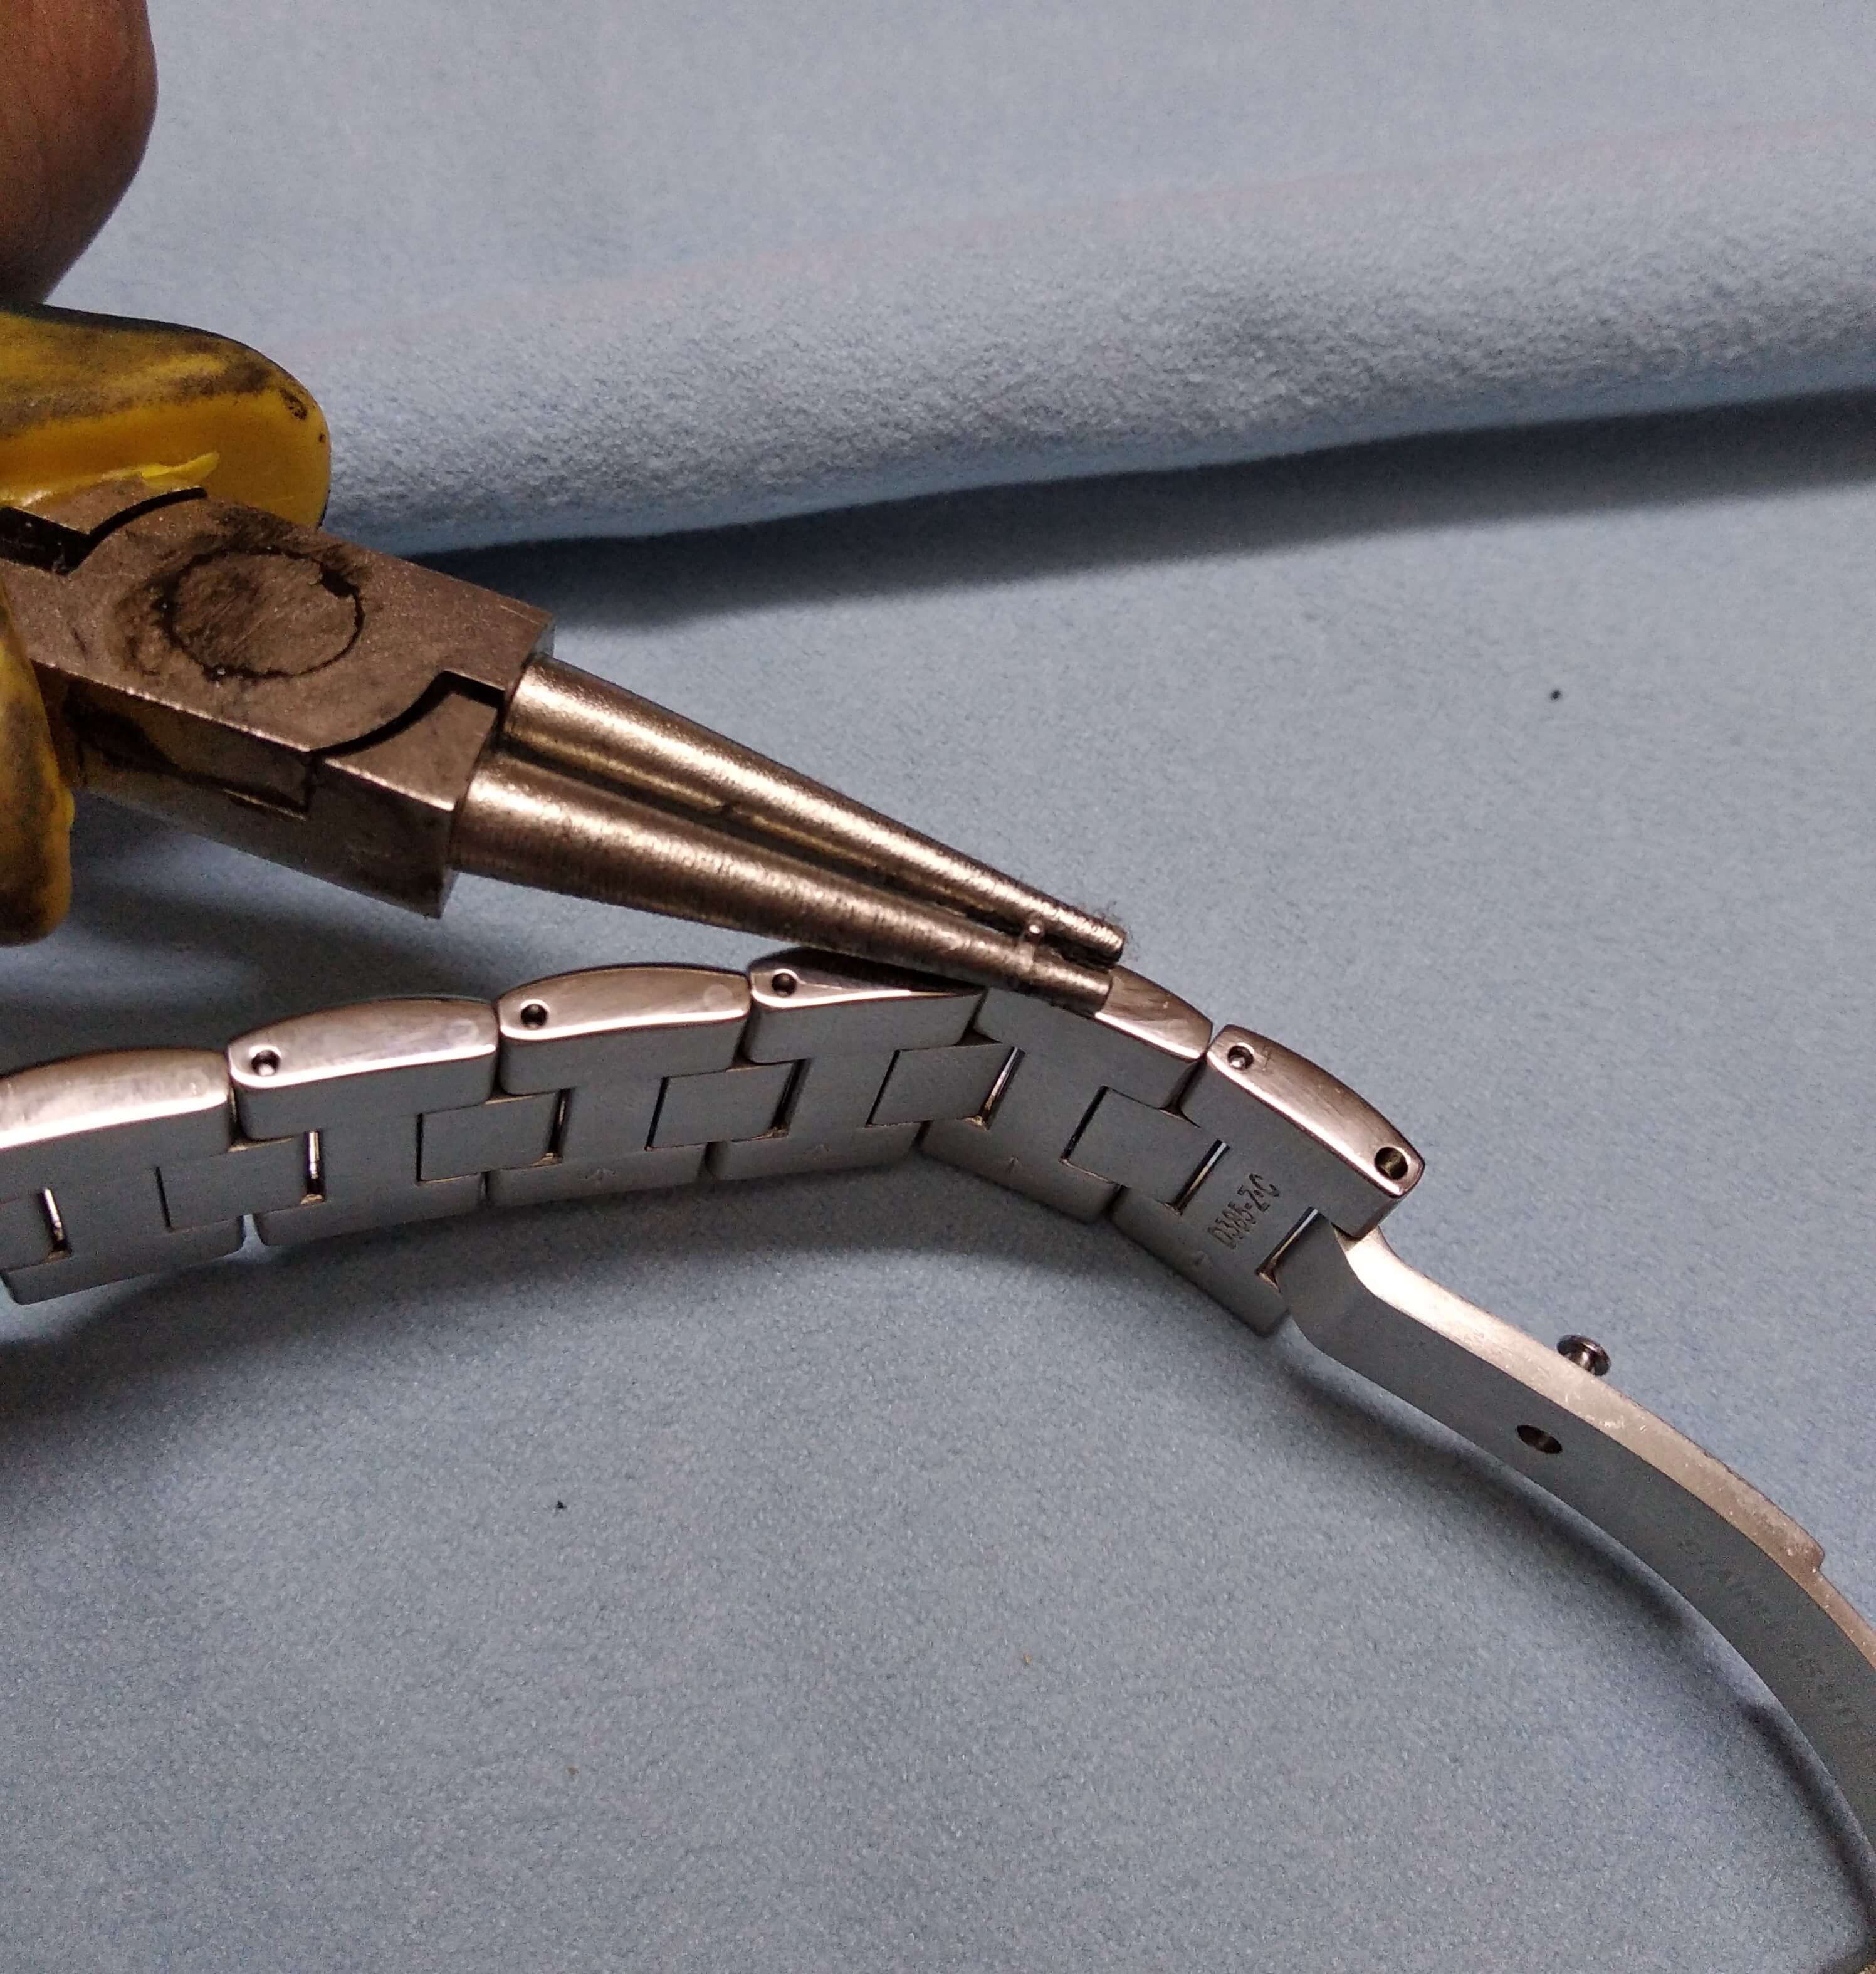
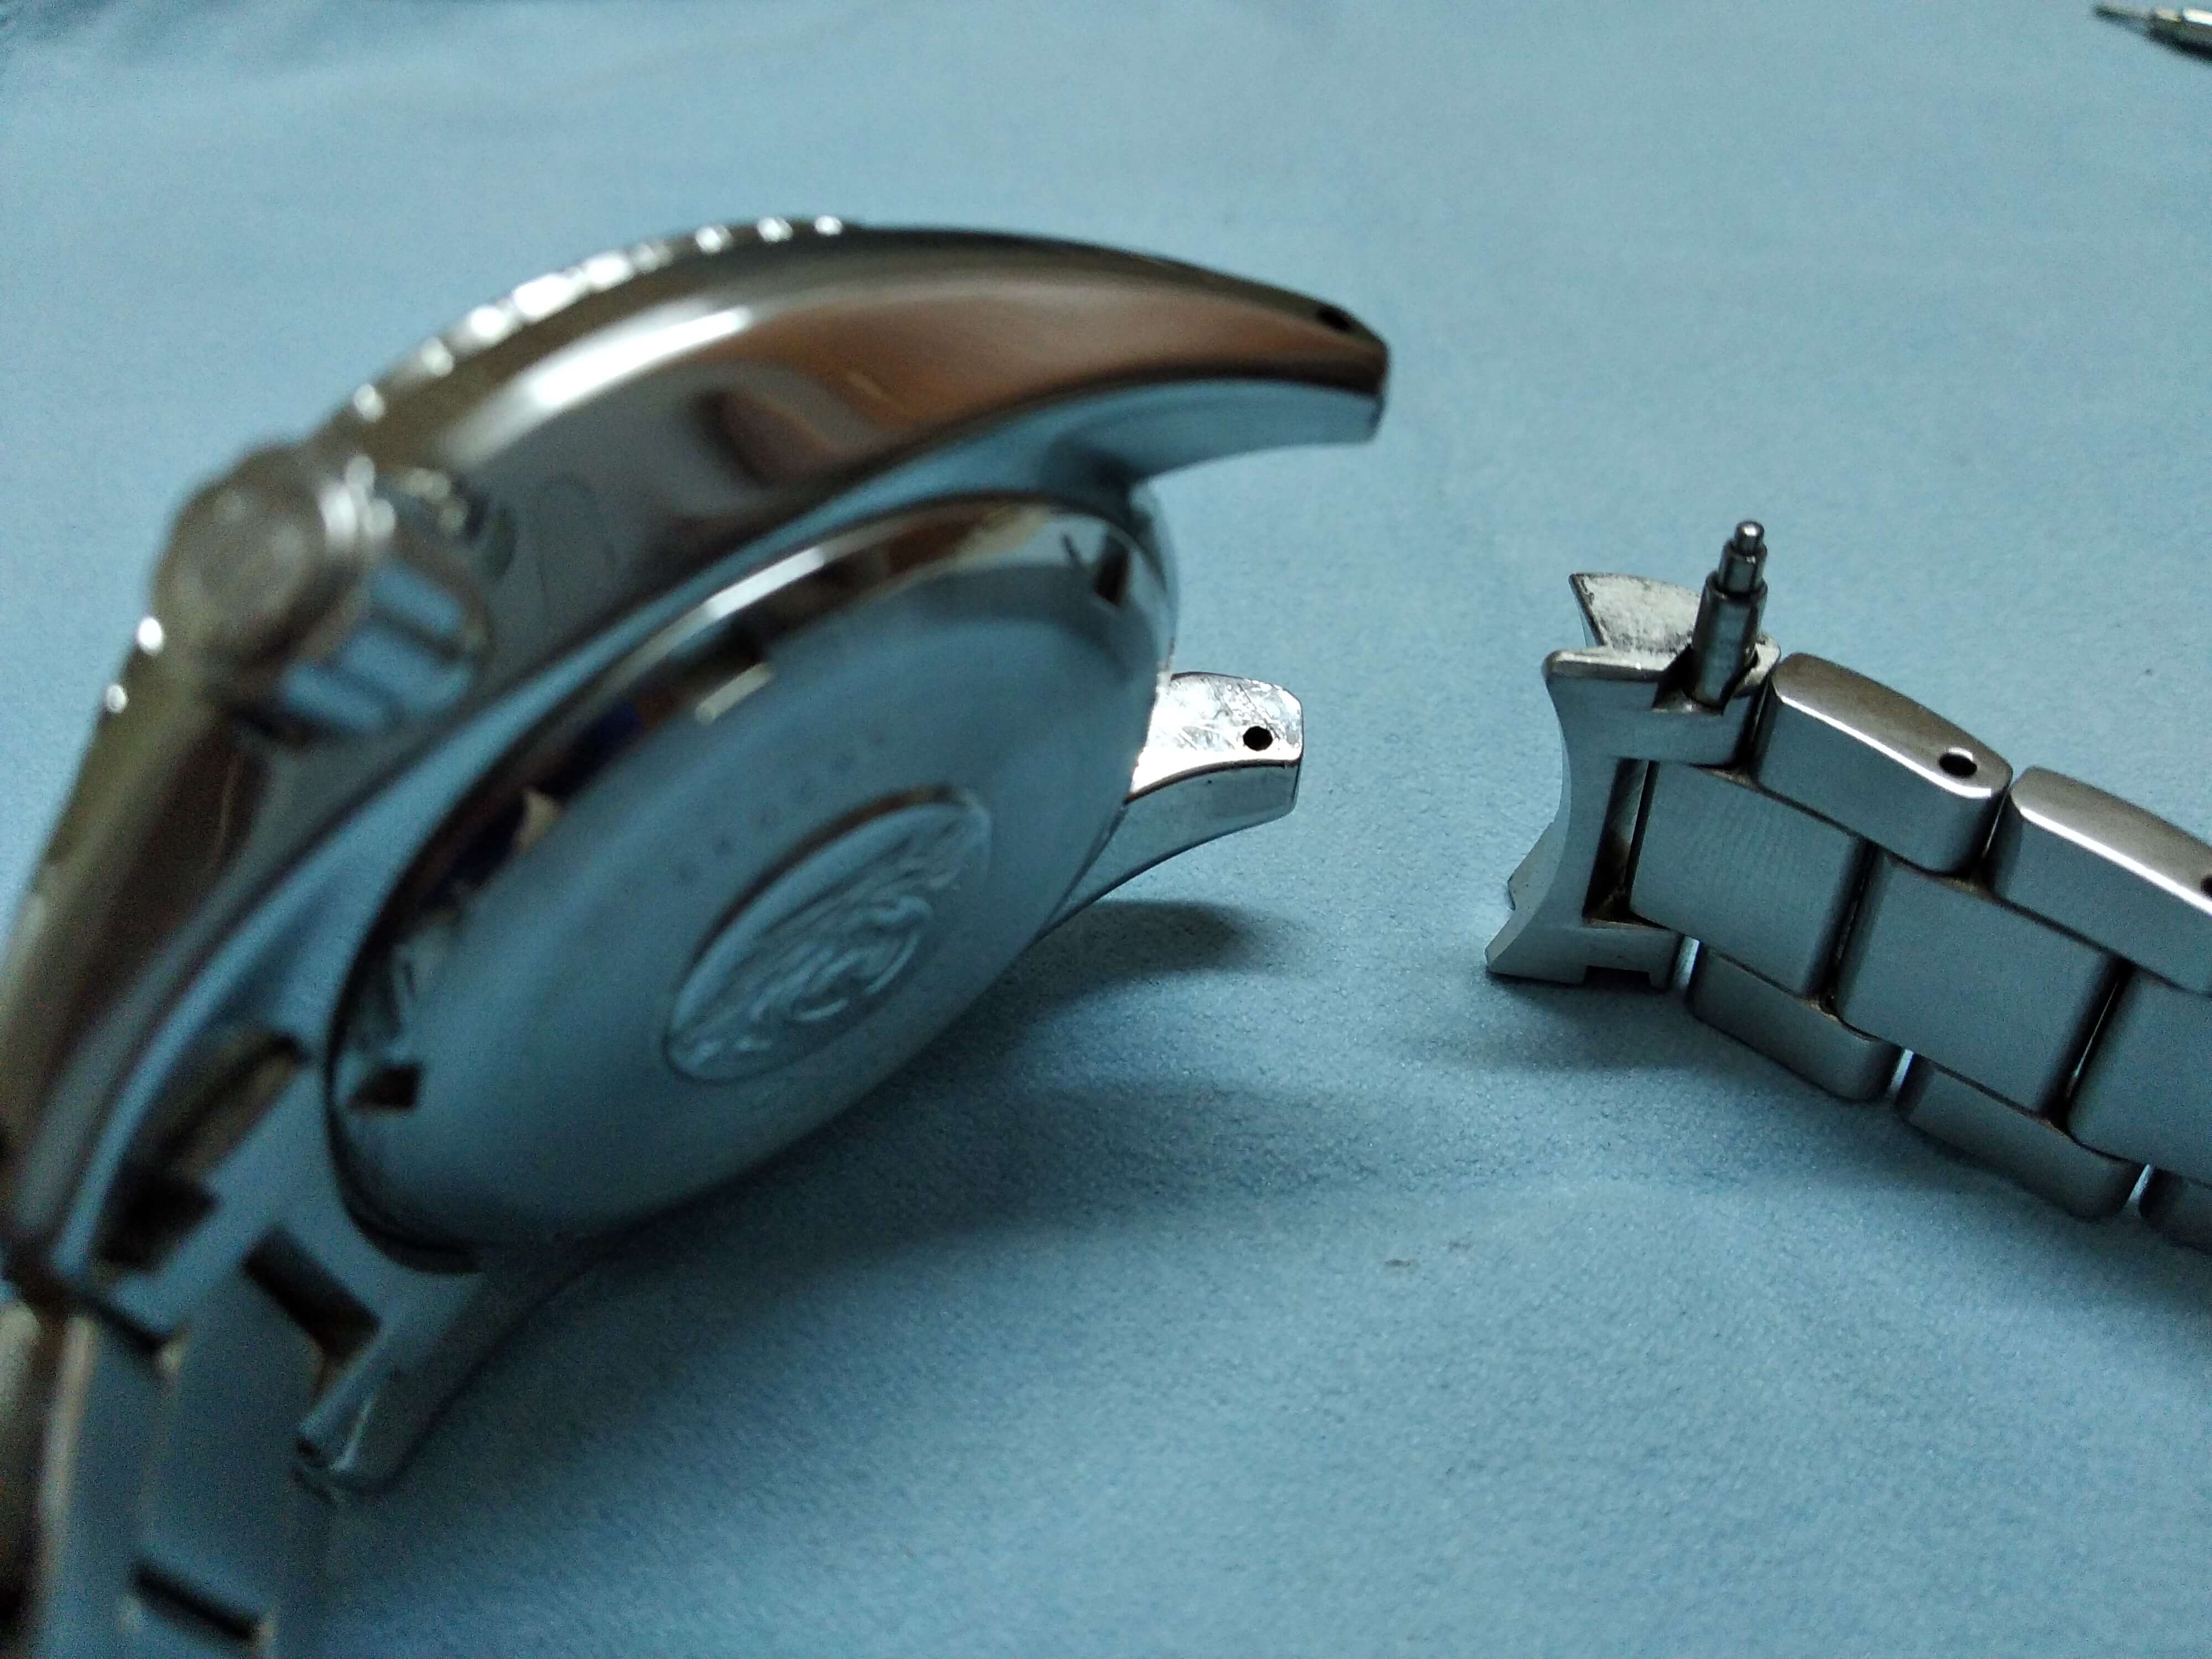
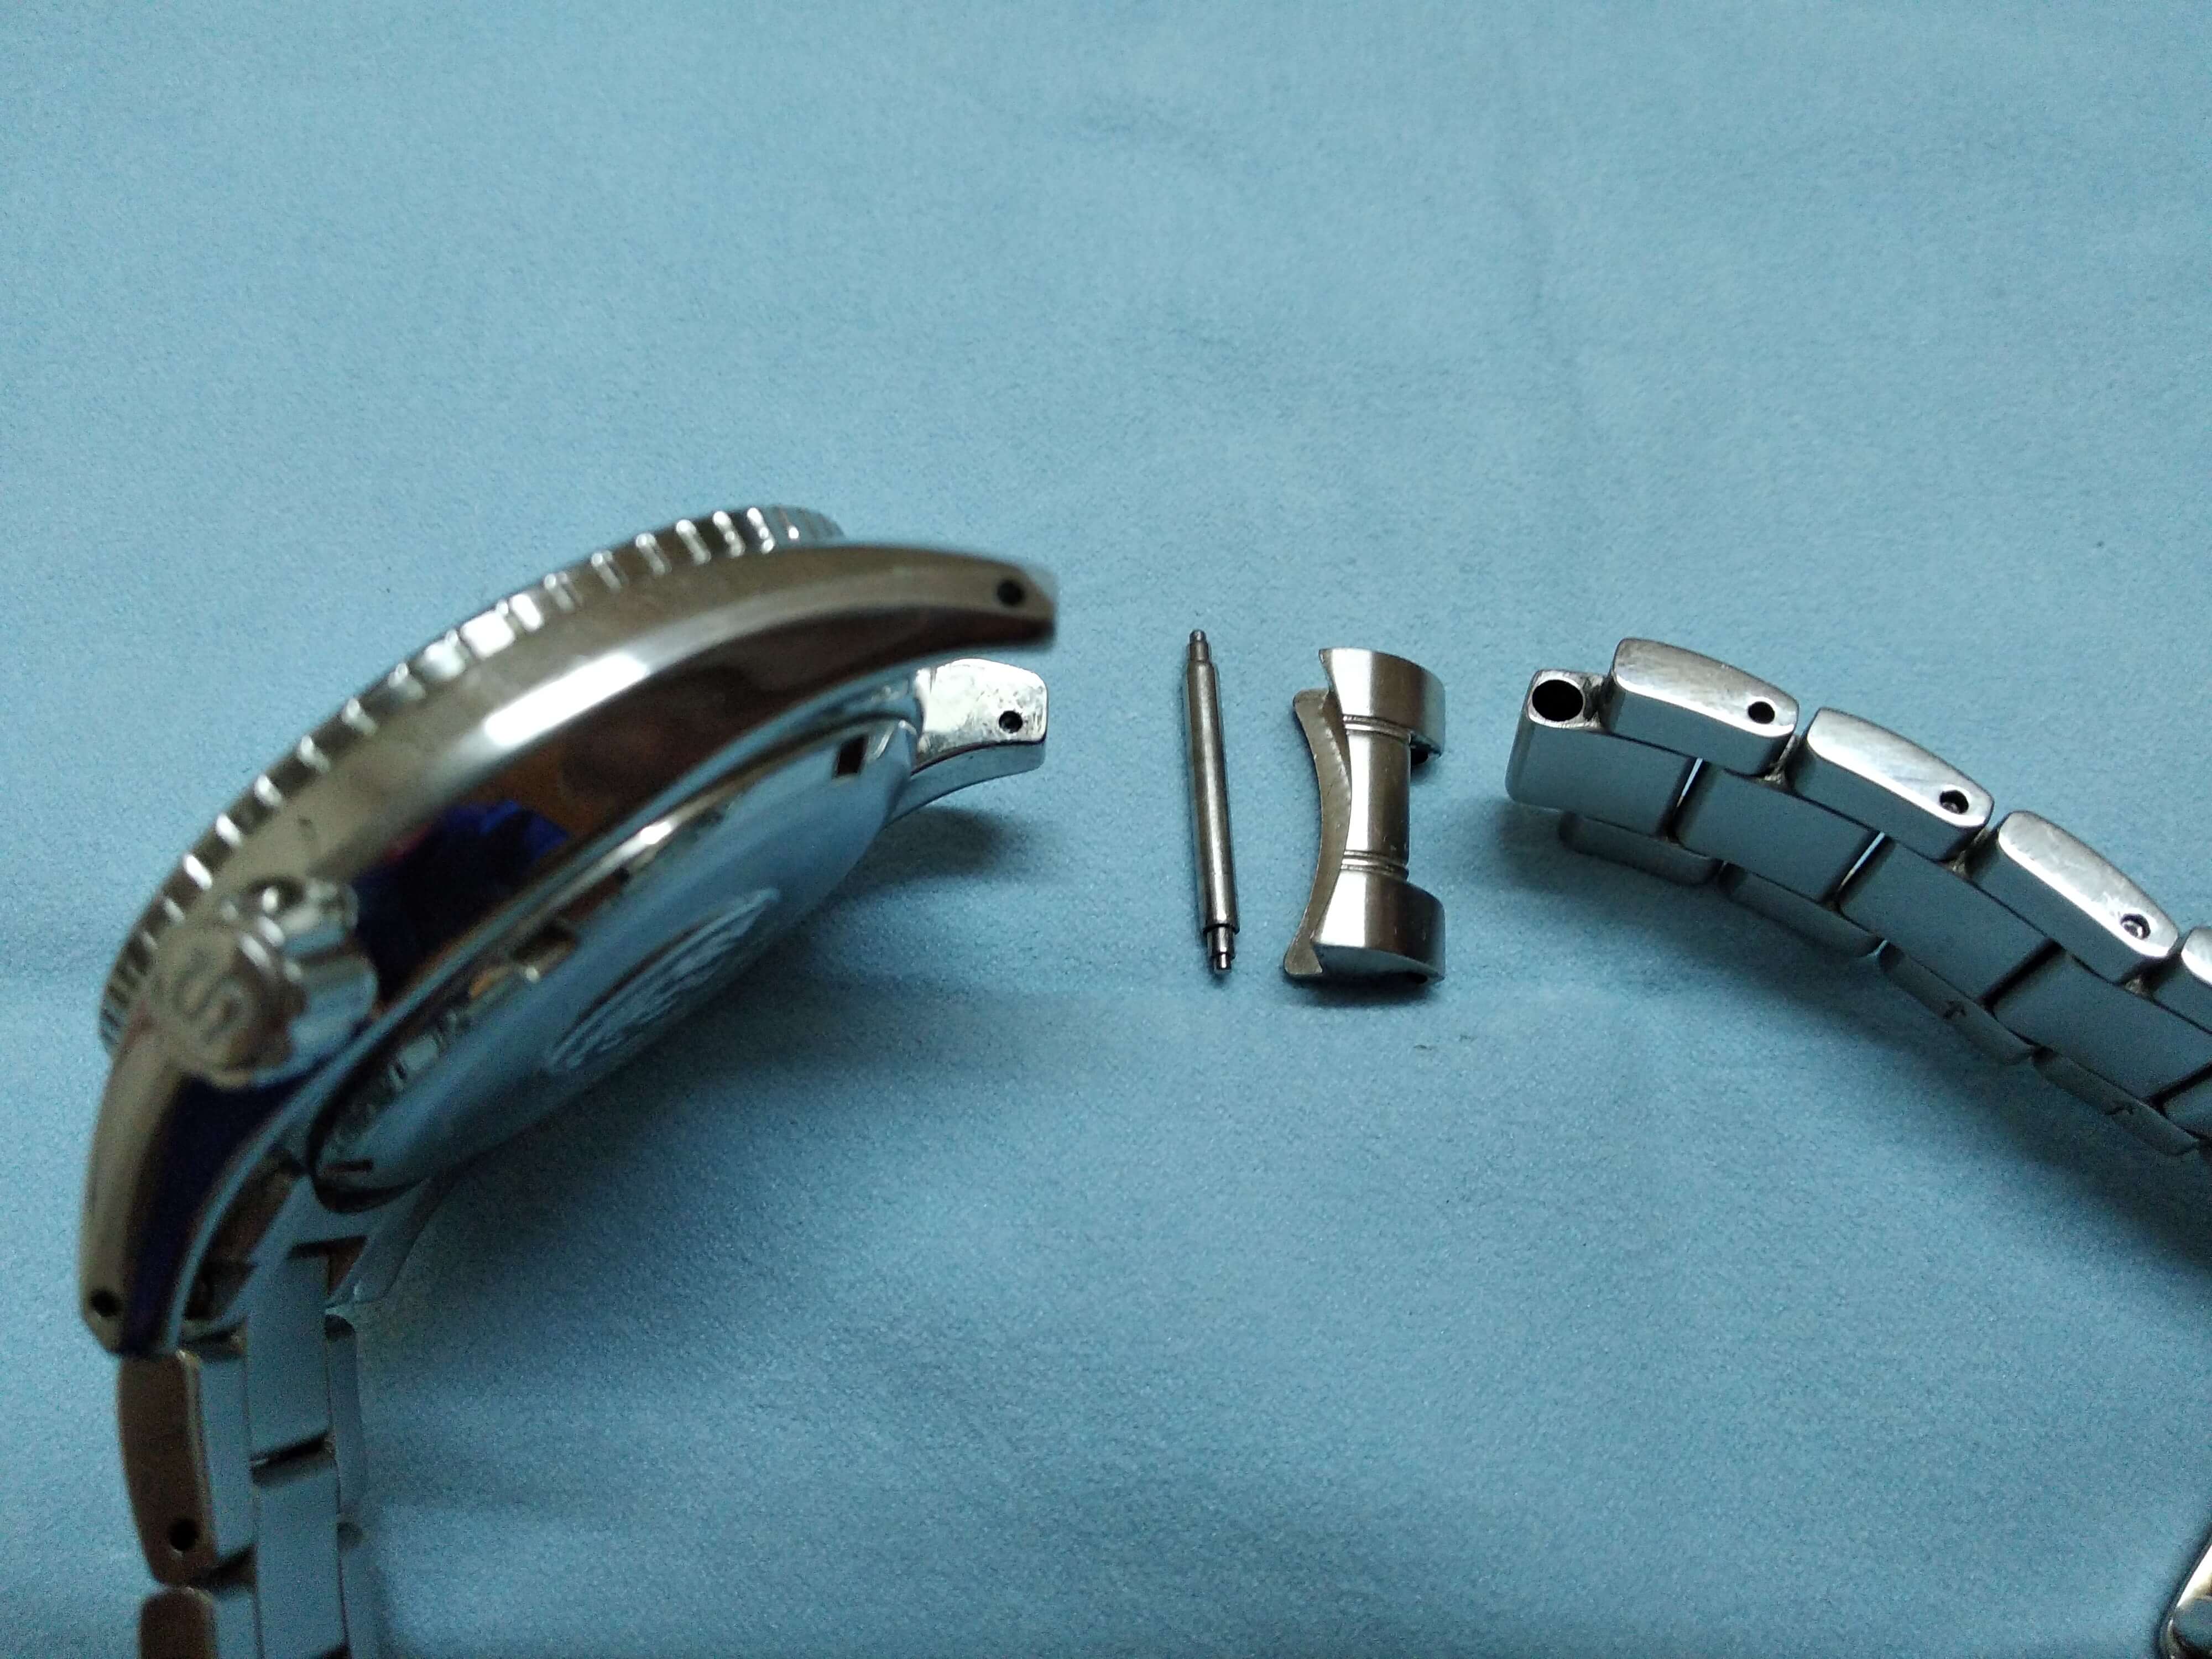
- You’ll see the pin is pushed out from the bracelet. Unlike the other bracelets, this pin is quite hard to pull out using our hand. So what I did was use a needle pliers to pull it out.
- The pin assembly consists of a pin rod and a pin holder. Take note of where which one goes in.
- Once you’ve removed the necessary bracelet portion, do the same thing in backwards to put everything in place again.
| Adjusting Seiko SARB033 Oyster Bracelet | |
|---|---|
1. Use the pin remover tool to remove the pin from the bracelet |
2. Using a pair of pliers, pull out the pin from the bracelet |
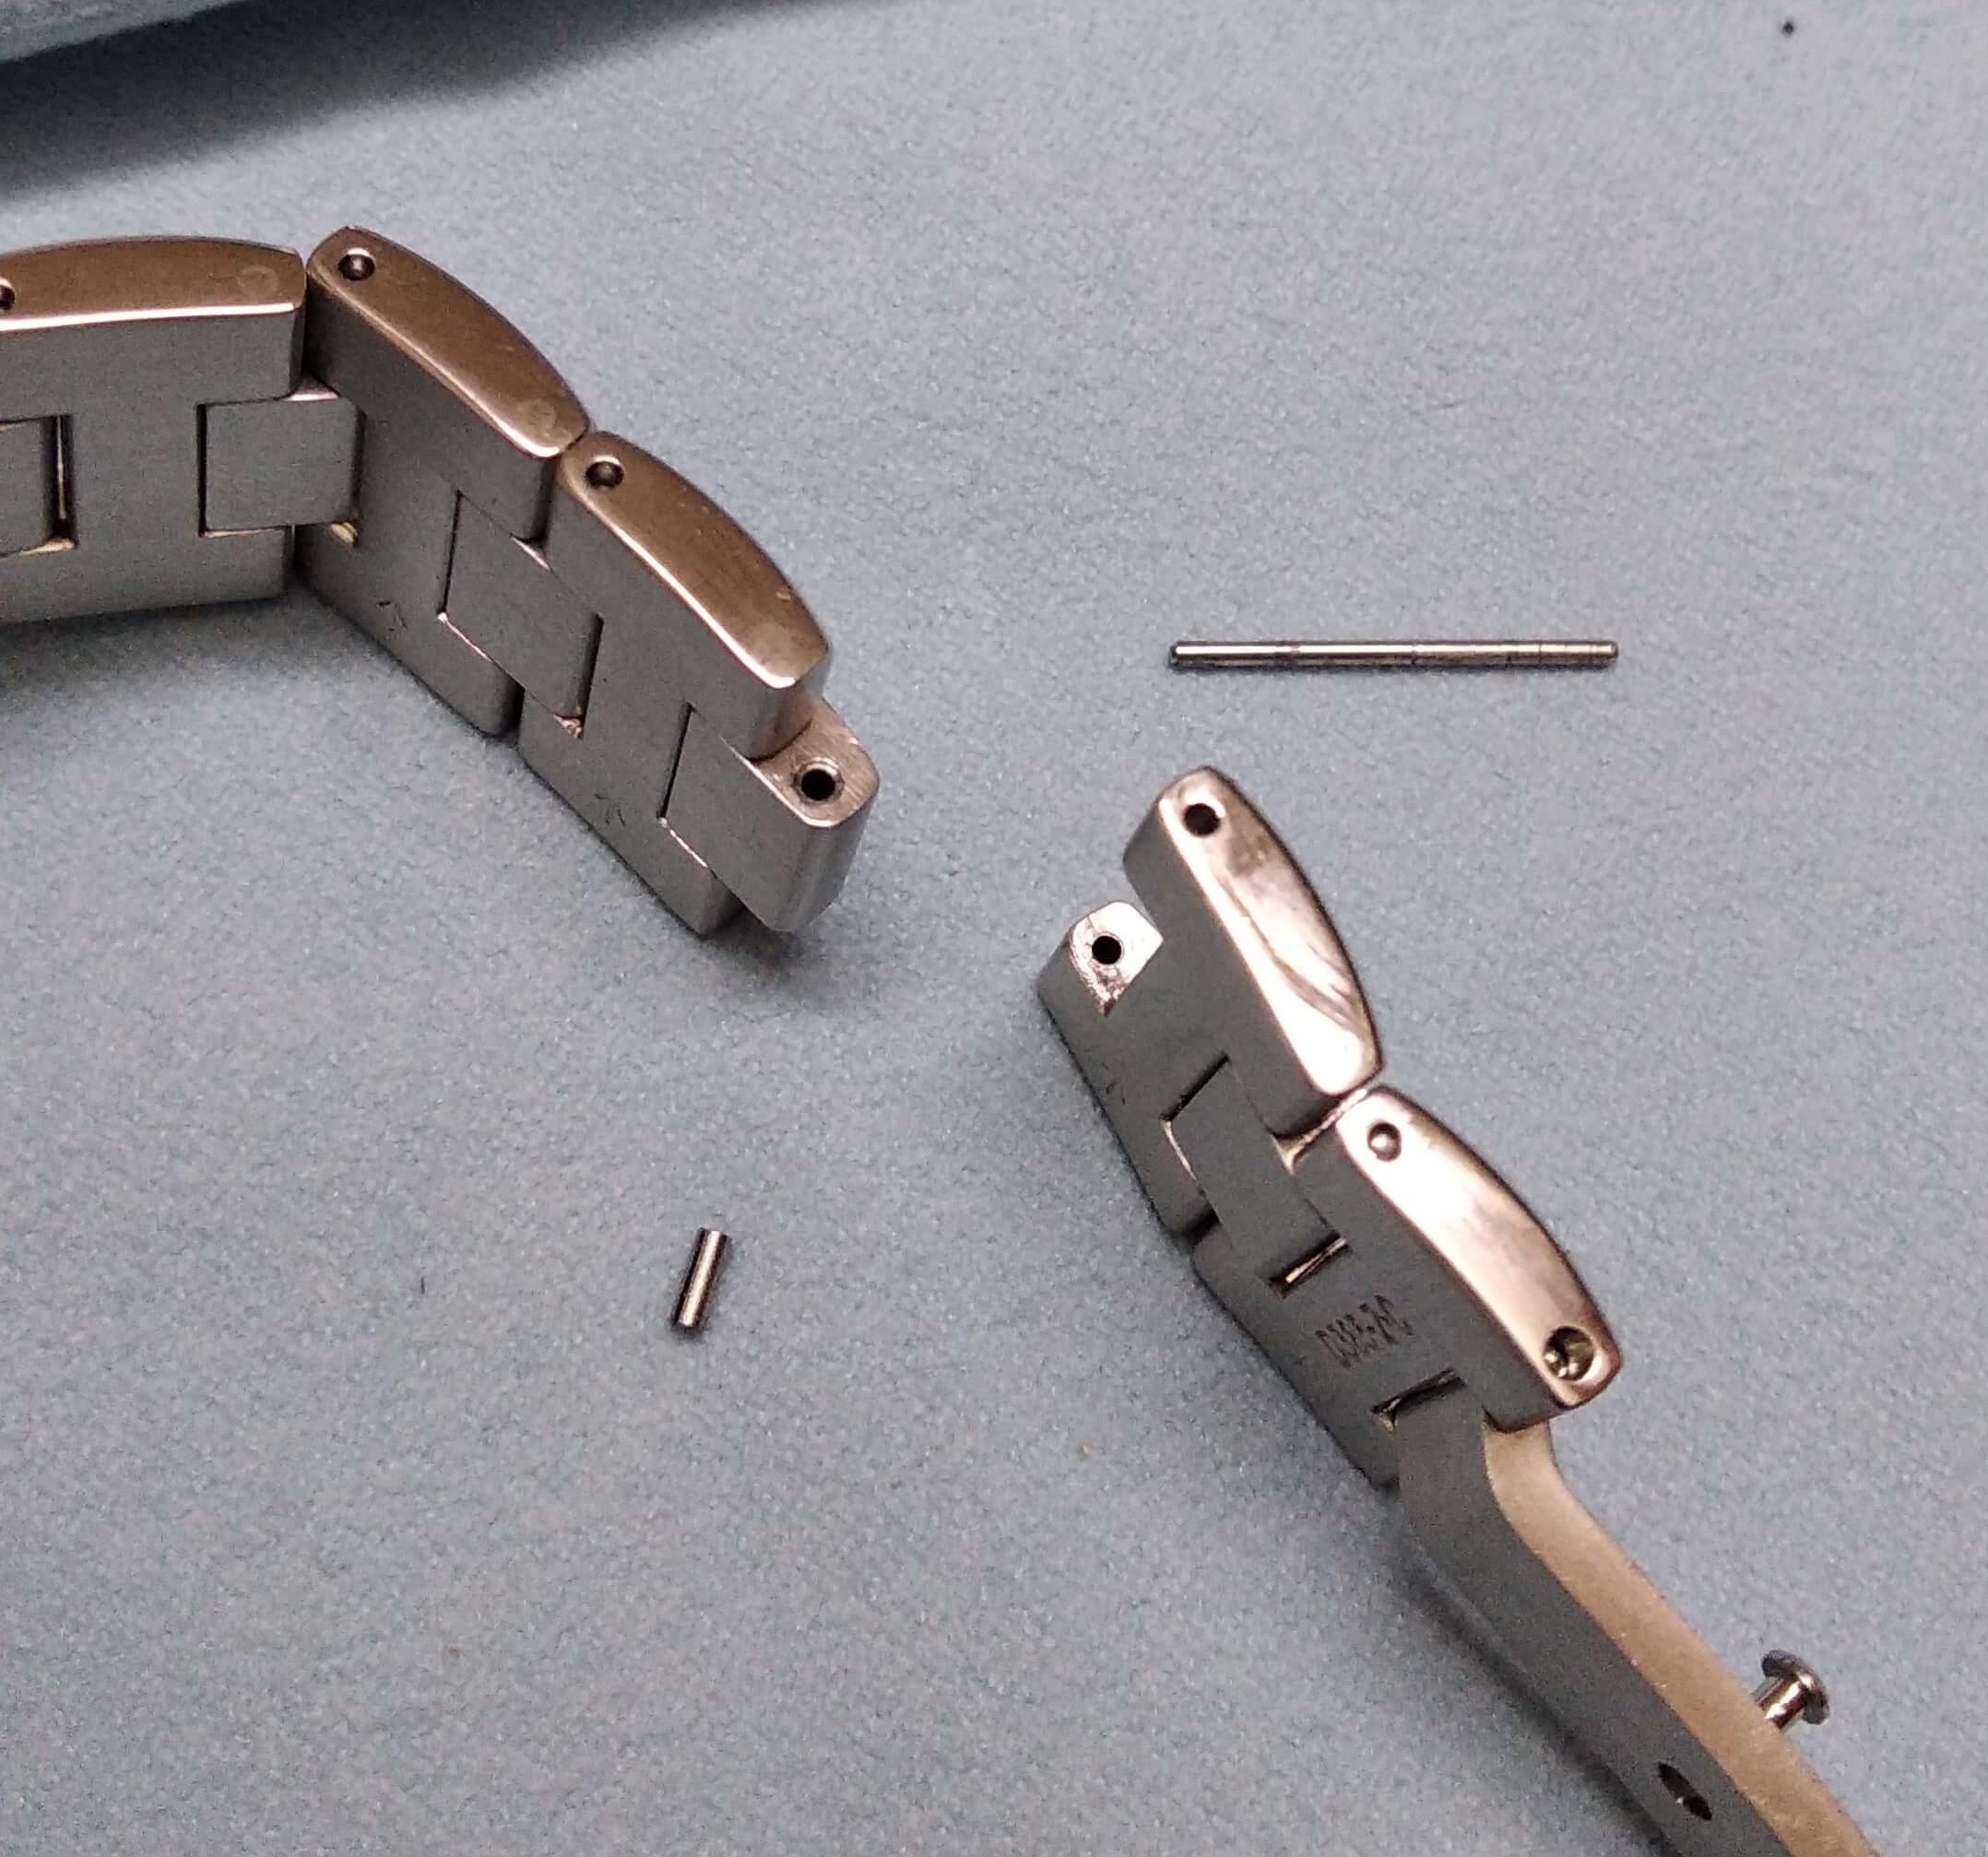
3. How the pin and holder looks like. It’s very similar to the Sumo’s but slightly smaller in diameter |

4. To put the links back, simply undo the whole process. Use a flat surface to help pushing down the pin inside the bracelet |
By far, the oyster bracelet on Seiko SARB033 is the one that’s hardest to work with because it needs the small needle pliers to pull out the pin holder.
While the pin will pop out after we pushed it using the pin remover tool, it’s not readily taken out like the other bracelets. Trying to pull it out using our finger will not work as it’s sturdily embedded inside.
The only way that I recommend is to use the small needle pliers to pull it out. You can use any kind of pliers too but I found the pliers with long jaws/tips is the best to pull out the small pins.
Adjusting The Micro Adjustment On Seiko Clasp
Most metal bracelets also have micro adjustment on the clasp and the method of adjusting is the same as with the links where we need to remove the pins.
The advantage with micro adjustments is it will allow for finer resizing. Normal oyster bracelet can has a width of about 1/3 inch or around 10 mm.
This might cause some problem as it’s too big and the bracelet can’t be fitted perfectly to the wrist.
Micro adjustment has a width of 2 – 3 mm between slots and can help to keep the bracelet fit nicely.
What we need to do is to take out the pin using the same method as above and put it in the next slot. Easy peasy!
While it can be taken out using any pin/needle, I found that using the pin remover tool is still the easiest way to do so.
| Adjusting Seiko Bracelets Using Micro Adjustment On The Clasp | |
|---|---|
Seiko Sumo bracelet with 4 micro adjustment slots |
Seiko SKX013 has the most numbers of slots at 6. But notice this is only possible because there’s no pusher mechanism to open the clasp |
Seiko SARB033 only has 2 micro adjustment slots |
|
How To Remove Seiko Bracelet And Strap
Removing the bracelet or strap is an easy affair, that is if you have the right tool. I’d recommend the spring bar remover tool to do it as it will really make things easier.
The bracelet and strap is not attached directly to the case. Instead, there’s a “spring bar” that acts as the joiner, much like the pins in the bracelet links.
These spring bars are called as such because it has a spring at both ends to easily attach to the lug holes.
Follow these steps to remove the bracelet/strap off the watch:
- Using the spring bar removal tool, point the forked end on the bar and pull it down. This will retract the spring bar to shorten it.
- Then quickly take out the bracelet off the lugs. As one end of the spring bar is outside, the other end will easily detached off the watch.
- Use the same spring bar to attach to the replacement strap. Do the same steps in backwards to attach the strap to the watch.
| Removing Seiko Bracelet | |
|---|---|
1. Using the spring bar remover tool, pull down the bar to retract it. Then quickly pull the bracelet from the lug |
2. The spring bar has been pull out from the lug |
3. The bracelet off the lugs |
4. A look of the Seiko Sumo bracelet, end link and spring bar parts |
5. The SKX013 with its bracelet taken off. Notice the end link is hollow type compared to the solid end link on the Sumo |
6. This is the spring bar remover tool with forked end that really help to hold and take out the spring bars from the lugs |
You can use a needle or small screwdriver to pick out the spring bar from the lugs (I did that) but it will take quite some time to do so.
Vastar Spring Bar Removal Tool Kit, With 8 Extra Spring Bars

On the other hand, I found using the spring bar remover tool makes life easier as the forked end can grip the bar sturdier.
It’s much more effortless compared to trying to use needles or other things to do it. Not to mention we won’t accidentally scratch the case or the bracelet unnecessarily (again, I’m guilty of this too..).
A word of reminder, ensure the spring bar is secured whenever you’re working with it. Losing the bars means you can’t attach the strap to the watch any more.
In case you lost one, you could get one from the internet. But if you’re unsure of the size of the spring bar, I’d recommend to visit a watchmaker so that he/she can help to identify the best fit spring bar for your watch.
By the way, do note that some spring bars are too big for some straps. For example, my Sumo uses a big heavy duty spring bar because of its thick bracelet and the intended dive use.
I found that some straps only have small spring bar slot, so much so that the Sumo’s spring bar can’t fit inside the strap. So do keep in mind of this whenever you’re getting a new strap, especially if your watch is a Seiko Prospex watch.
Final Note
While it’s very easy to adjust, resize and remove Seiko metal bracelets on your own, do keep in mind to do so carefully.
The key here is to not rush when doing it.
Do remember that the tools are made from steel and any rushed job can cause scratches on your watch (I speak from bad experience, sadly..).
And speaking of the tools, I highly recommend for you to get one of these. Think of it as an investment in your watch collecting journey.
Besides, it won’t cost you much for these affordable tools that will tremendously help in sizing your bracelets.
Trust me, you don’t want to get cheap and use those needles or anything laying around in your house to do these kind of things.
Vastar Spring Bar Removal Tool Kit, With 8 Extra Spring BarsWatch Bracelet Link Pin Remover Tool Kit5-Inch Needle Nose Pliers
If you have any question, feel free to ask me in the comments section below.
Cheers!
where can I get the pin and collar to repair band? 18mm
Hi Greg. You can easily get one from Amazon or Ebay. It should costs just a couple of bucks
My Seiko strap isn’t like any of those!
Can I email you a photo?
Hi Isaac. I just finished your article on Seiko watch bands. I liked the layout with all of the how to photo’s. They are very helpful. Do you remember the old Timex watches? My dad used to have to remove the pins to adjust the bands. He would of loved the pin gadget!
I’ve tried adjusting the bands without any tools and it’s a very terrible experience so I can totally relate to your dad. With the tool, one can save LOTS of time adjusting their band. Not to mention there’s also little chance of damaging the band by using improper tool and technique =)
Nice. I have always known that re-adjusting these bracelets aren’t that hard, but never knew how to go about it.
Thanks to you, I’ve learnt how to do it. I’m grateful and would try it out. Got new piece that has this issue. Thanks a lot for the tips
No prob bud. If you’re collecting watches, I’d bet sooner or later you’ll stumble upon this issue. It just didn’t make sense to go to a watchmaker to have him adjust our bracelets when it’s not so hard to do. And not to mention the tools are dirt cheap too!